(My portfolio is intended to provide examples of my various skillsets, and to get to know me as an artist; therefore, the selection of work shown is casual and not crafted to suit any particular need.)
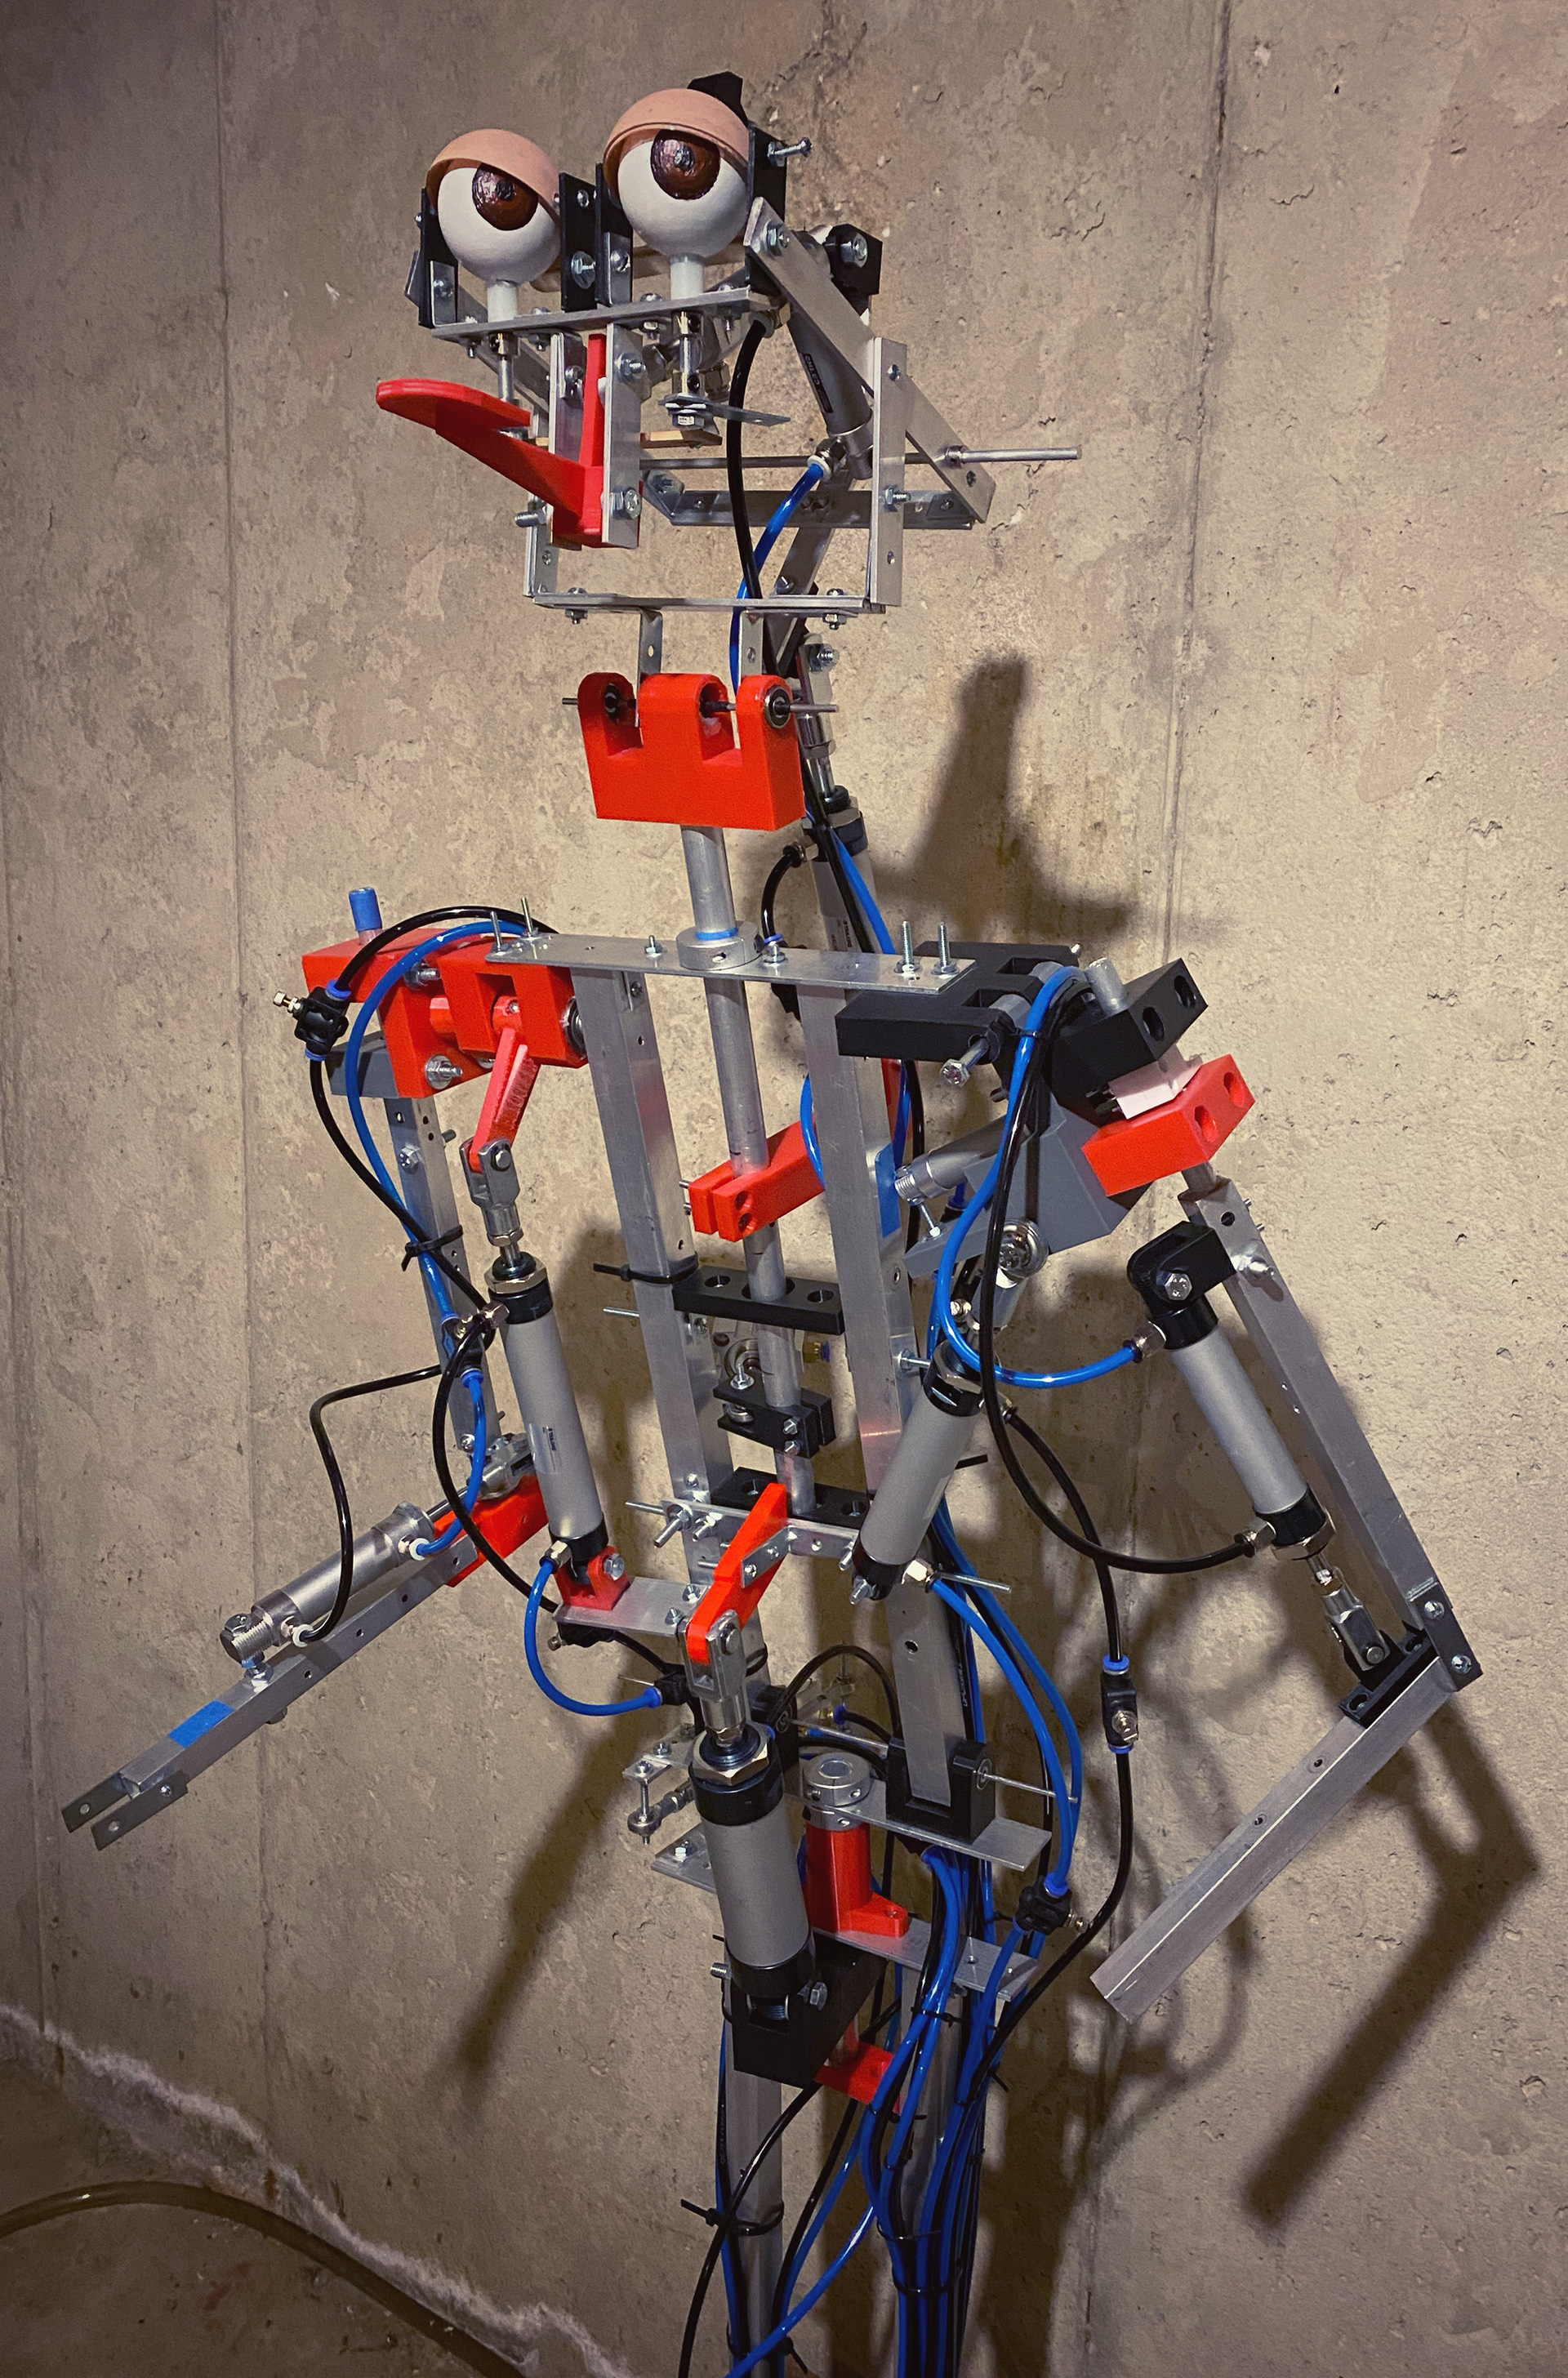
Current Mechanism Progress
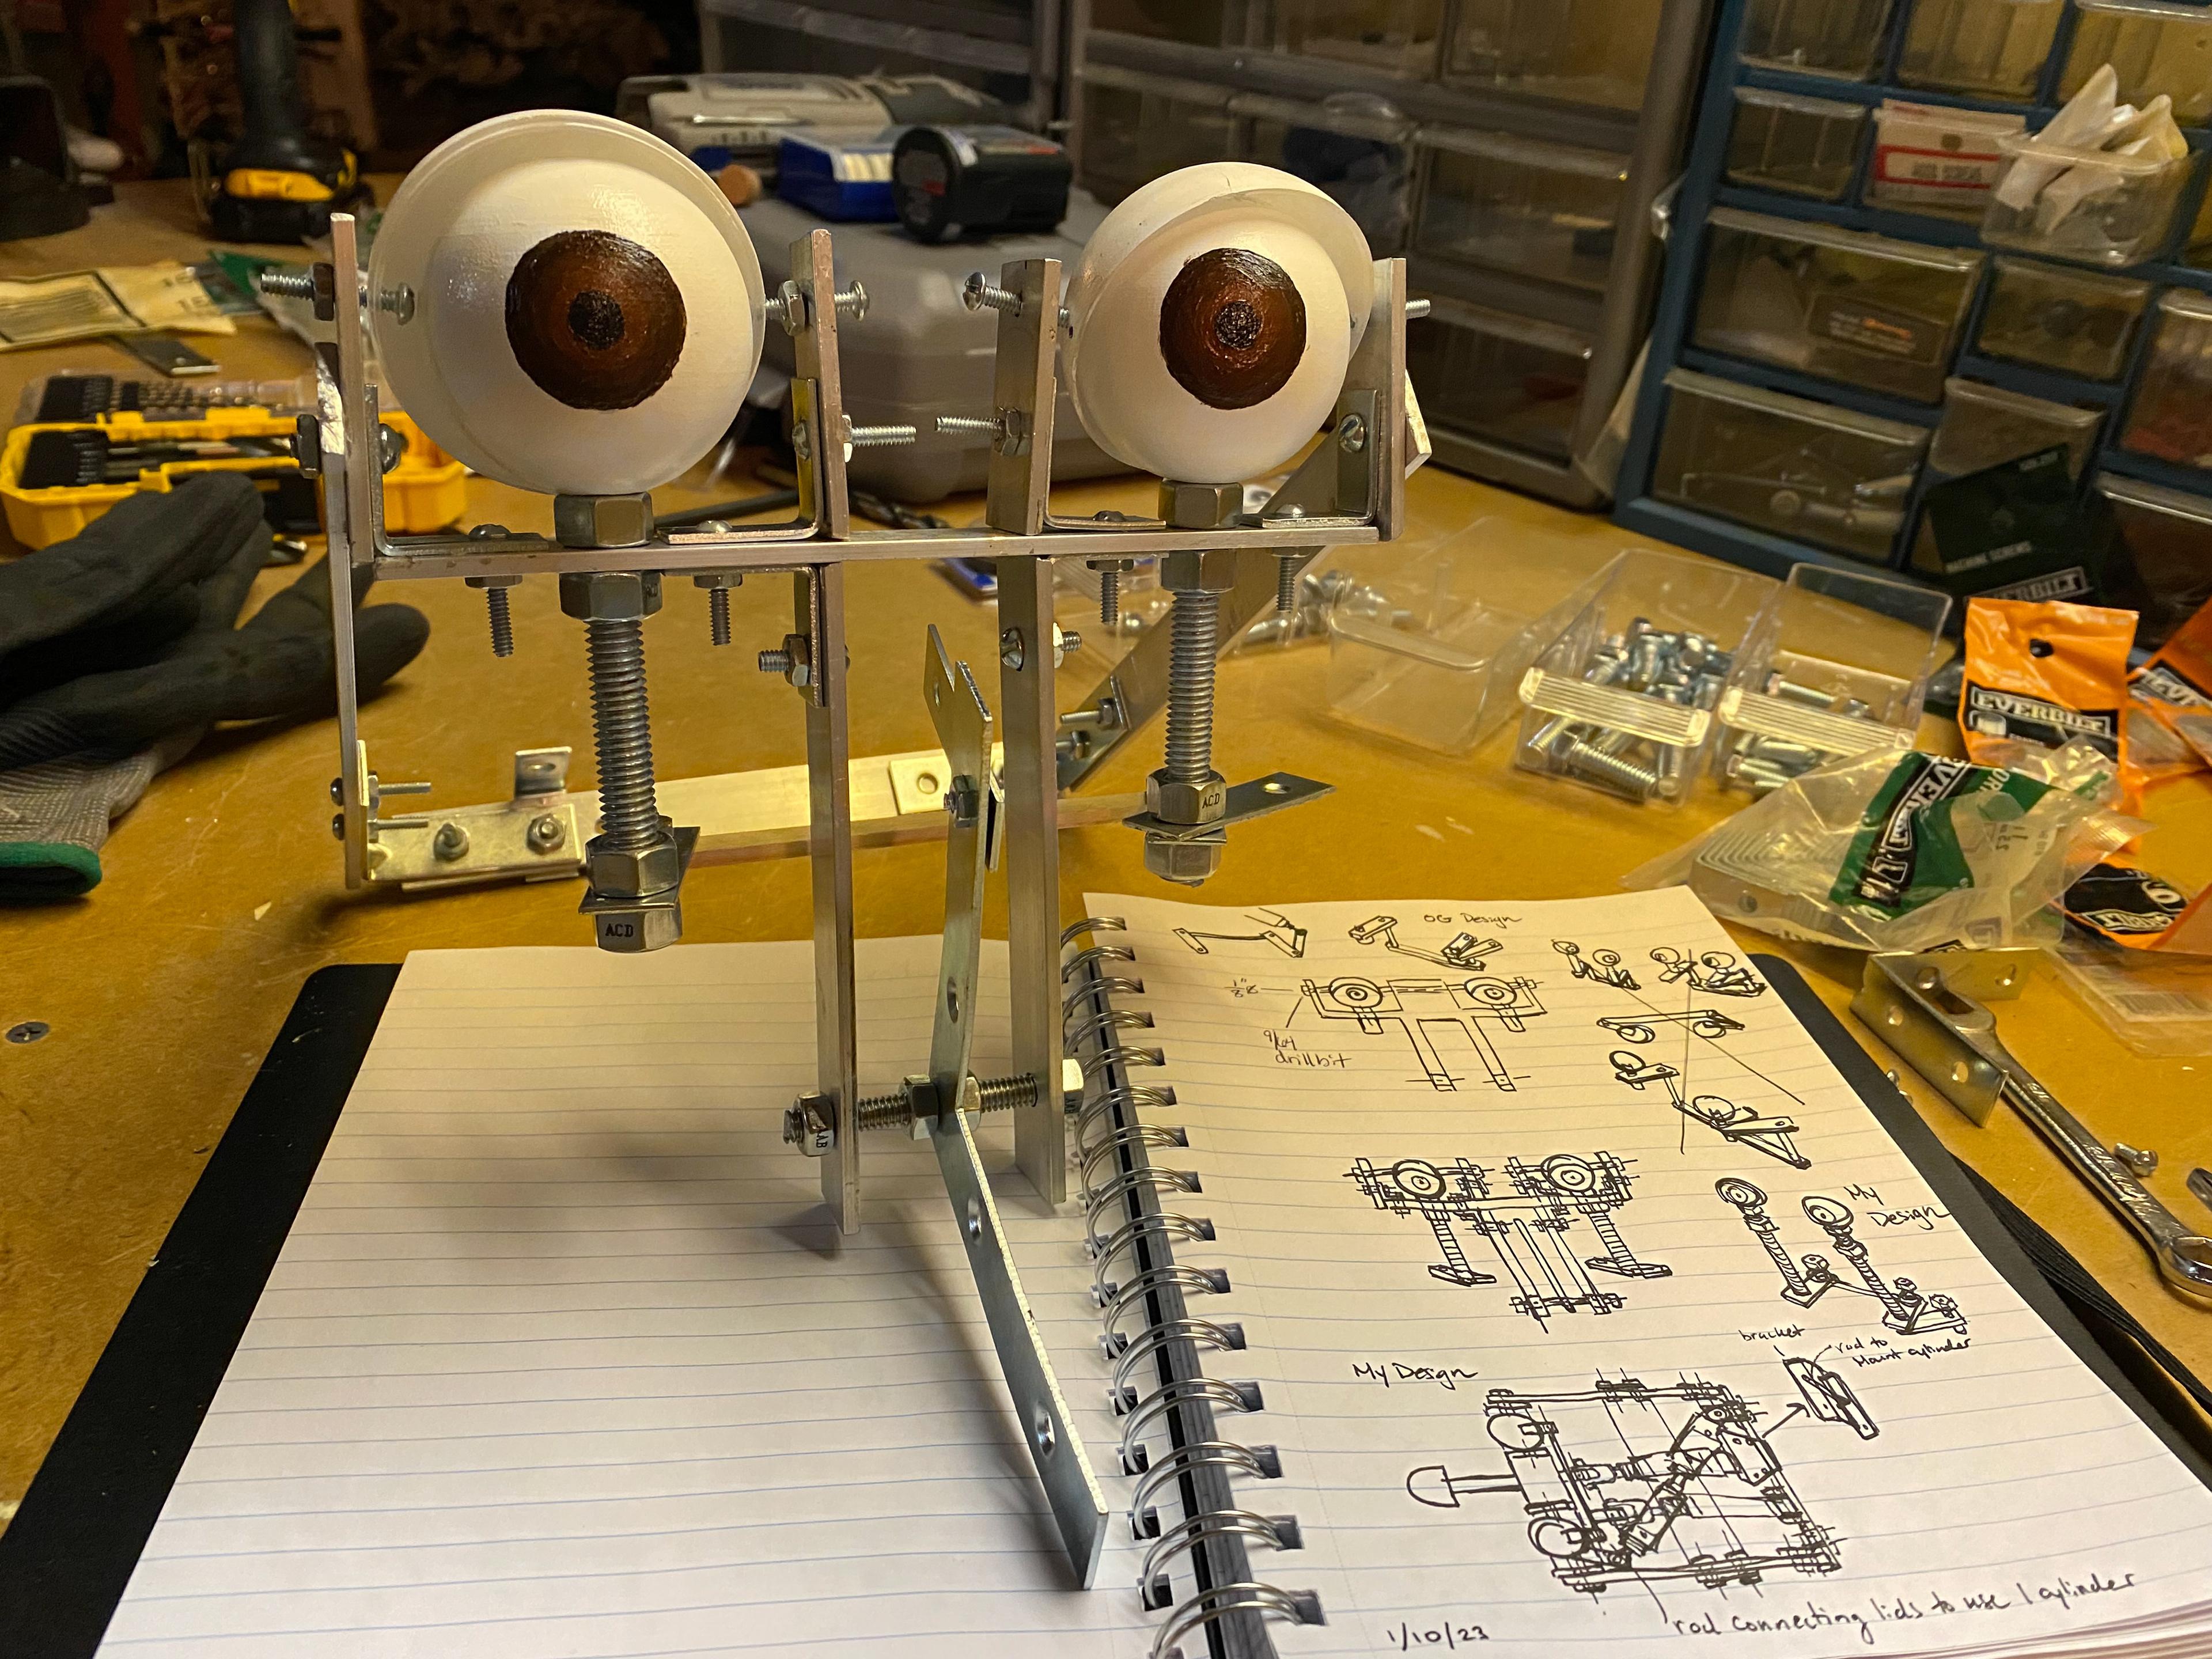
At the start of this project, my original mechanism composed of raw material haphazardly held together with fasteners and 3D printed parts. While it did work, it wasn’t exactly stellar looking… but, it did prove that I was heading in the right direction.
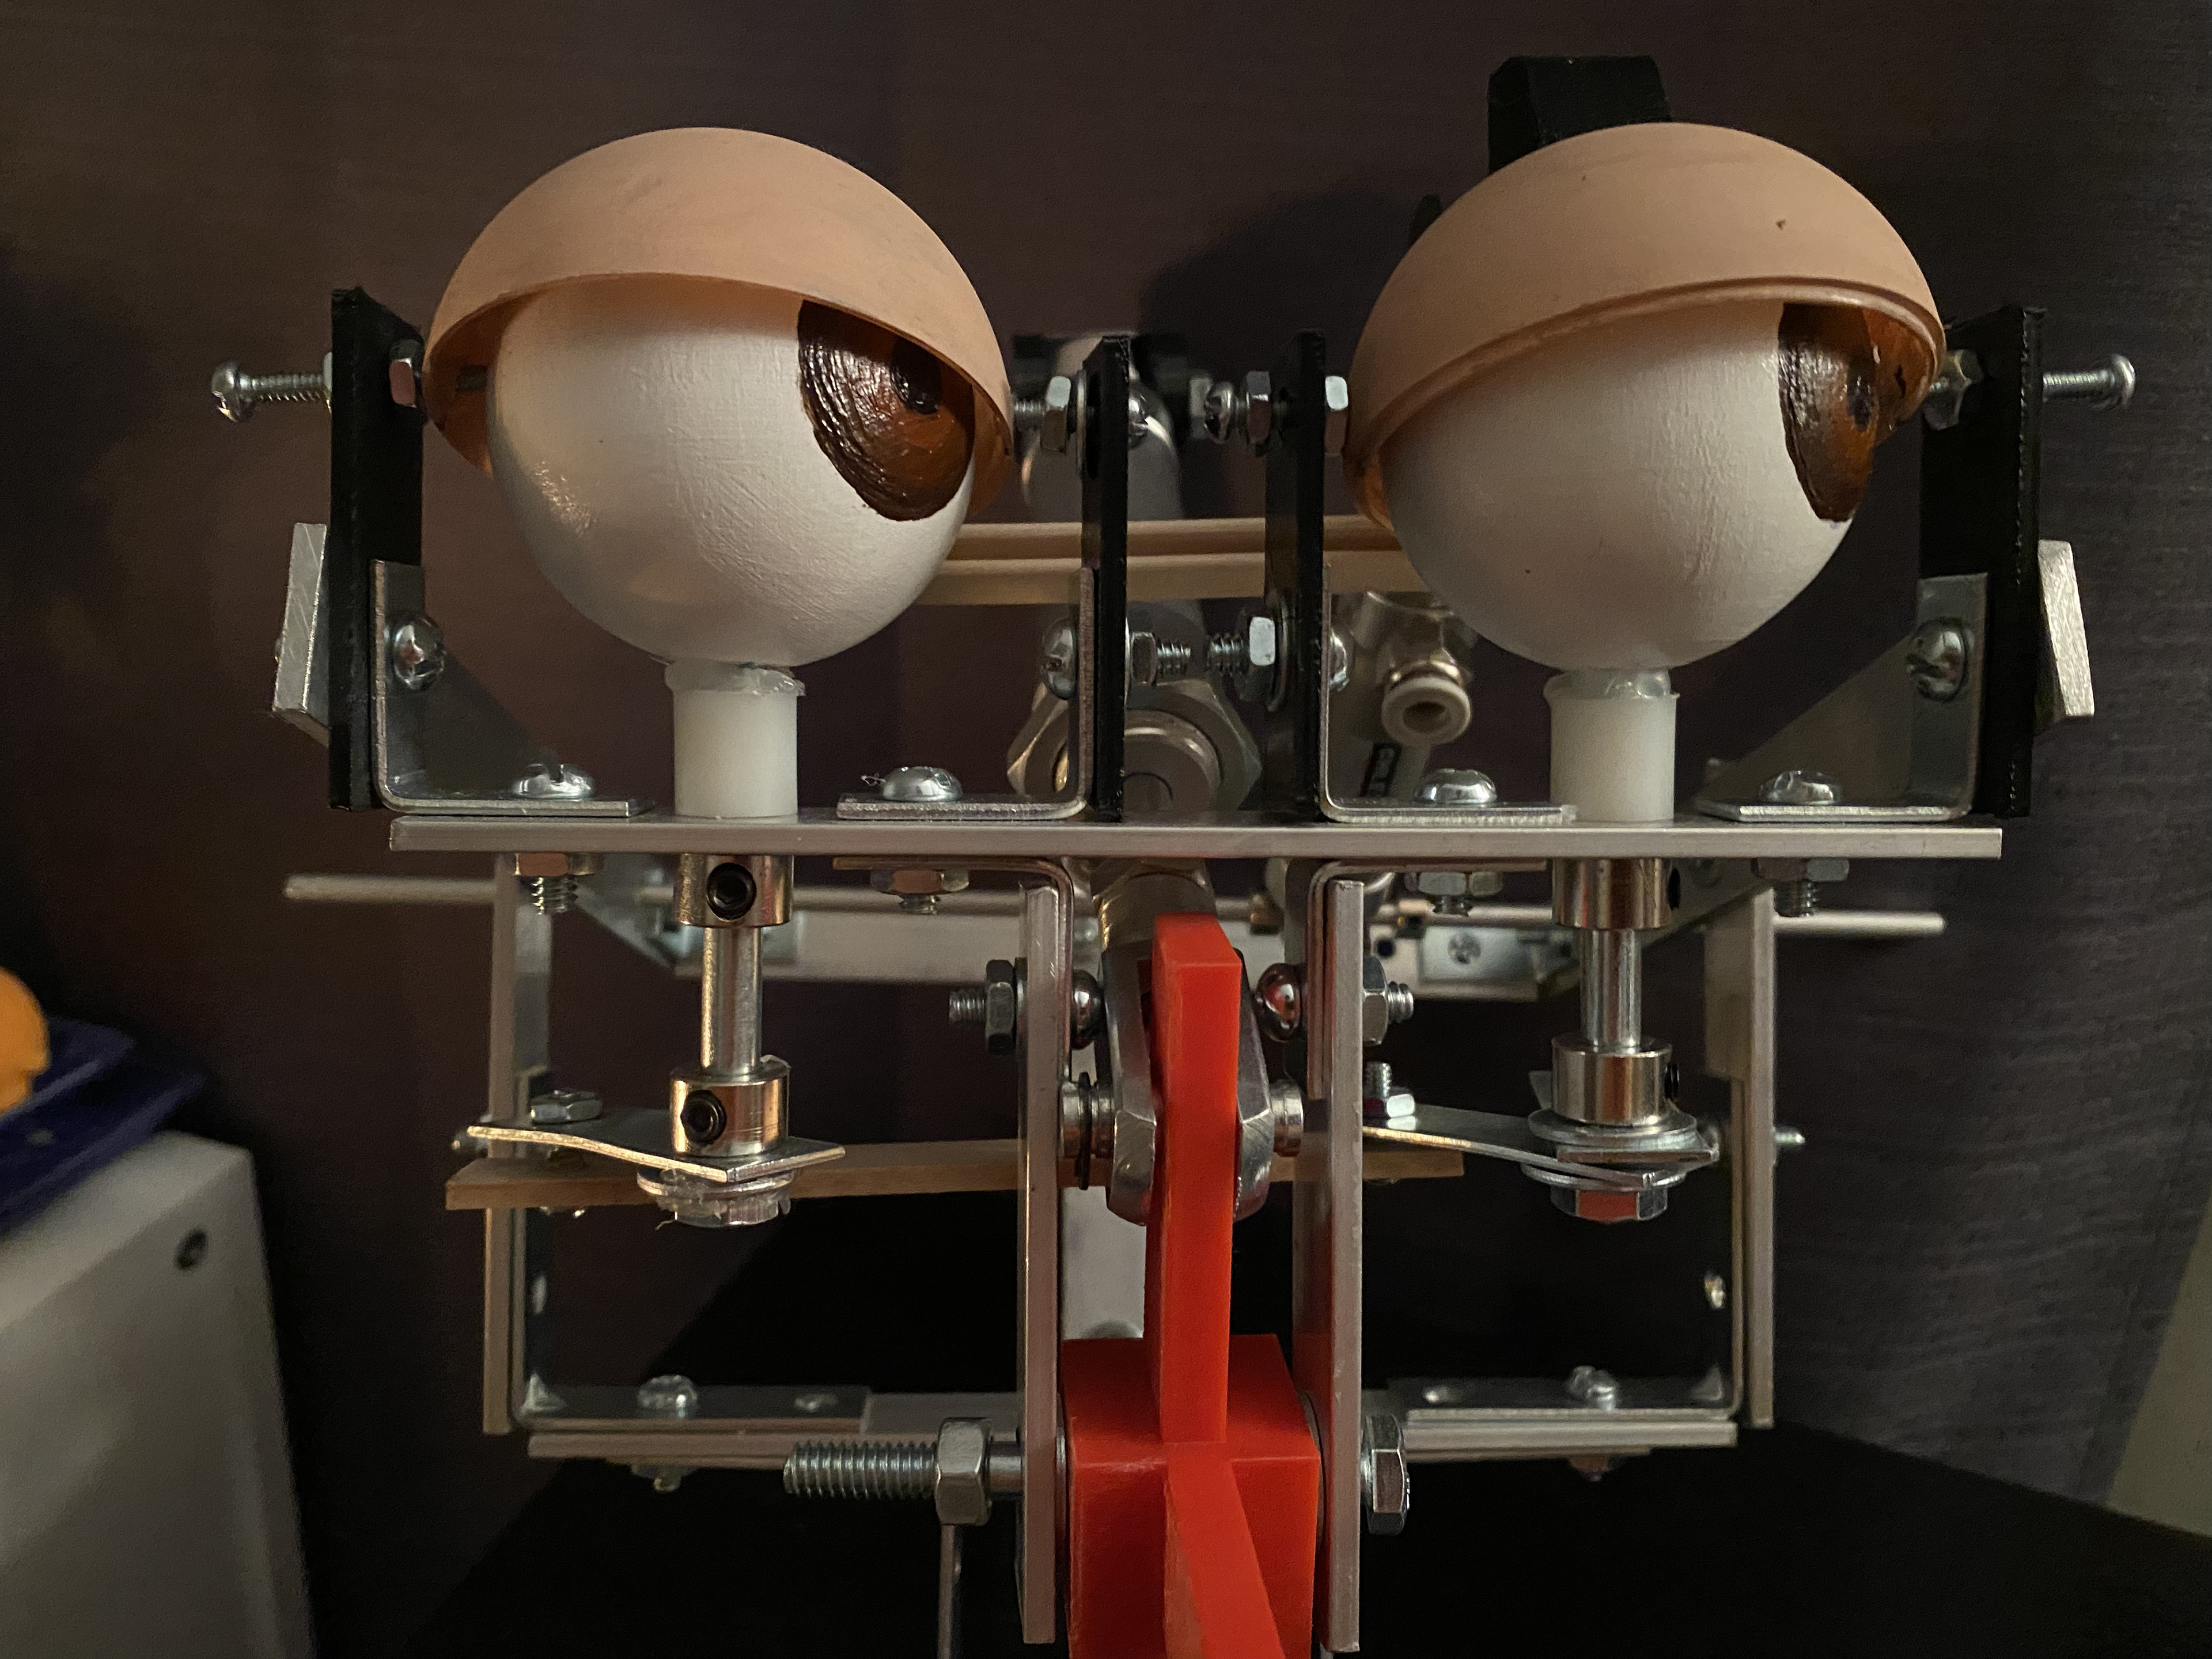
This homemade mechanism has since had some significant changes to its build, as I have progressed in my understanding of how to design and build animated figures like this.
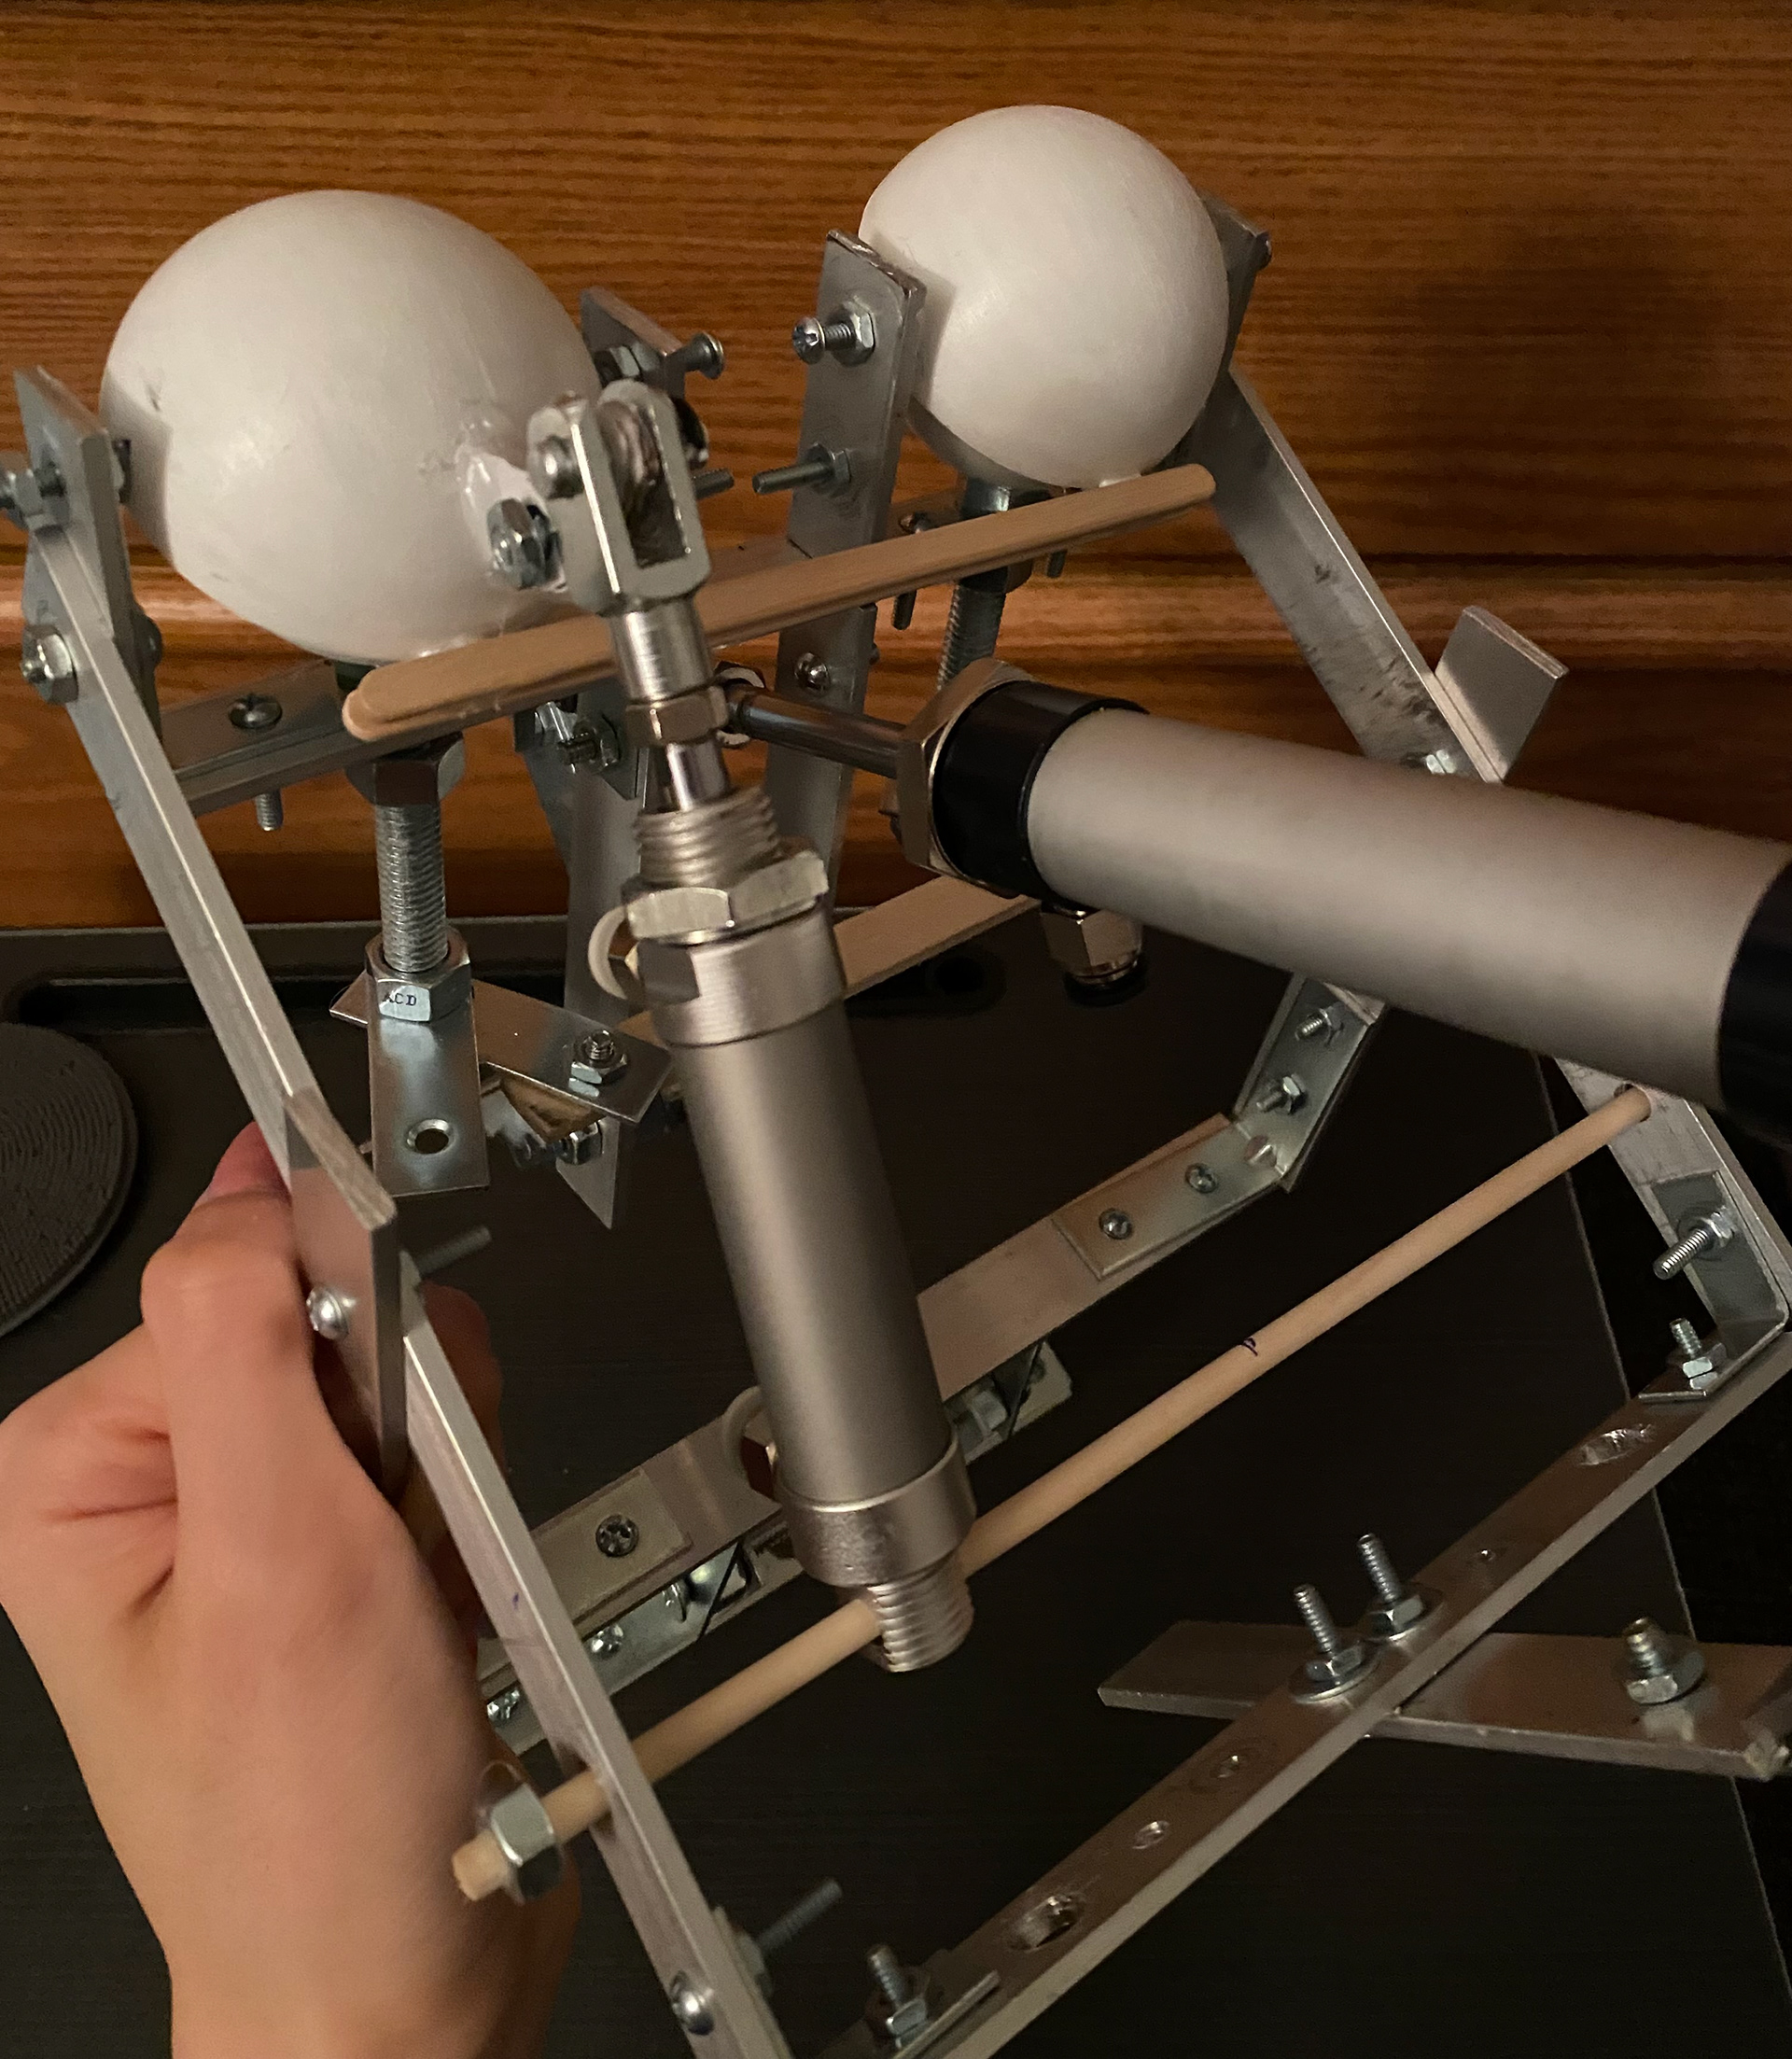
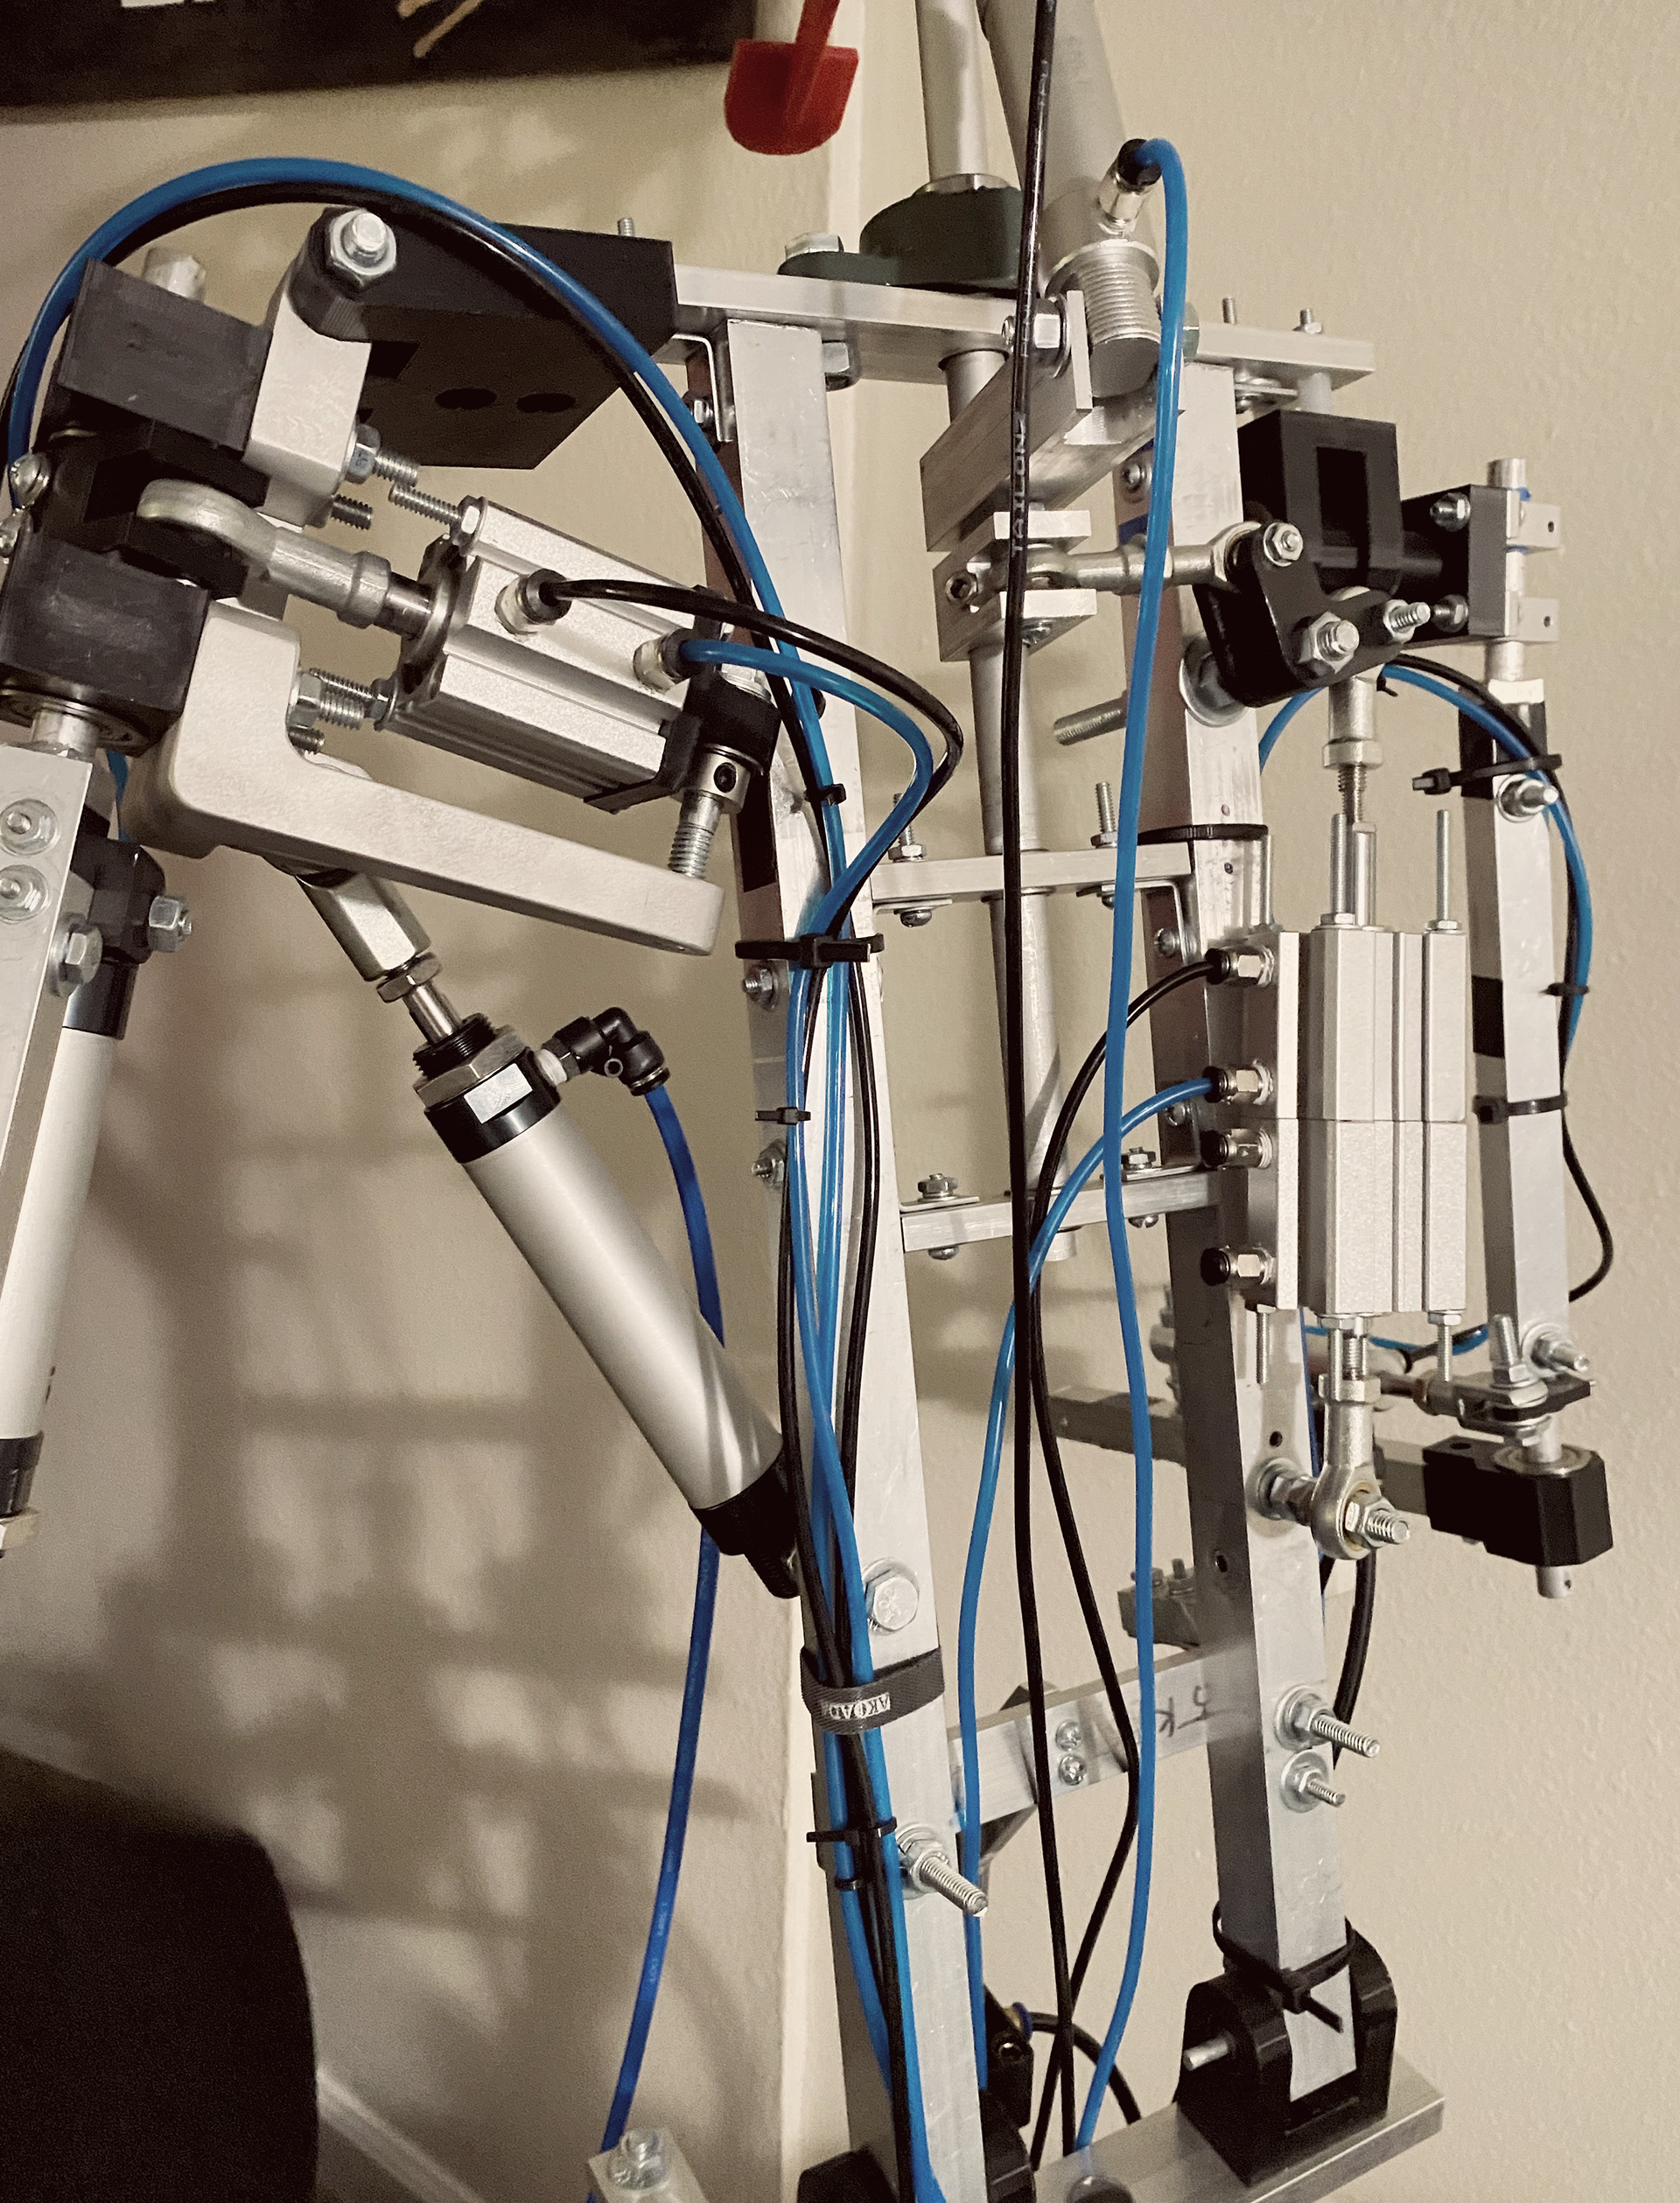
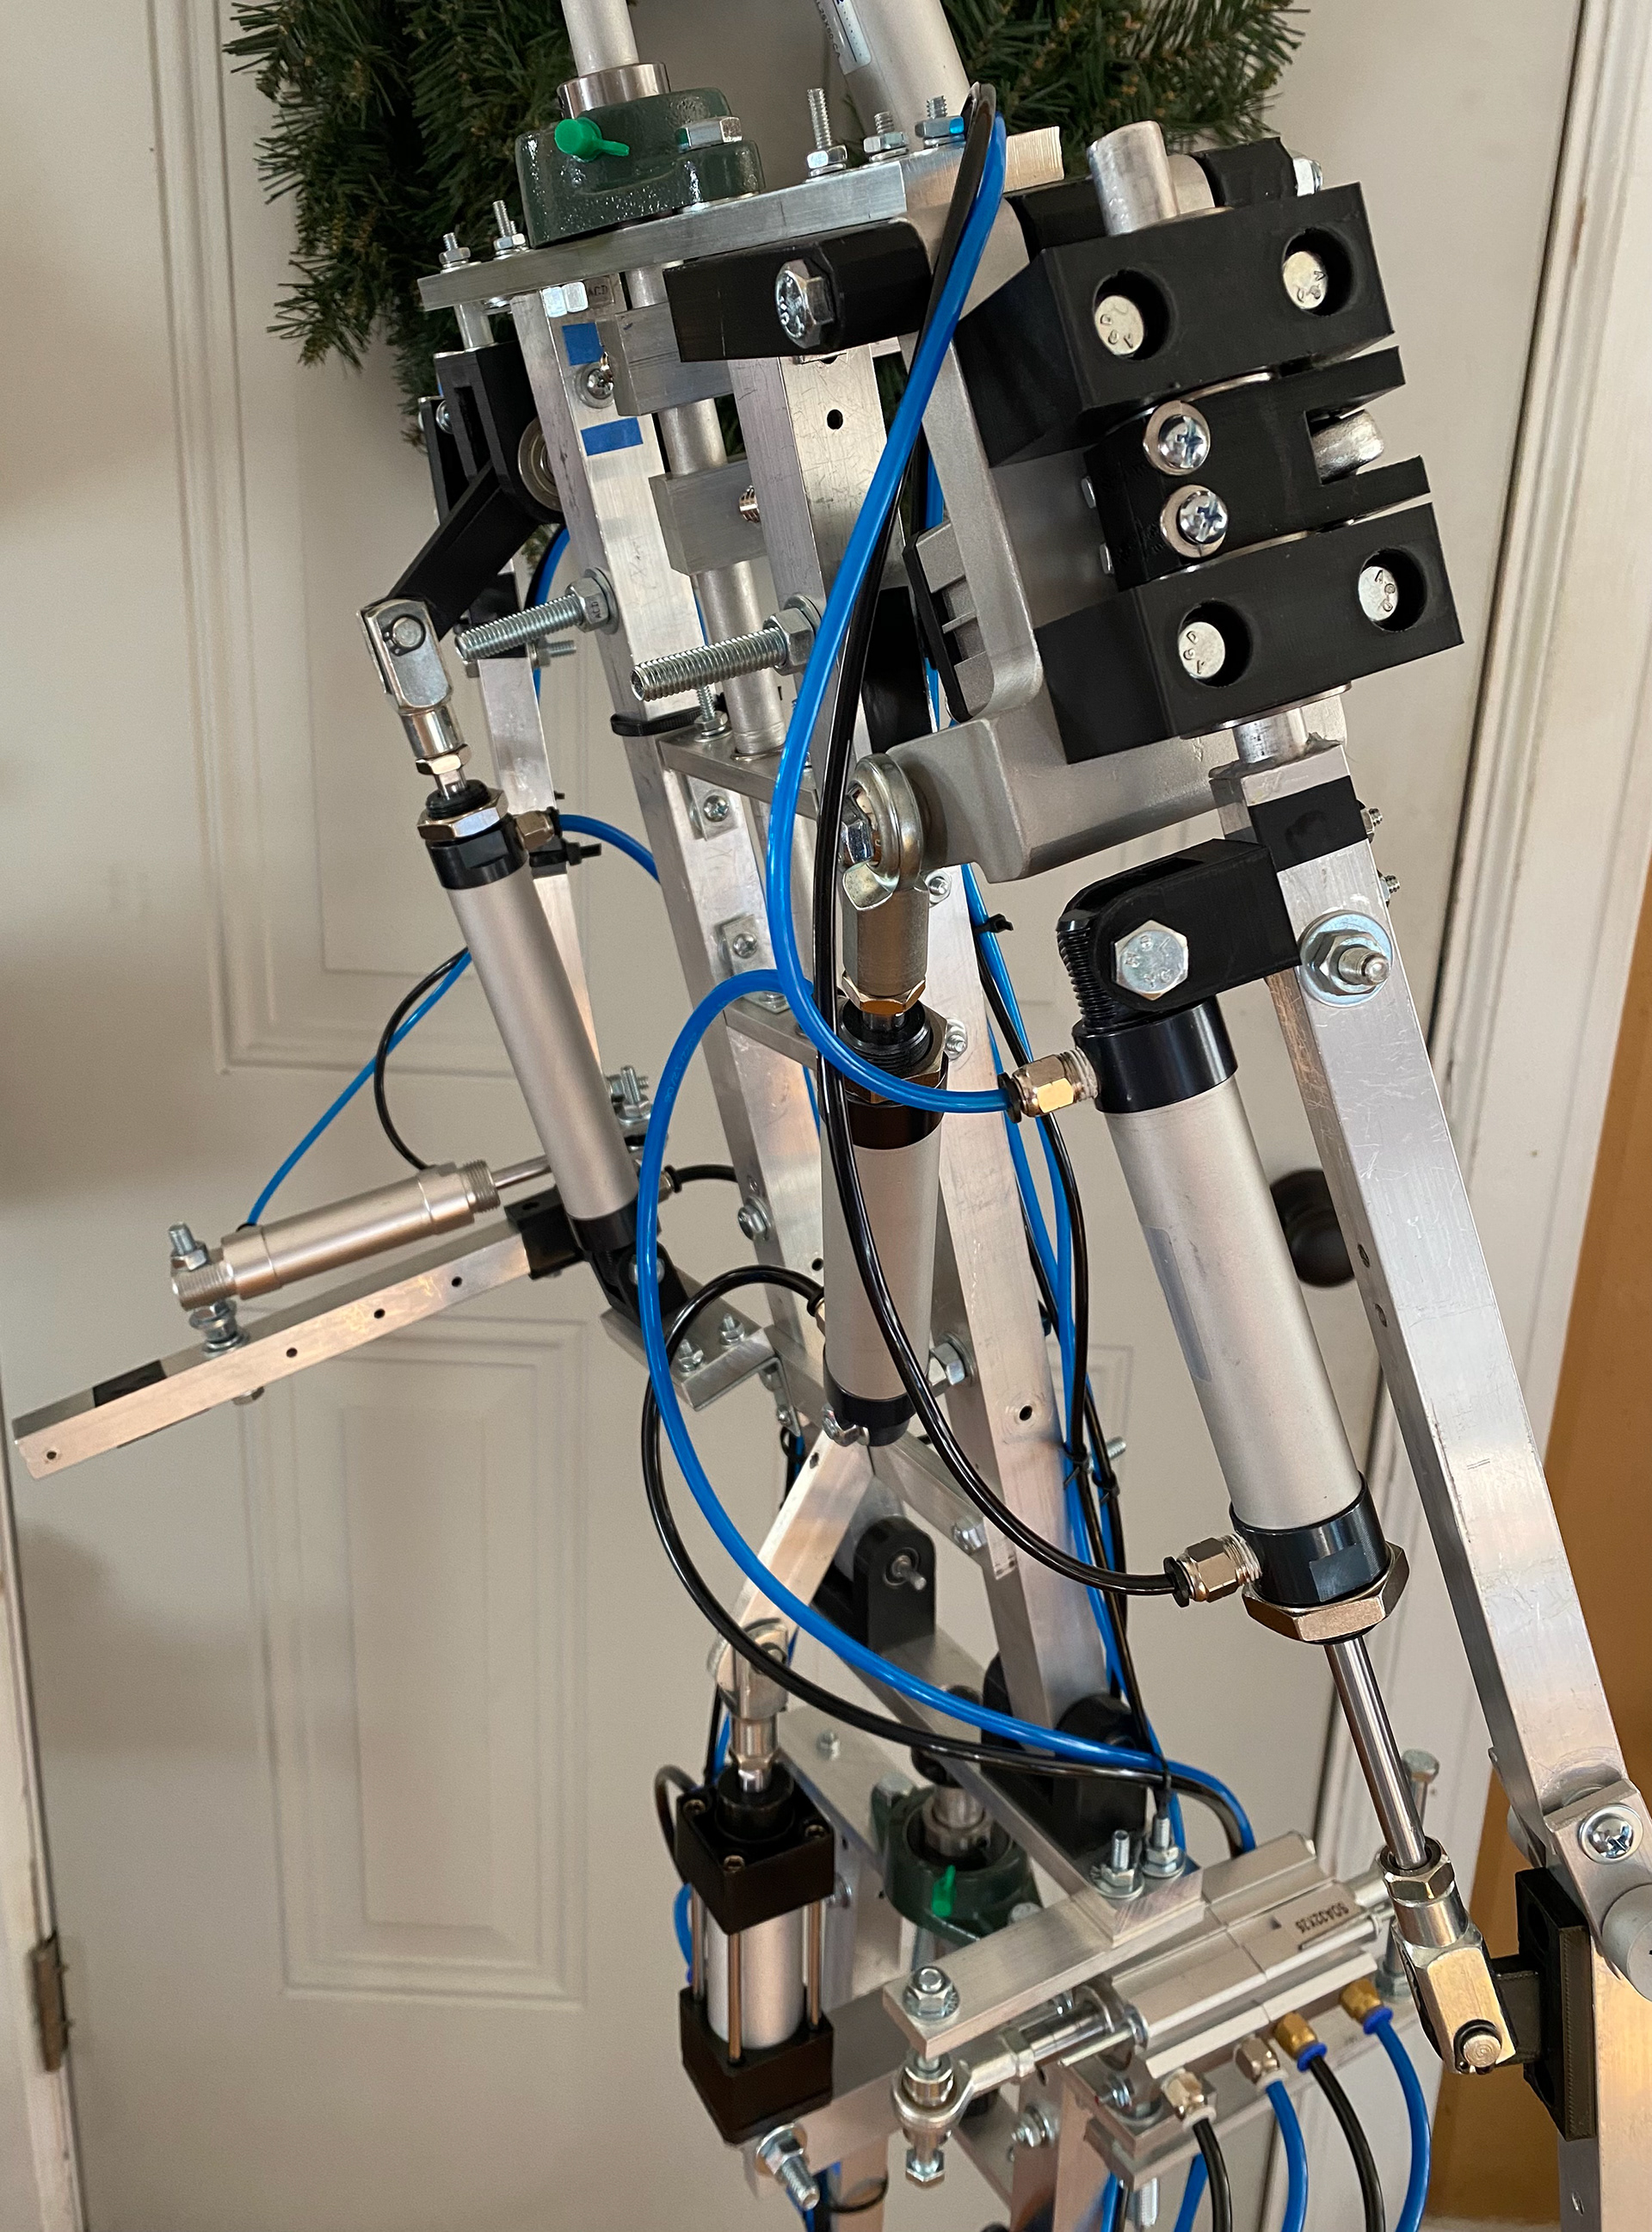
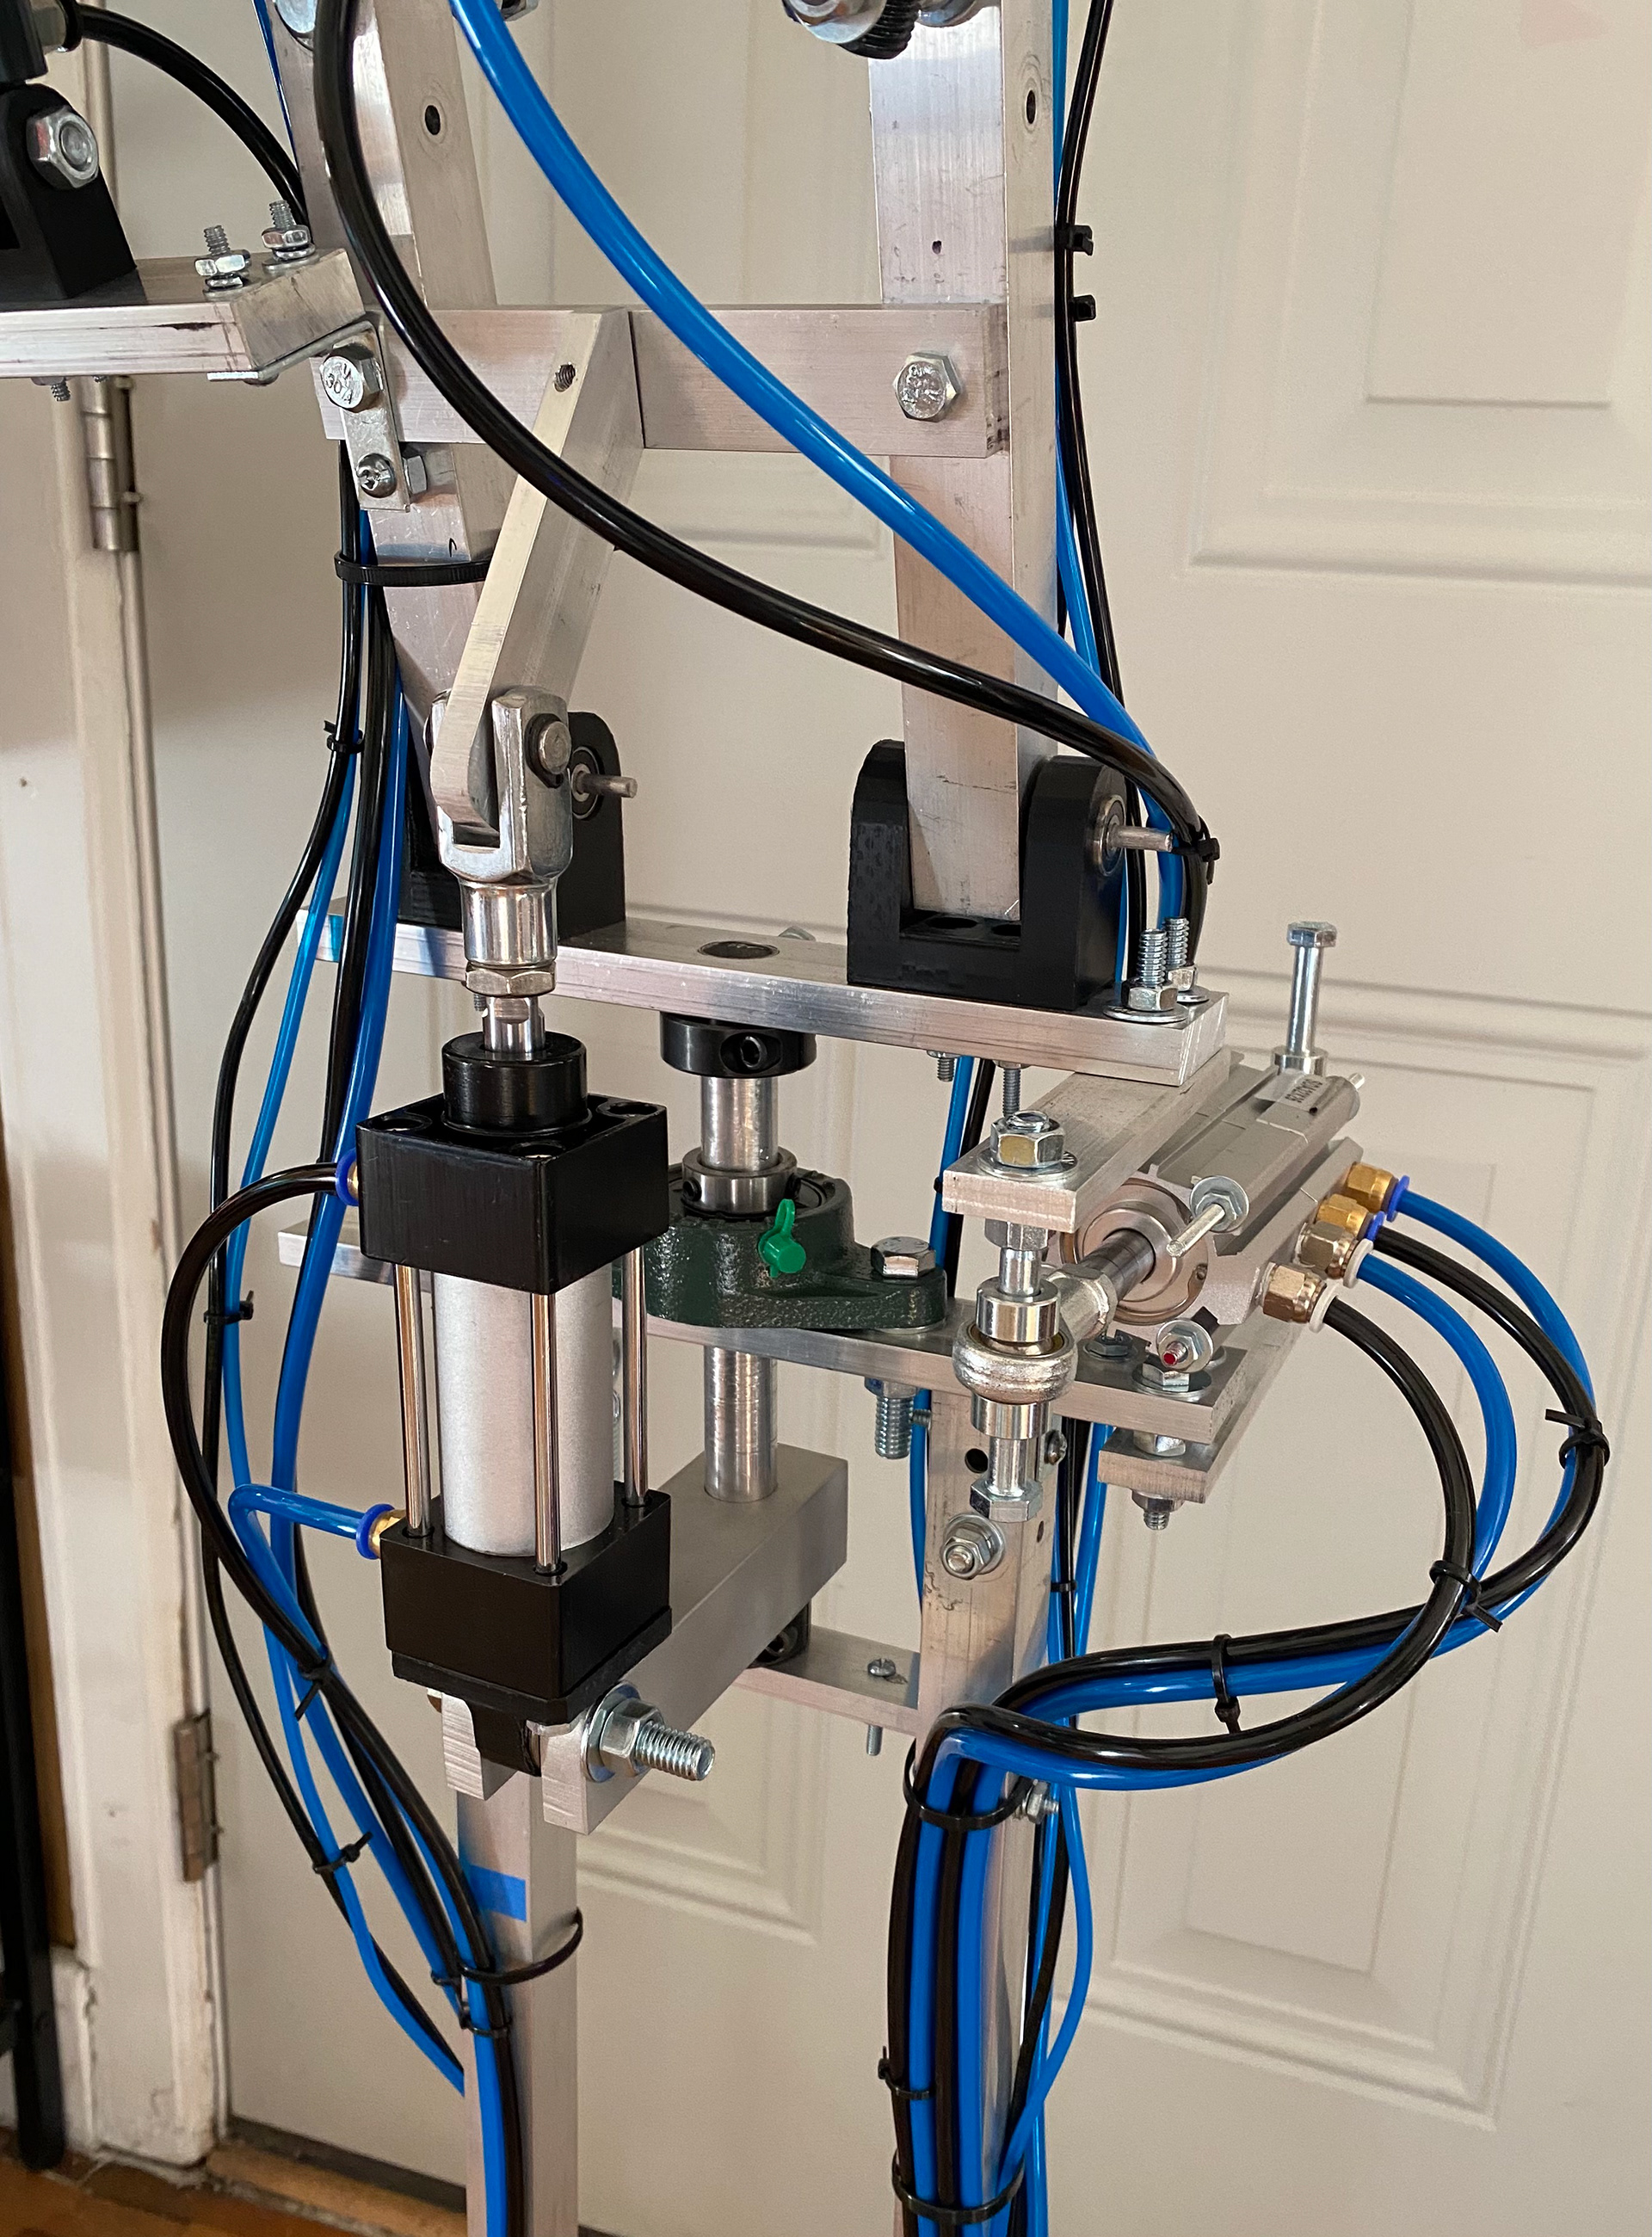
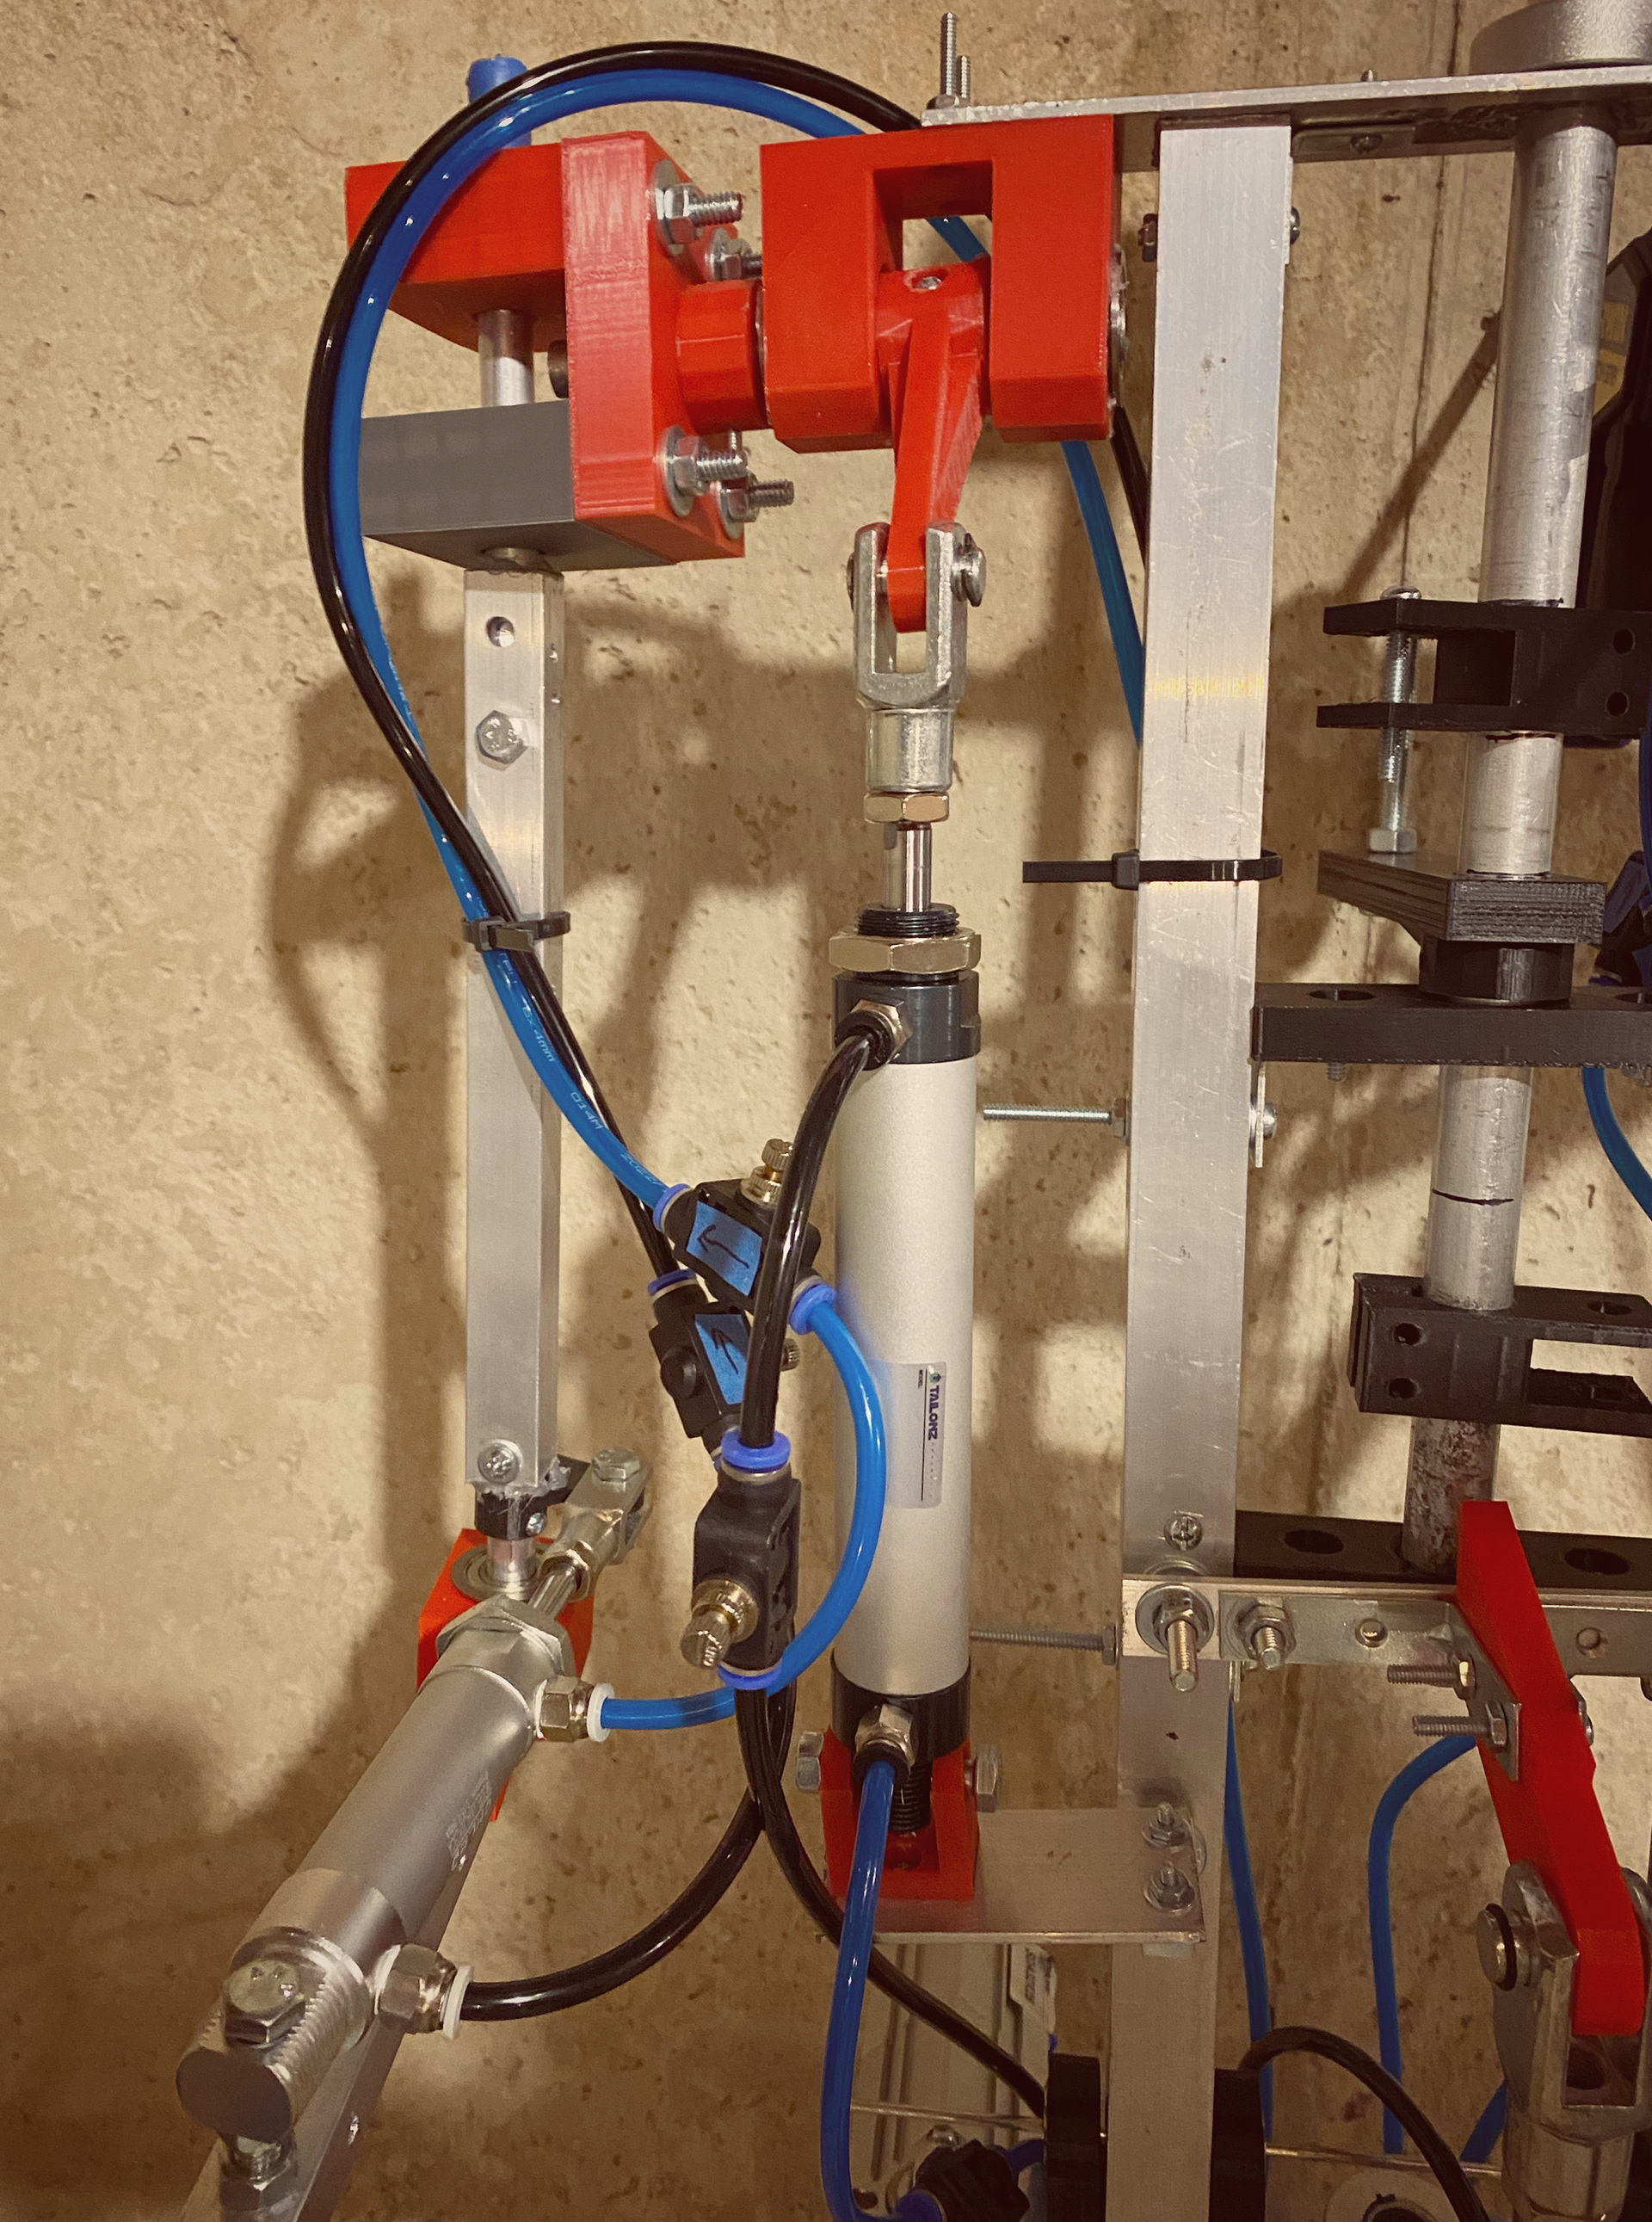
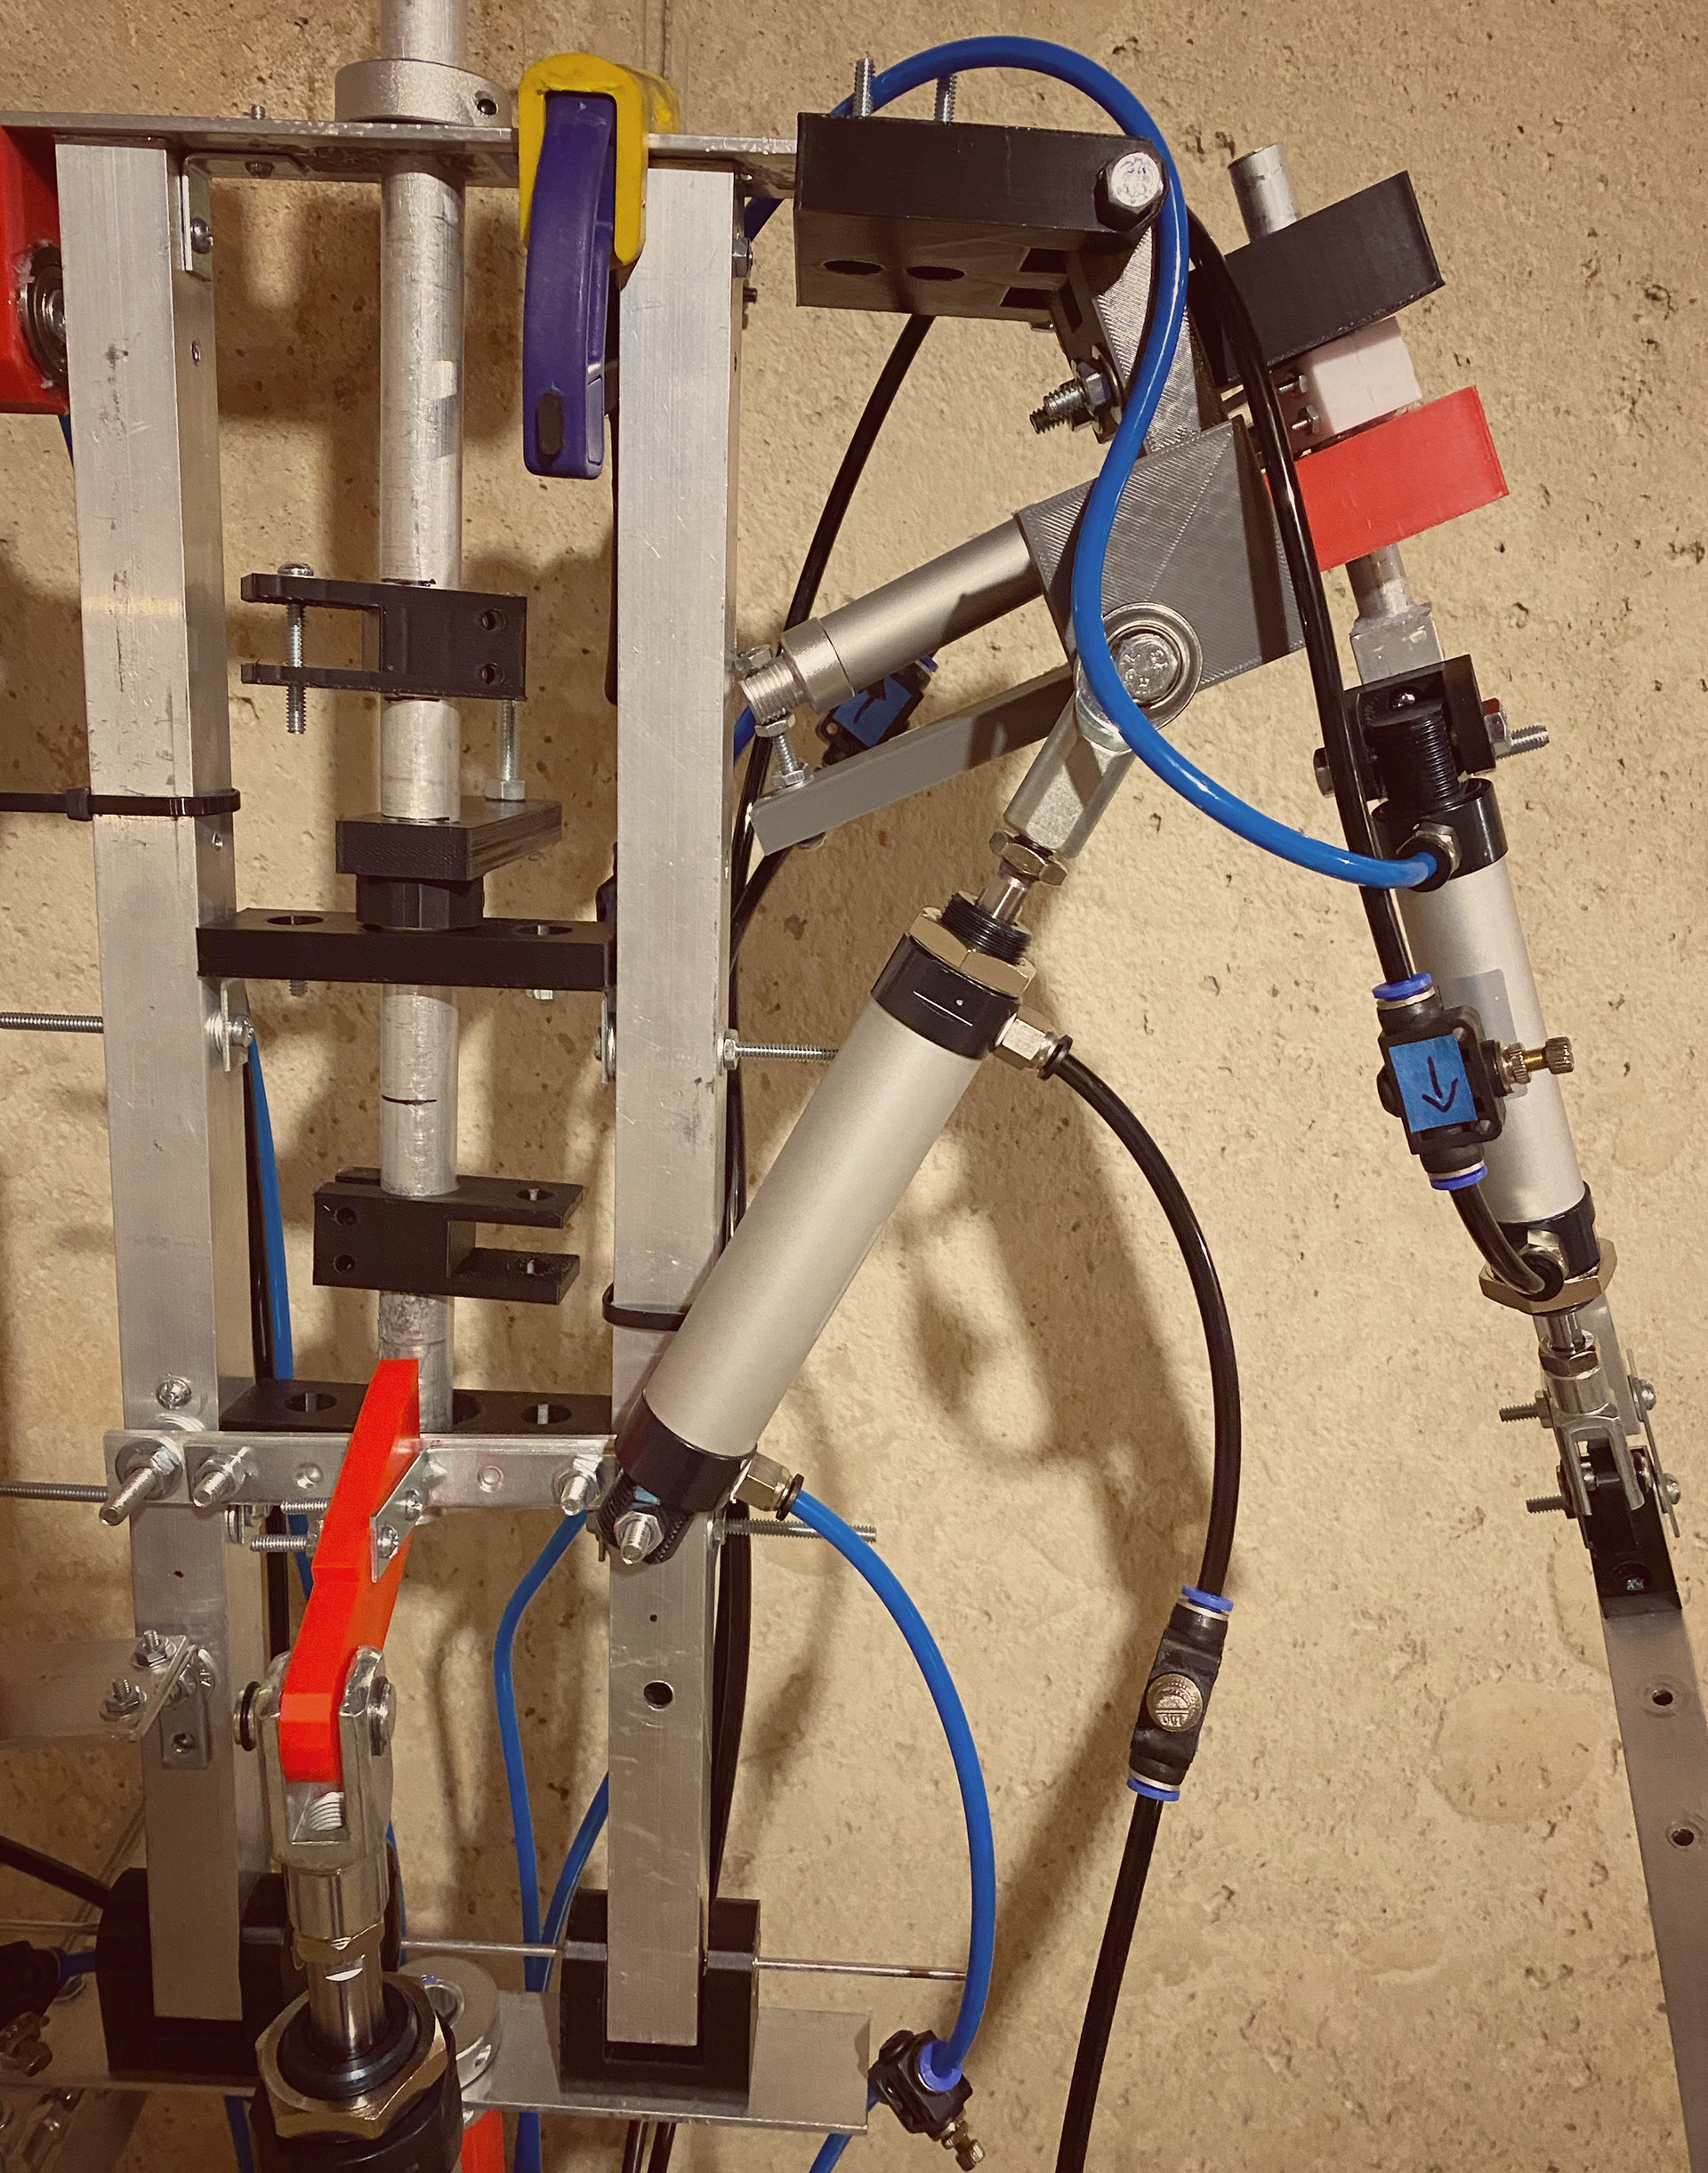
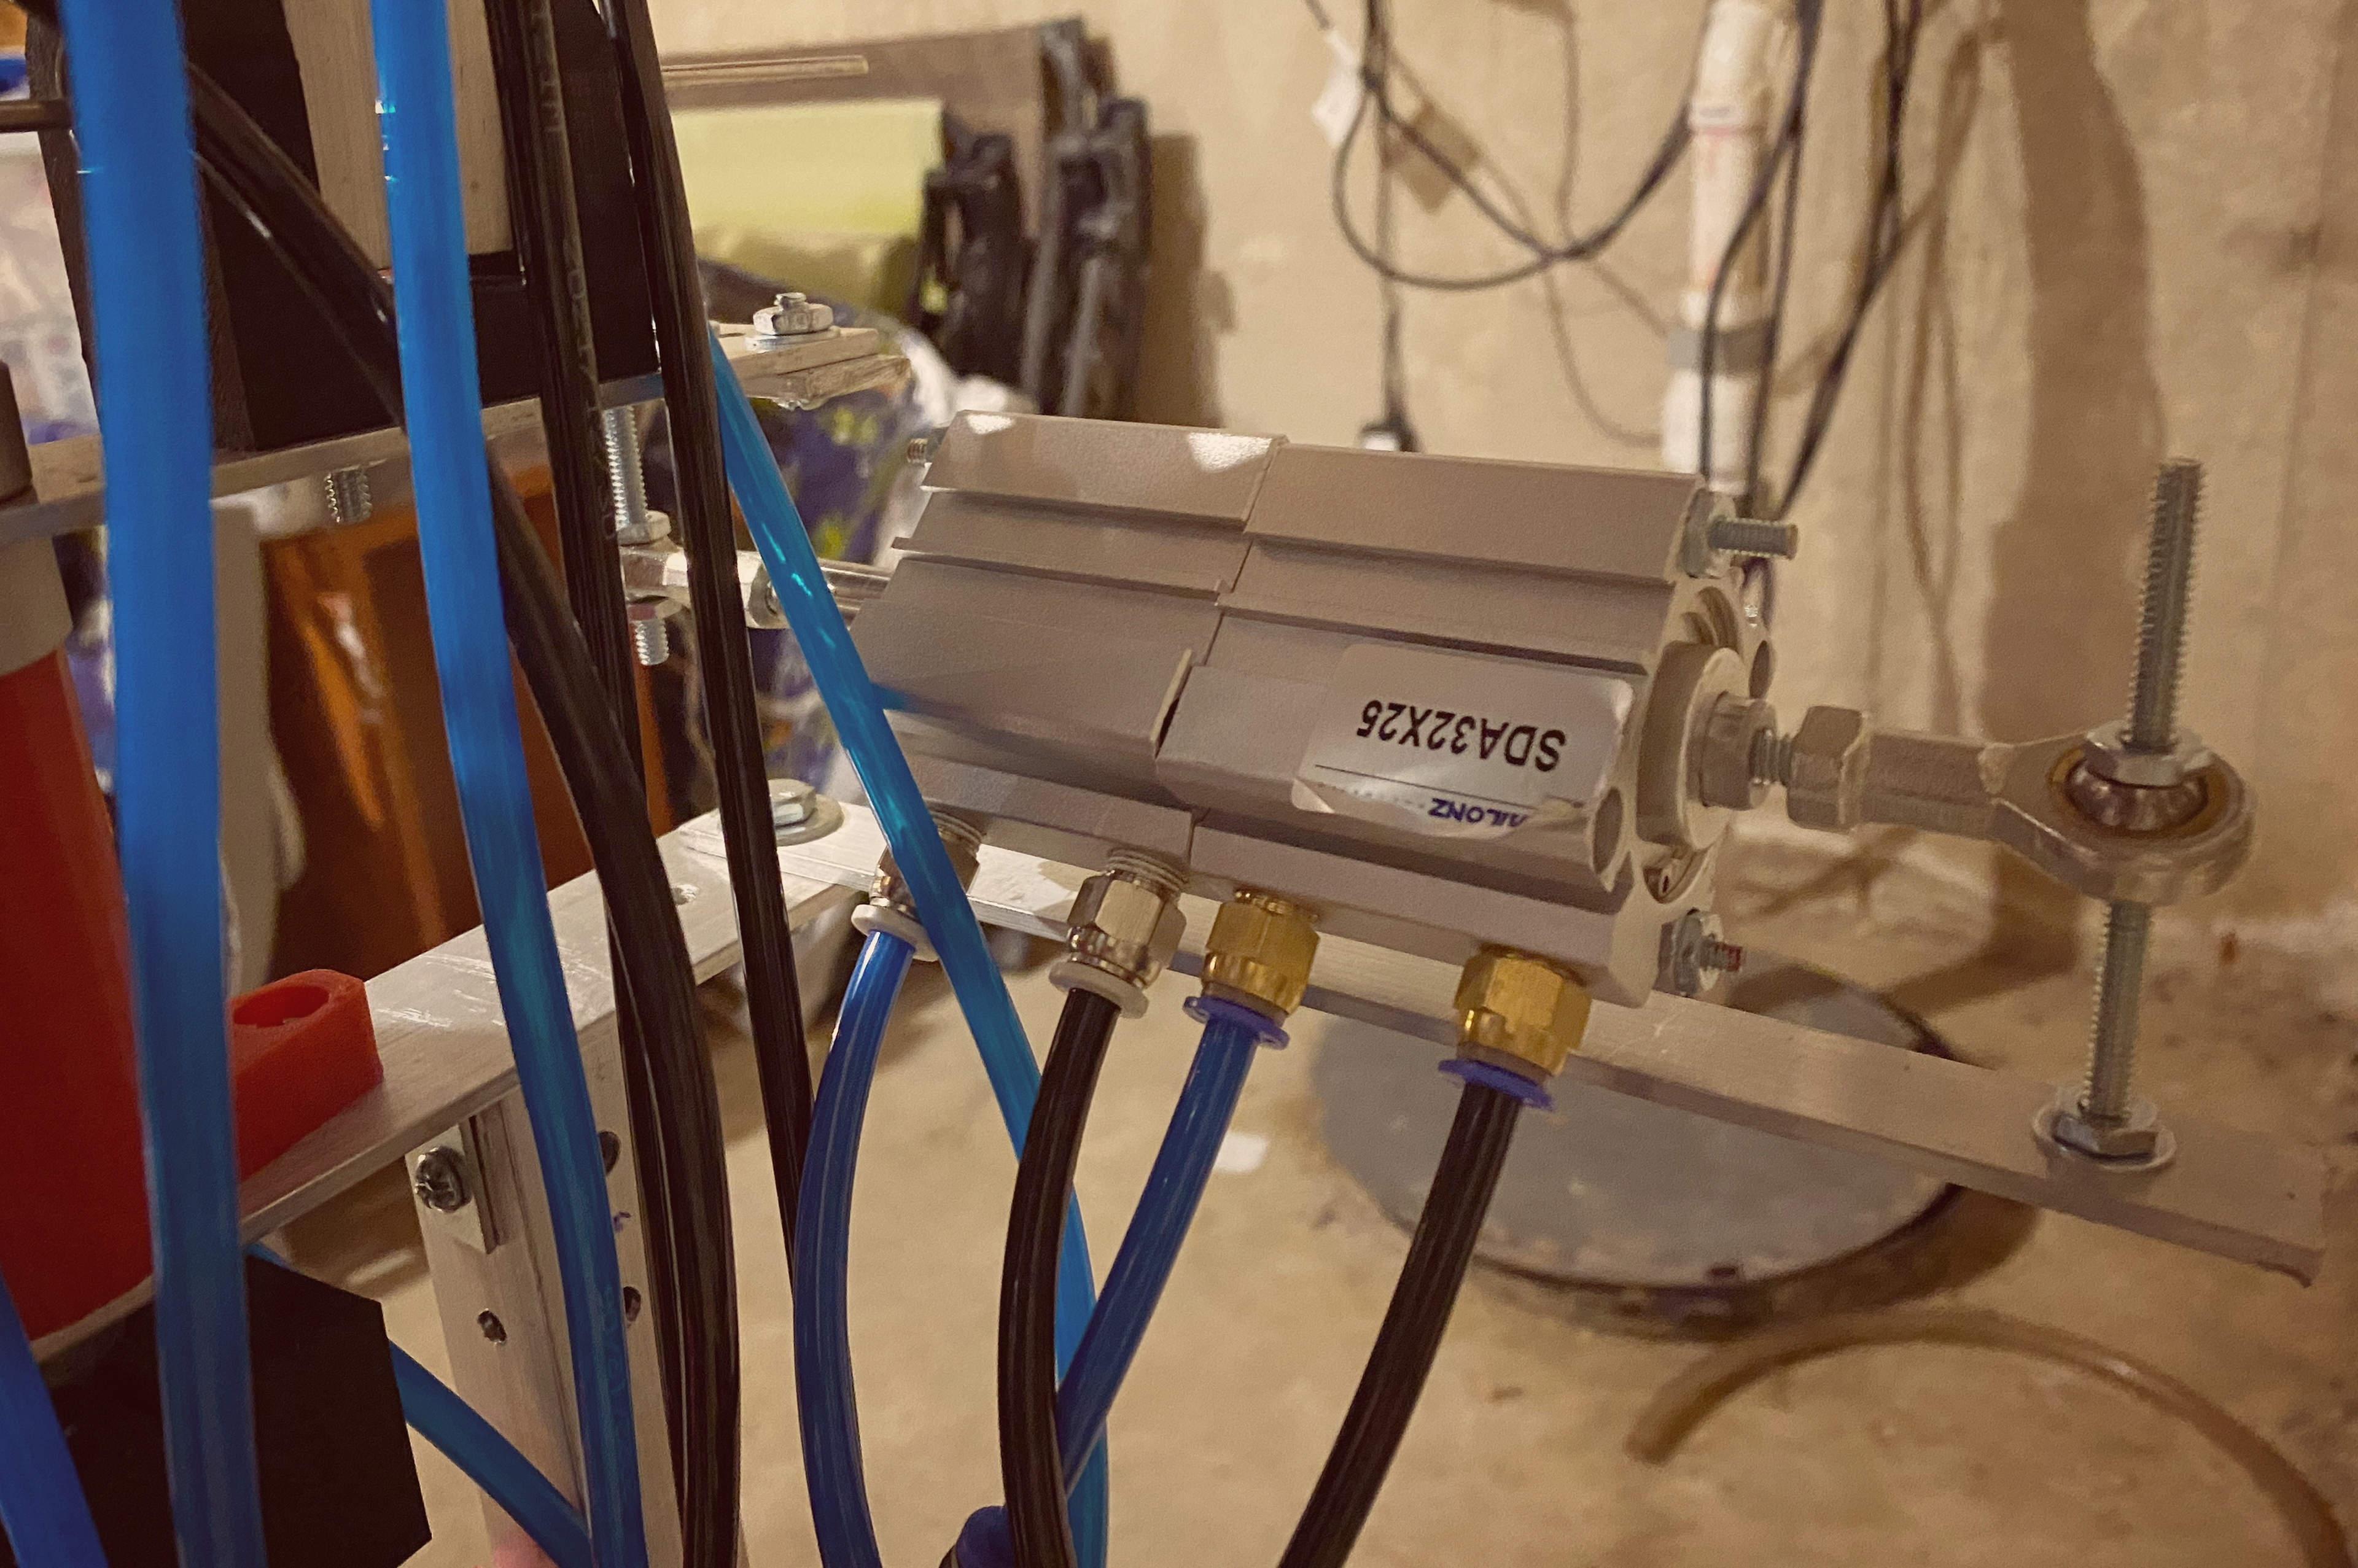
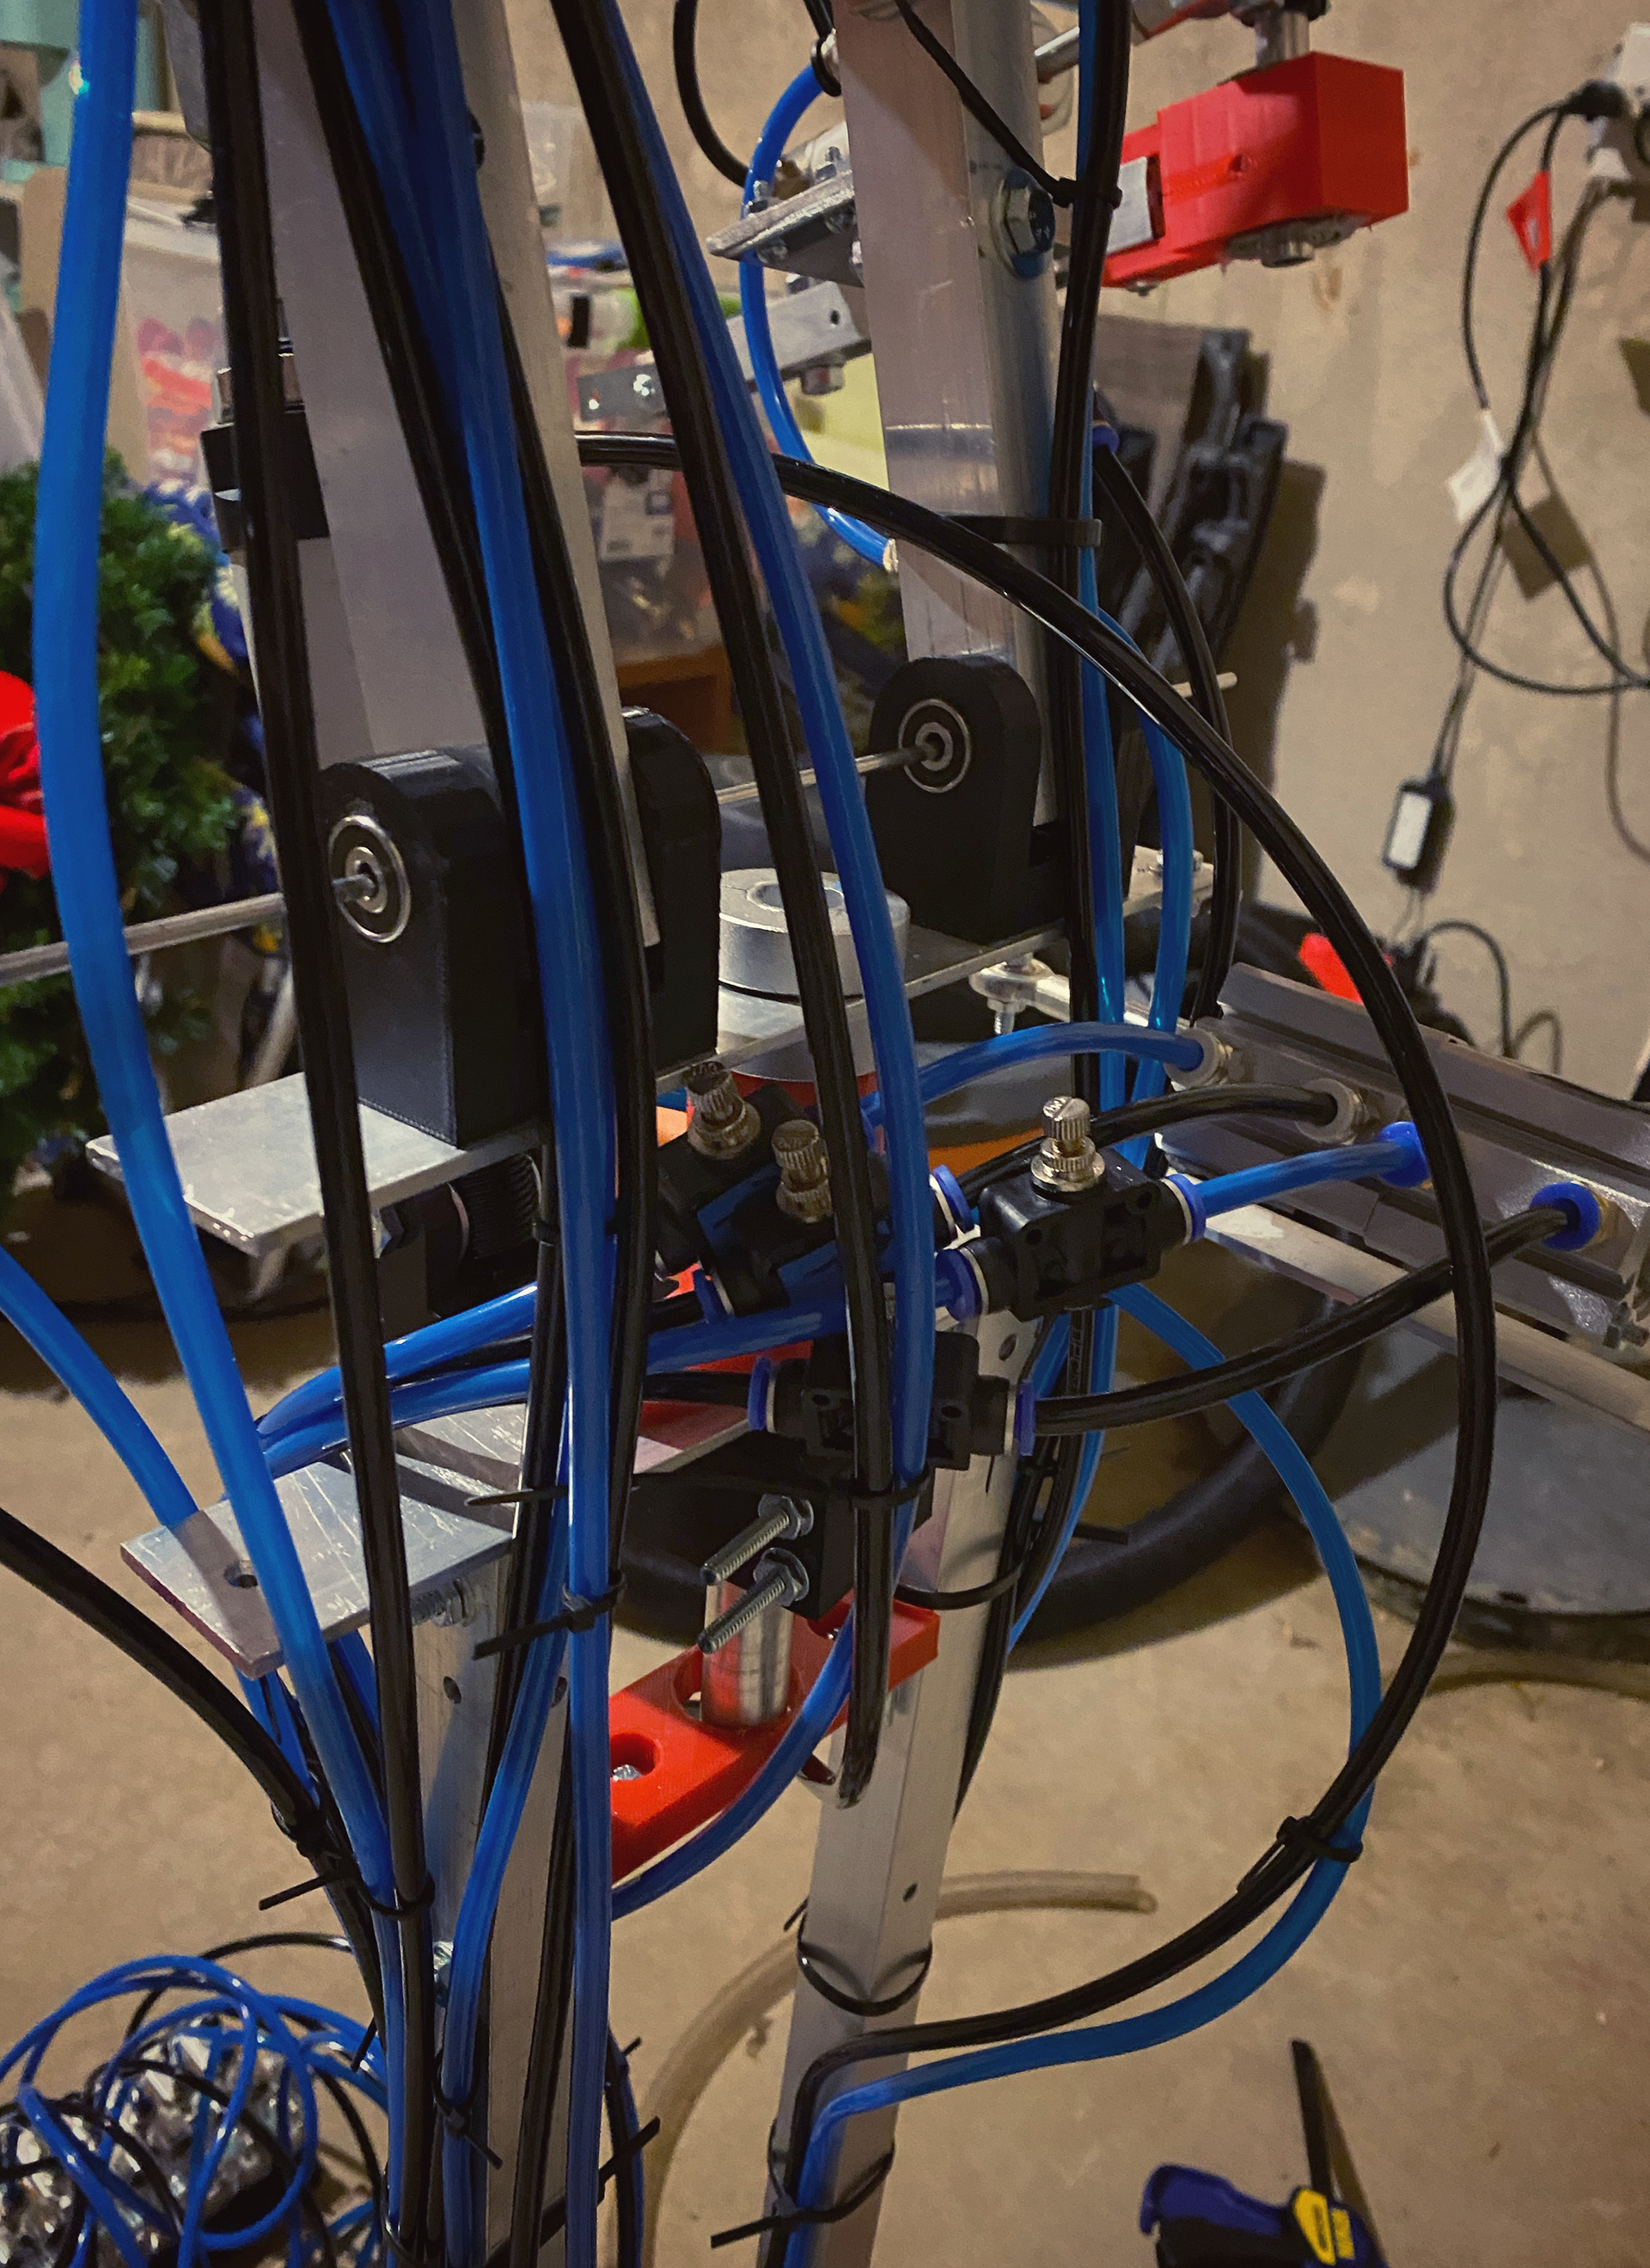
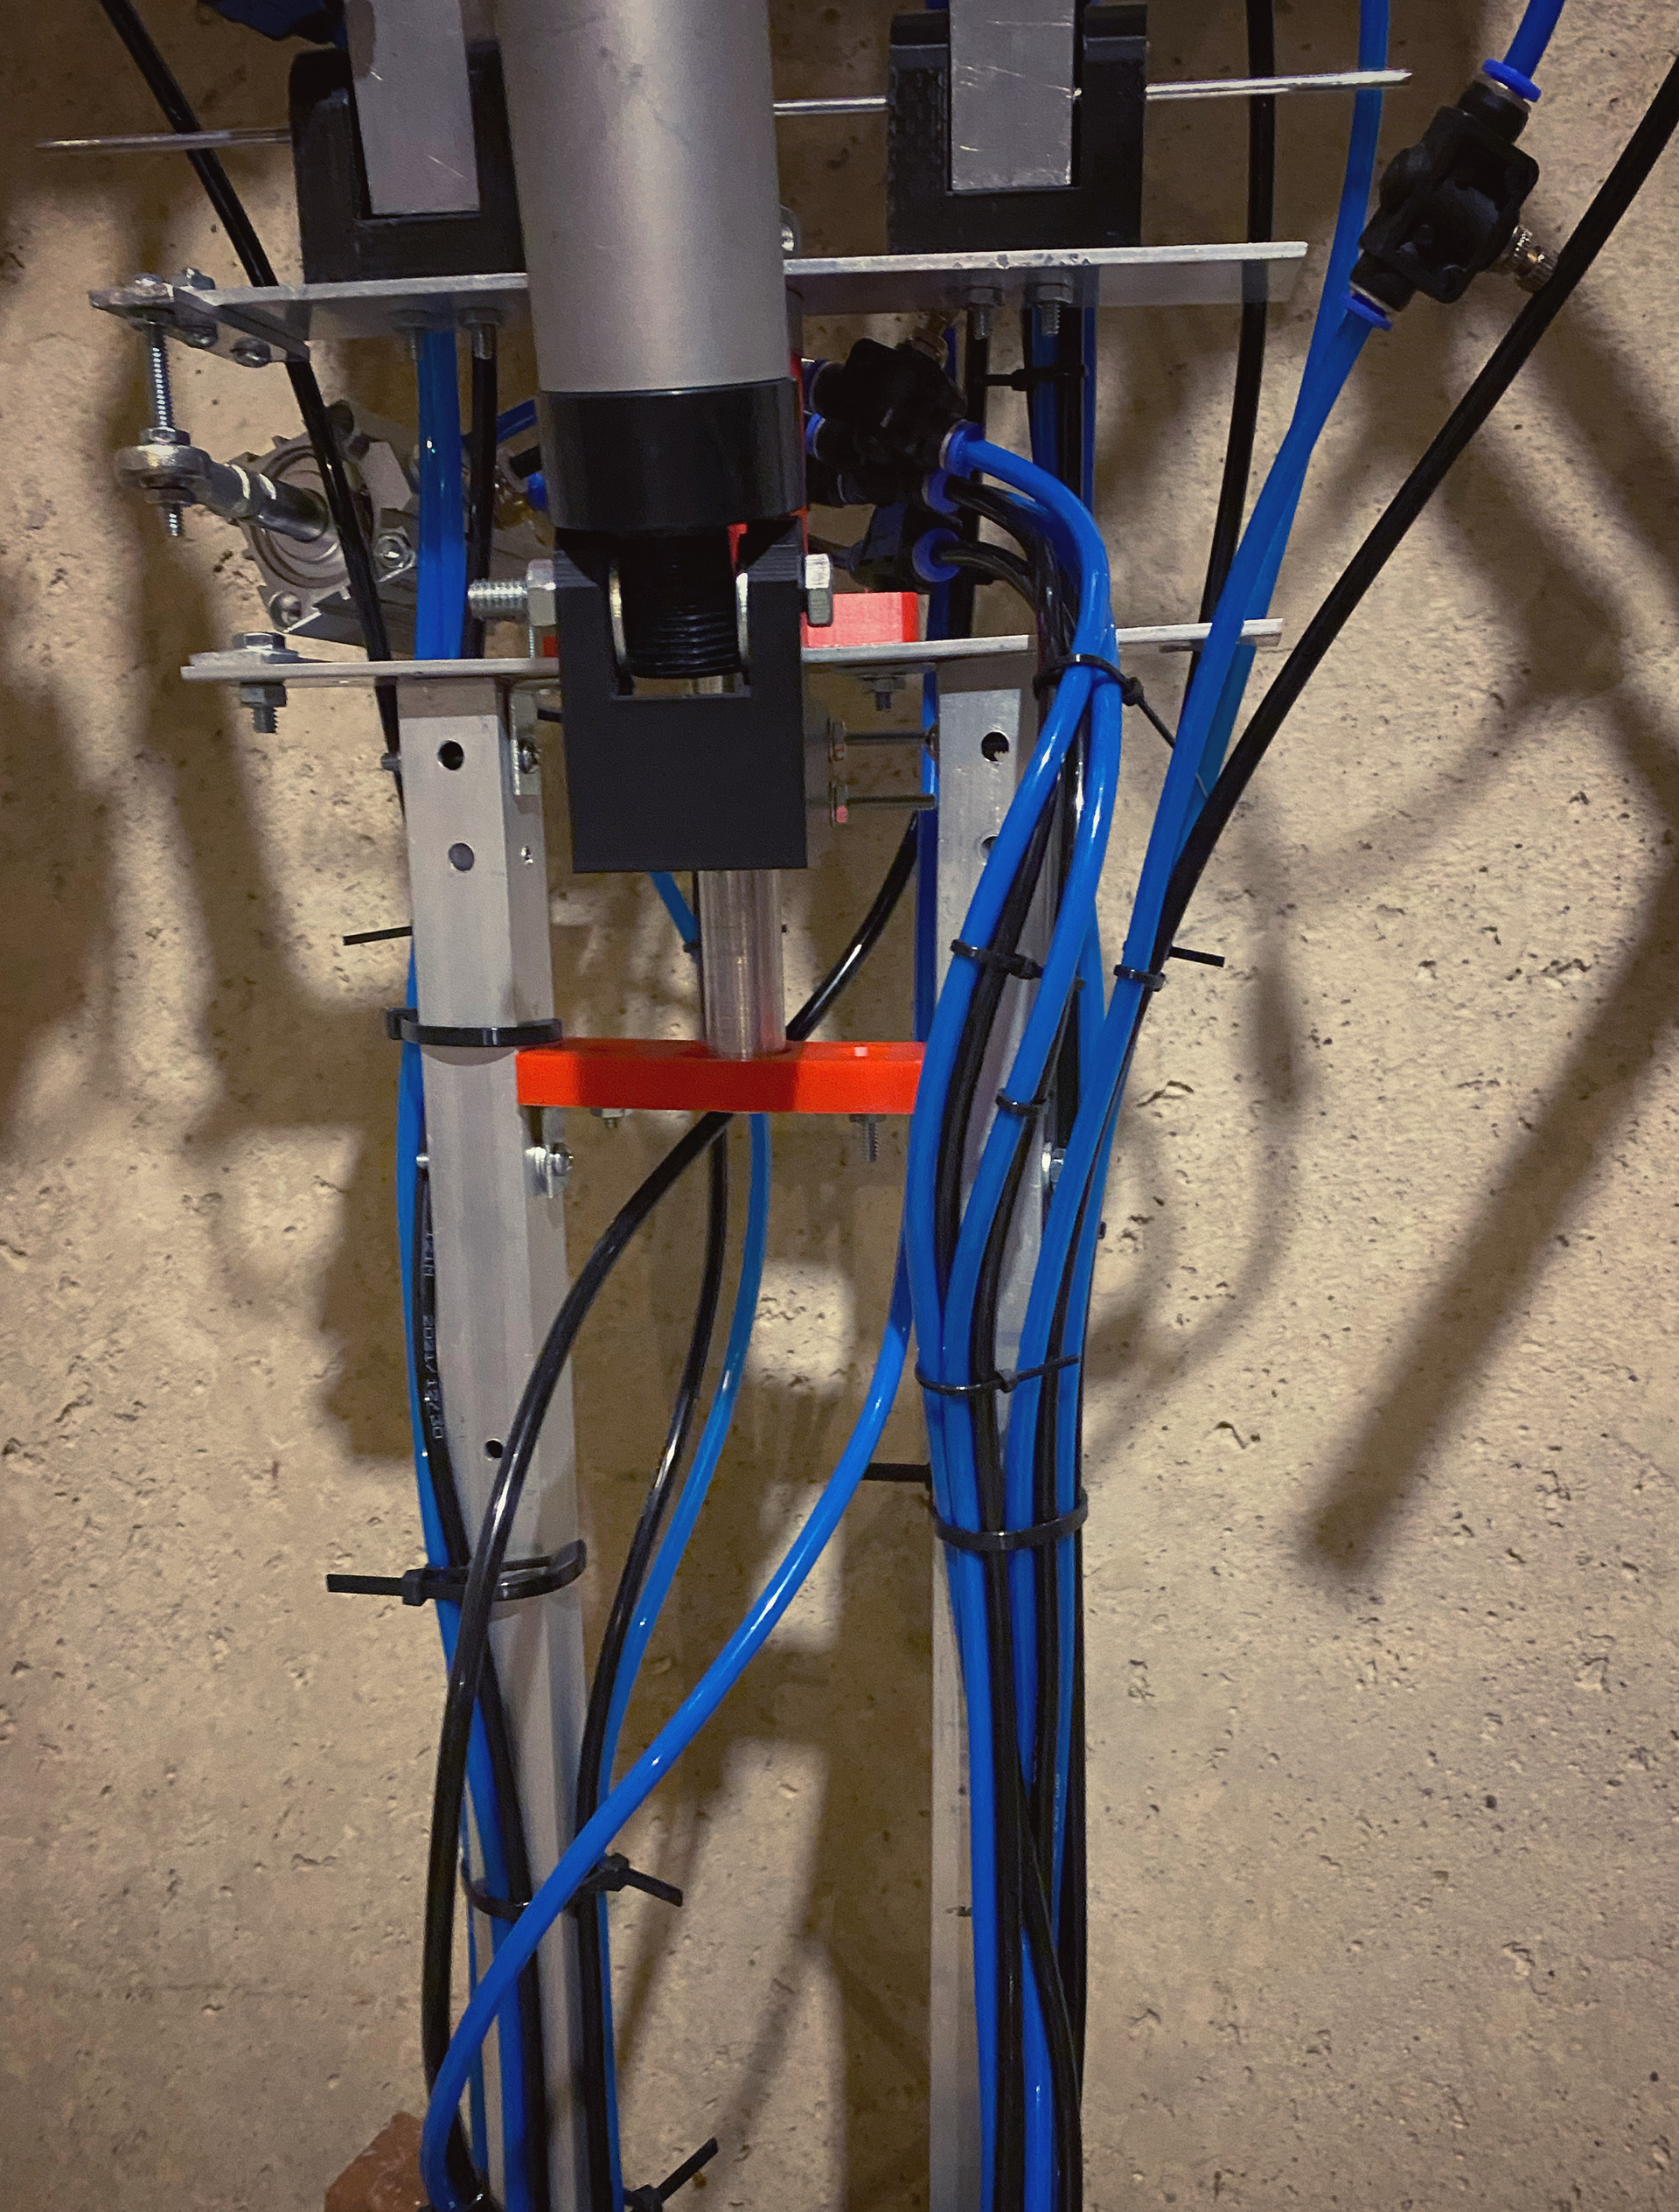
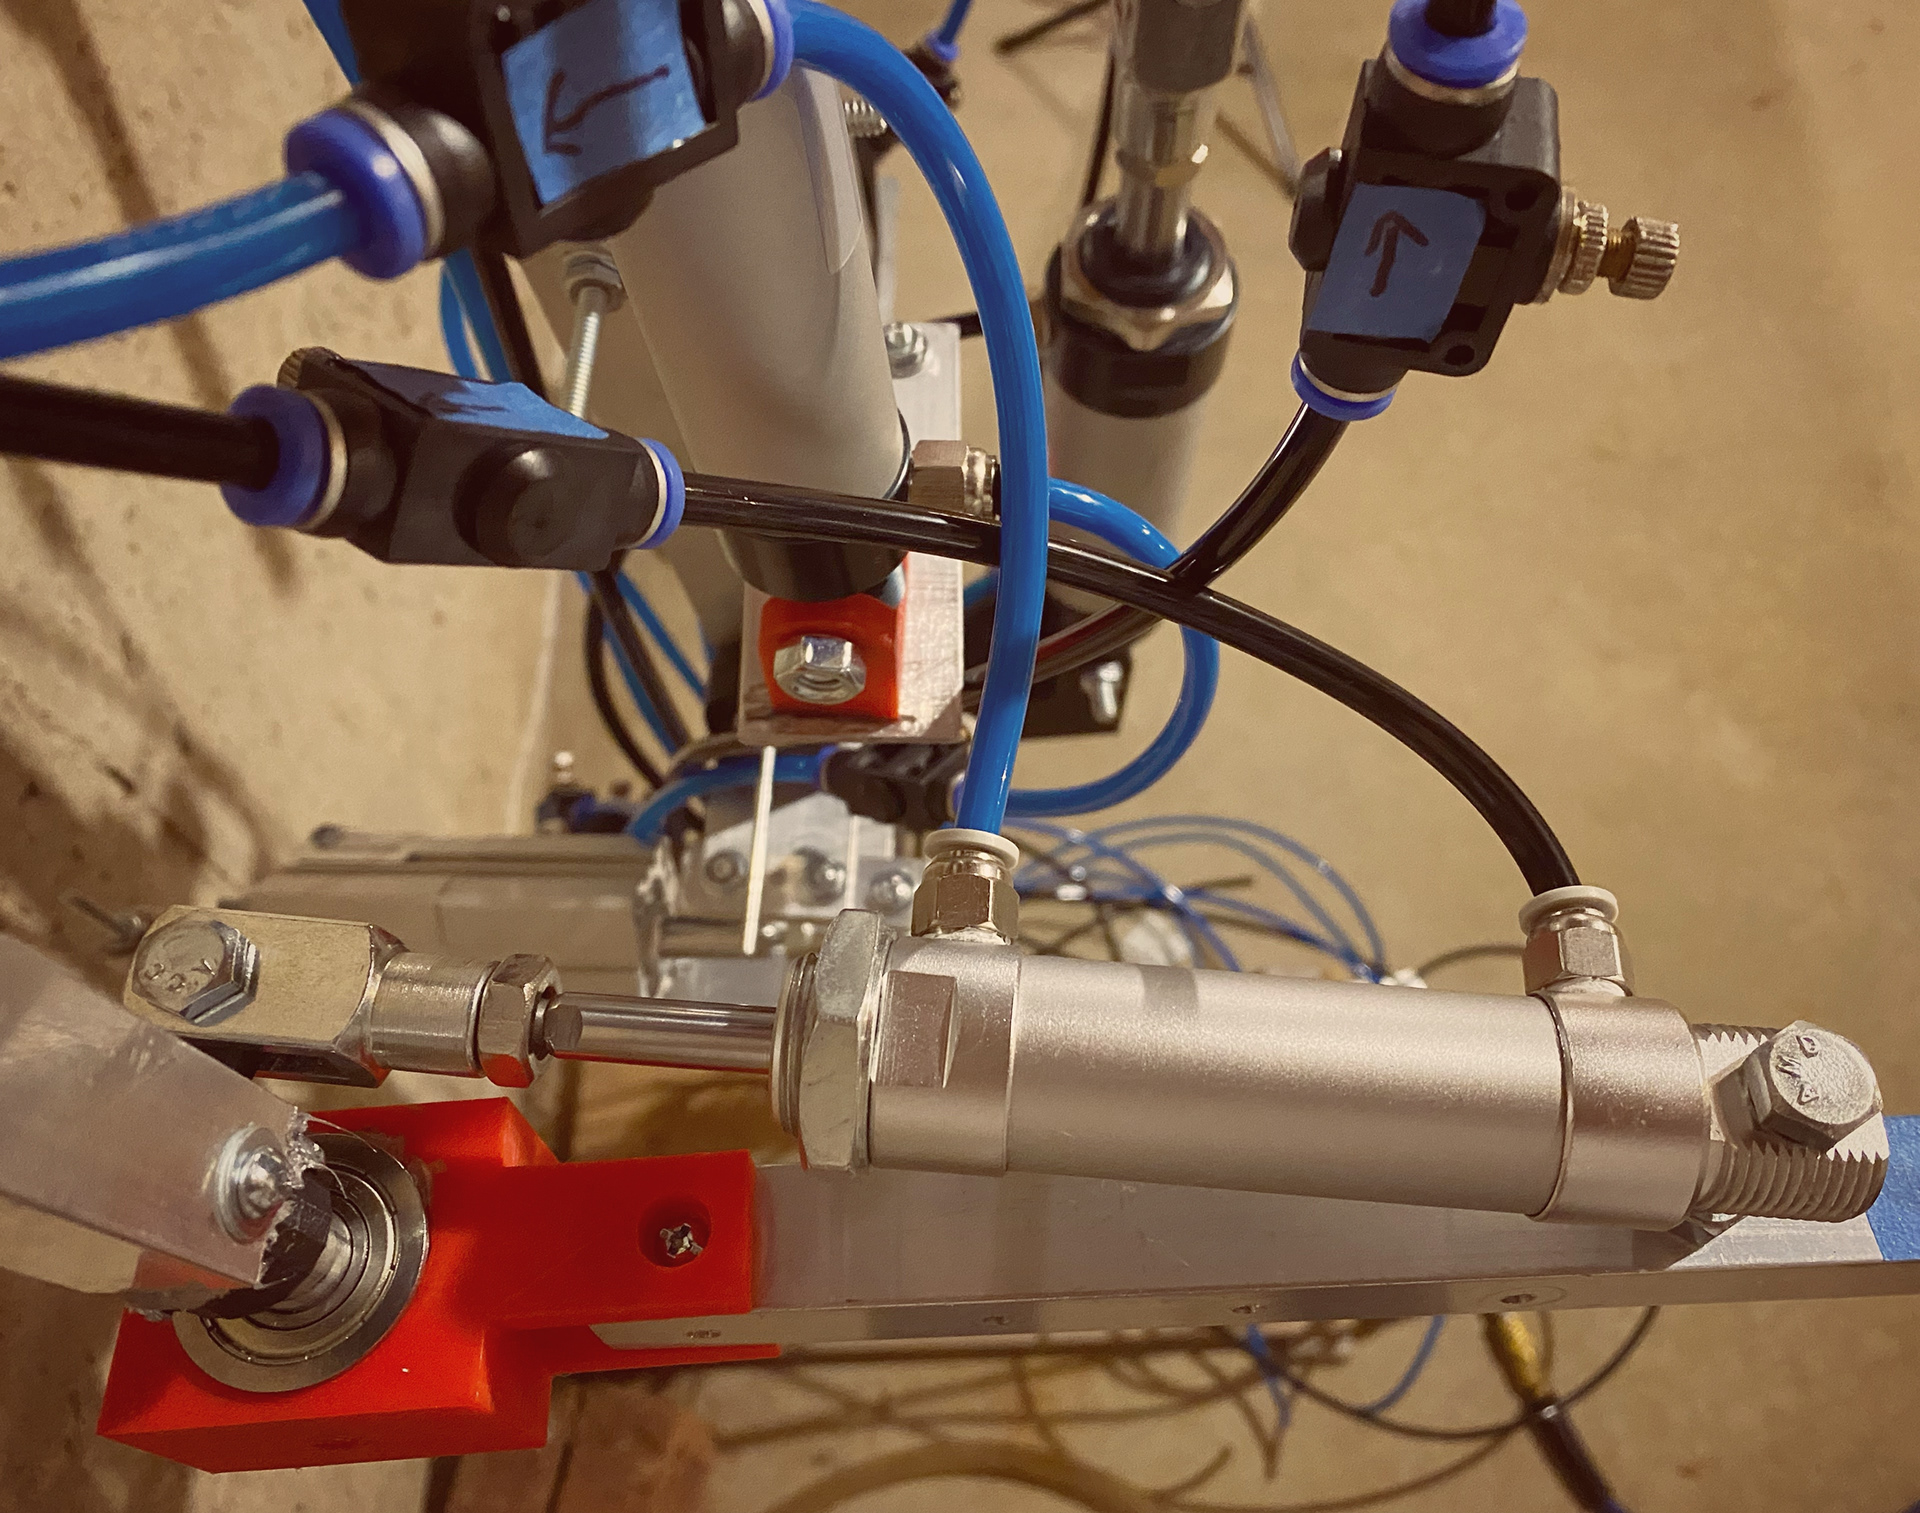
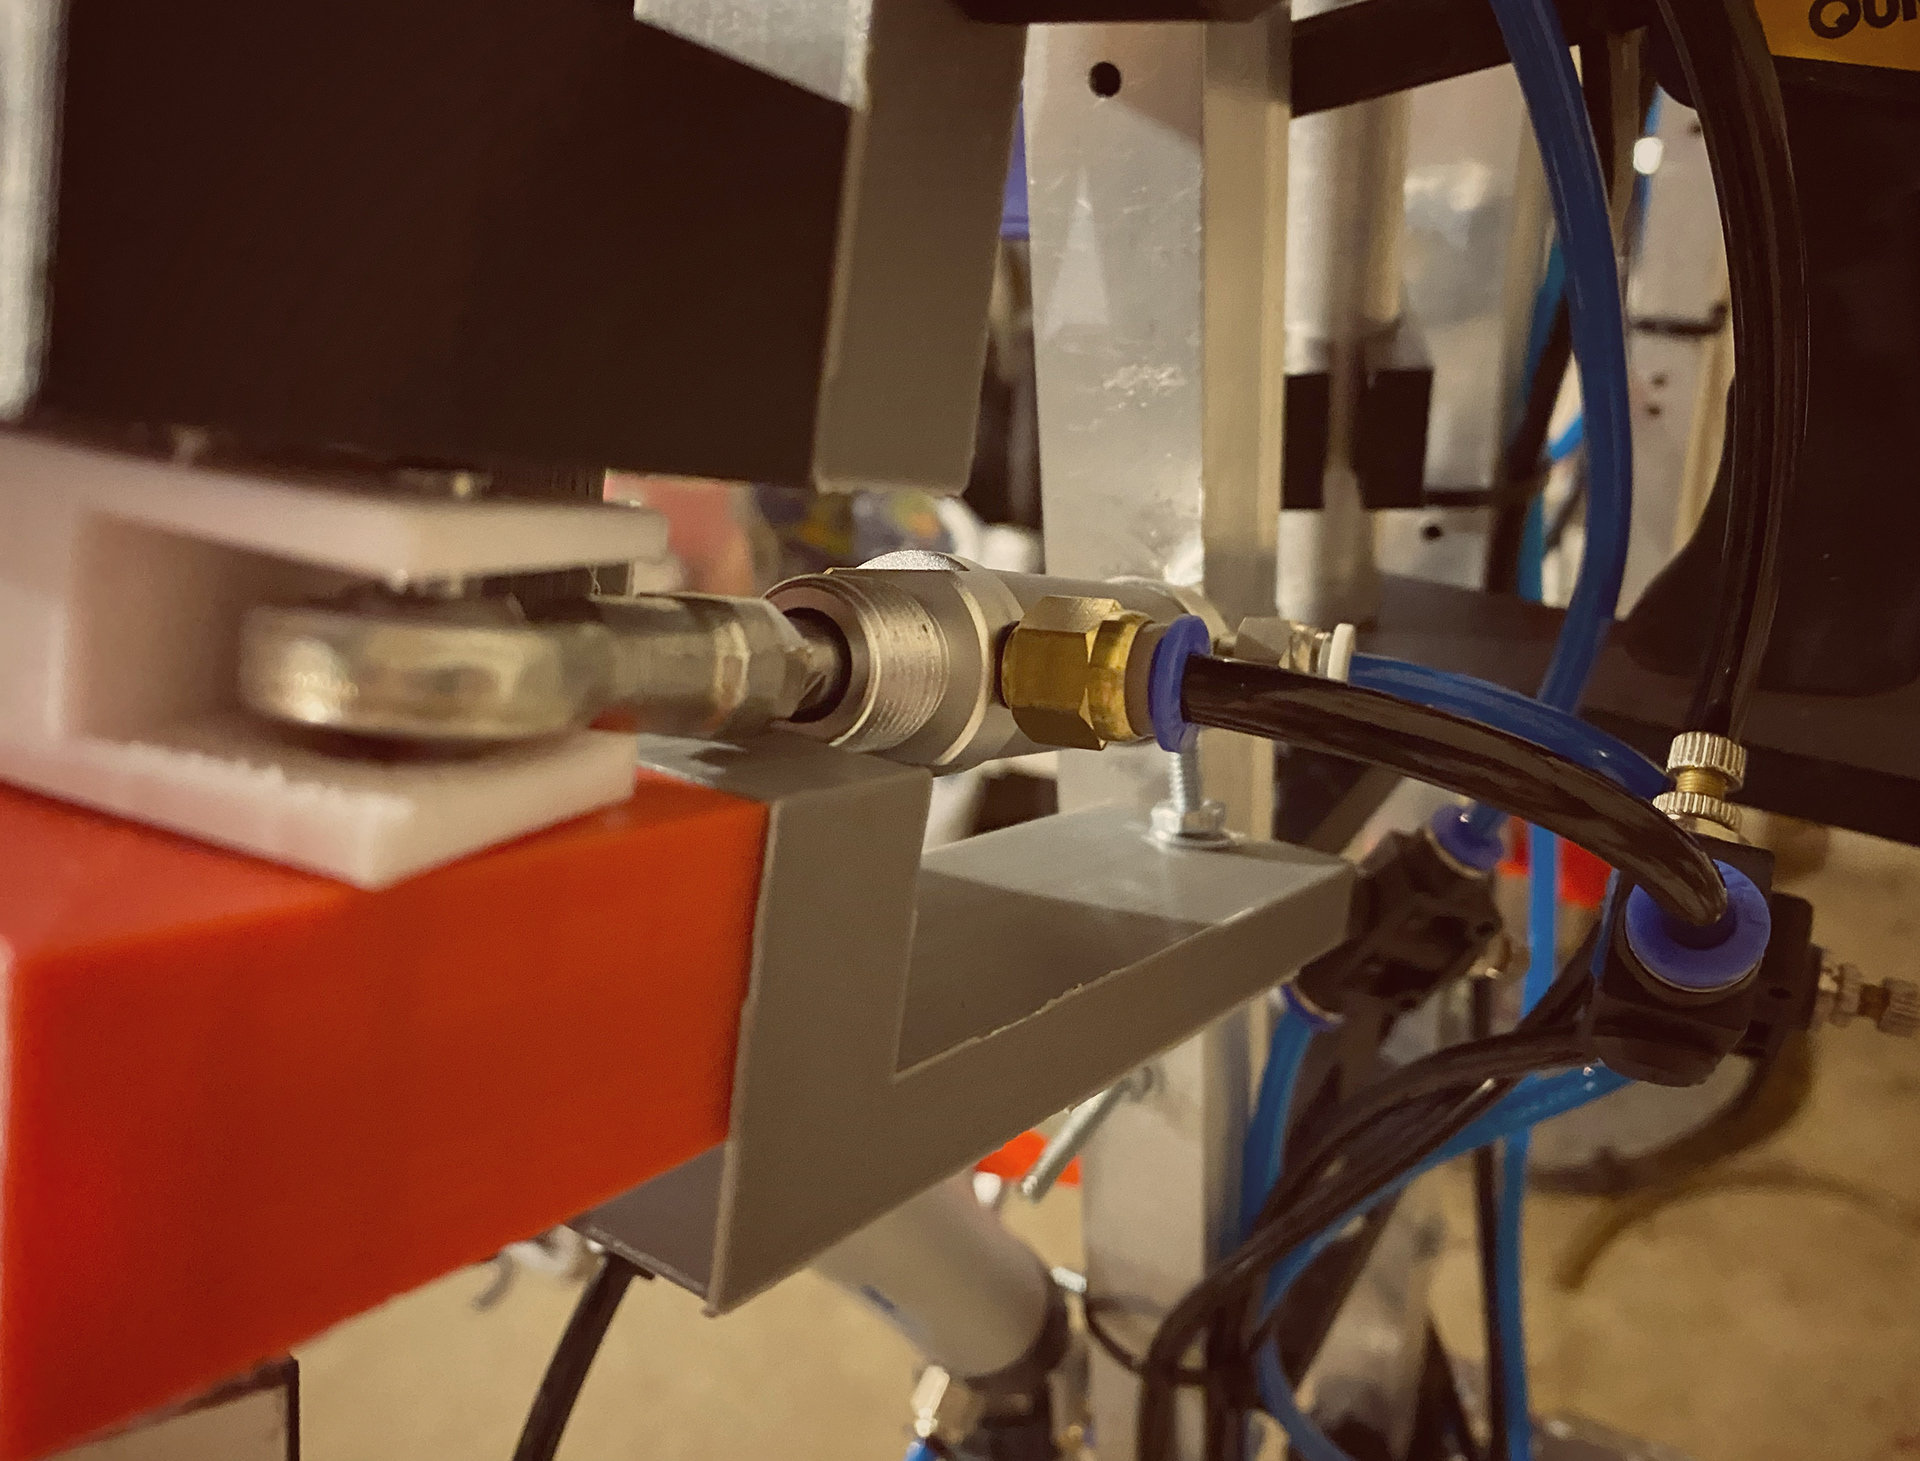
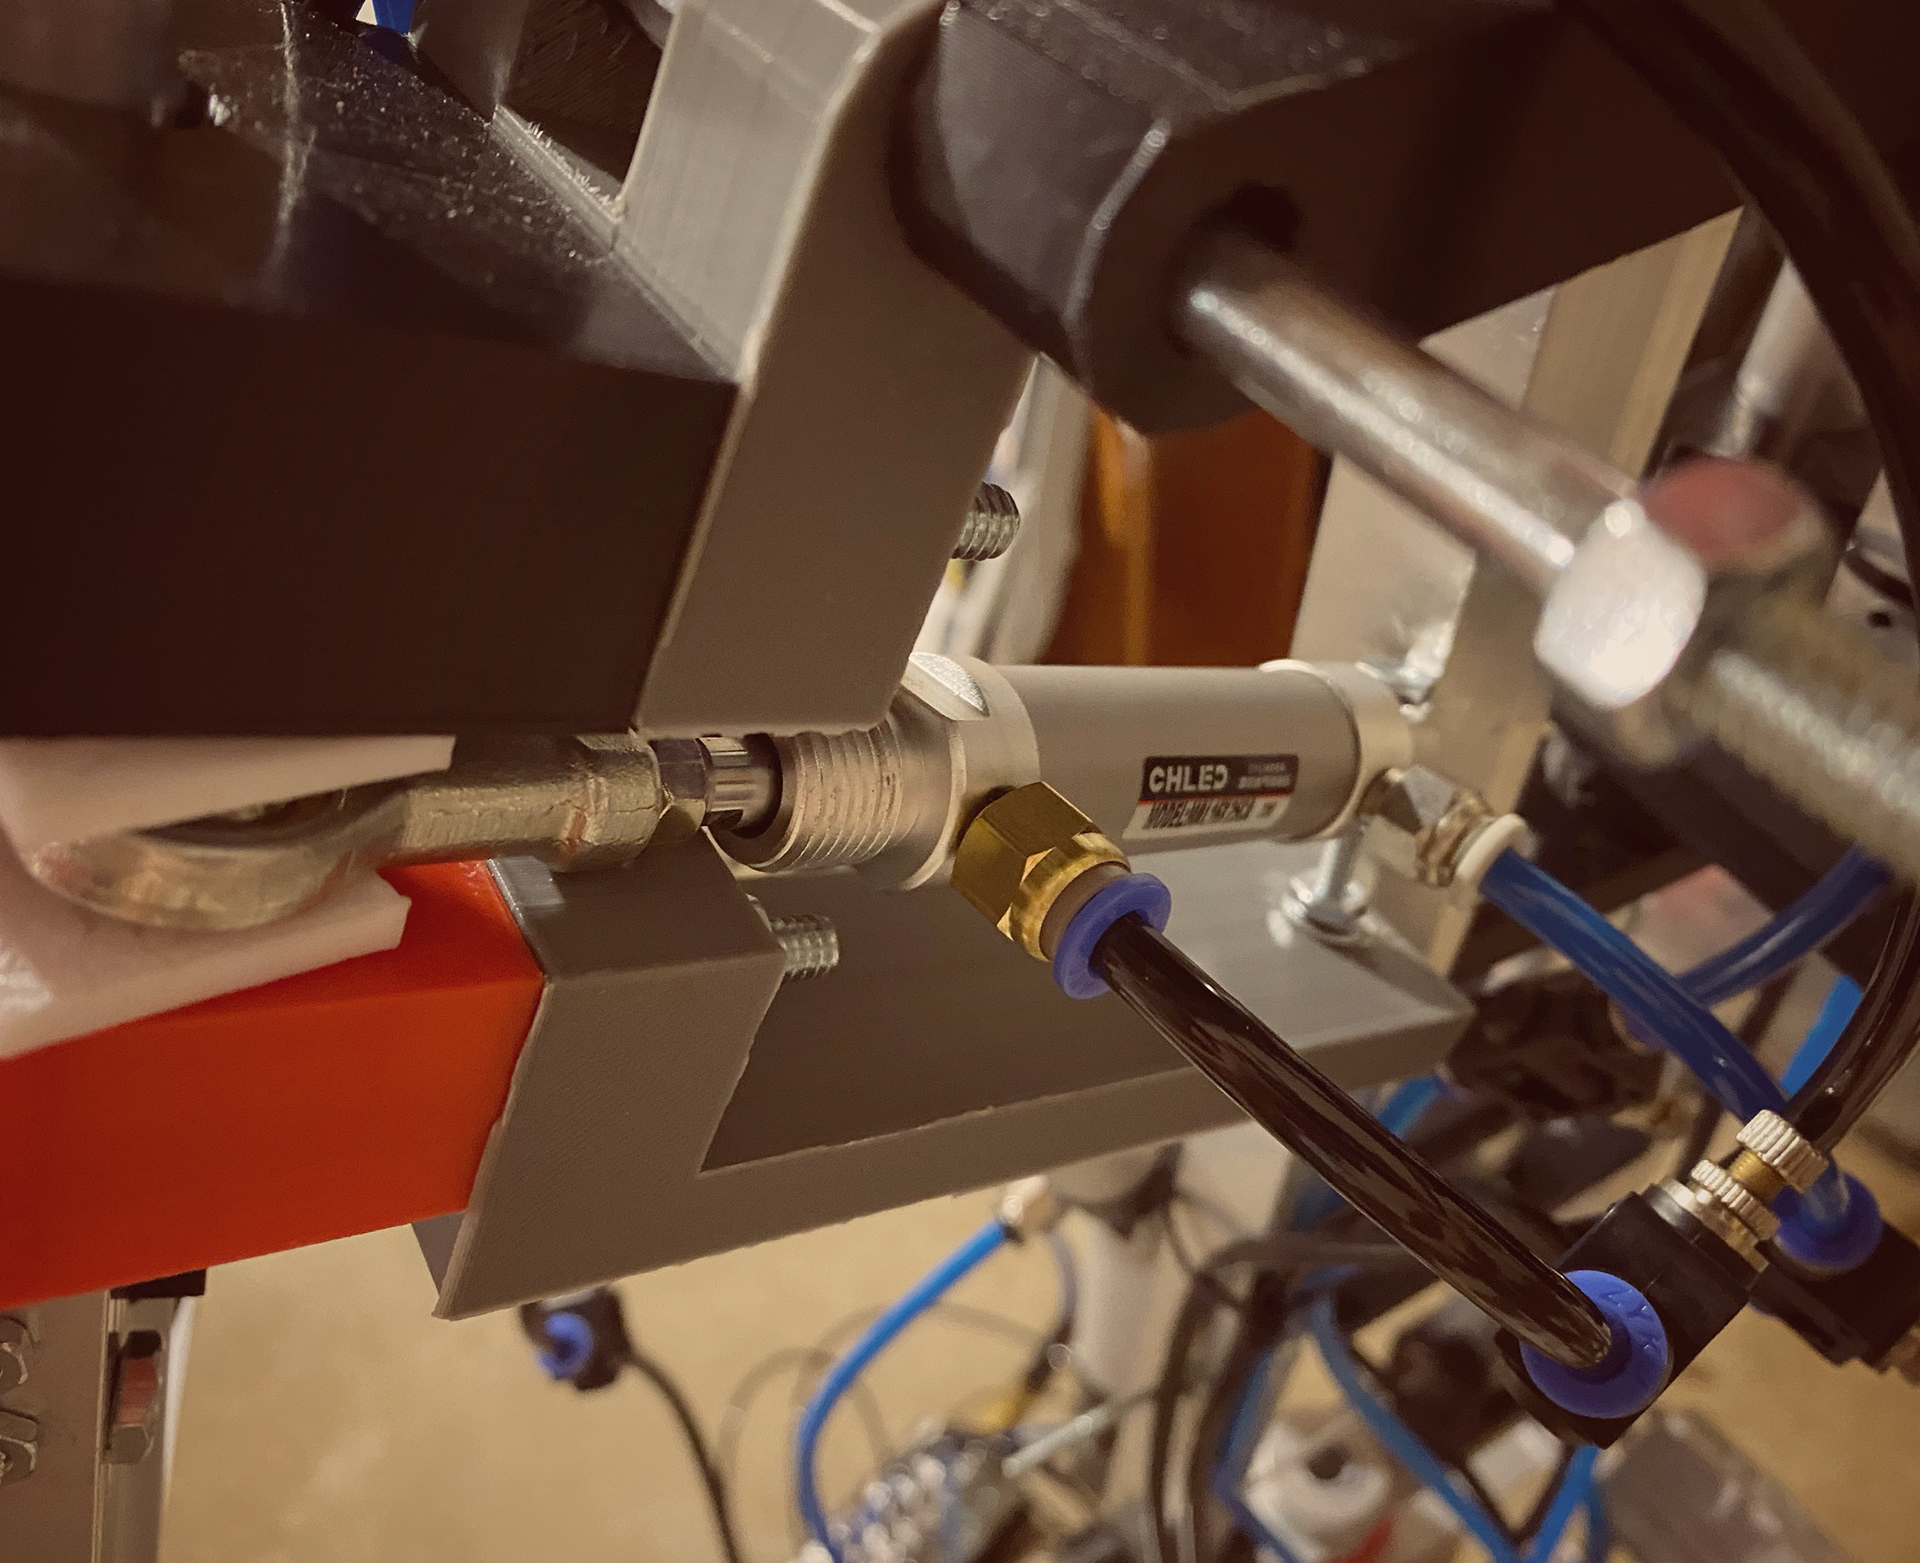
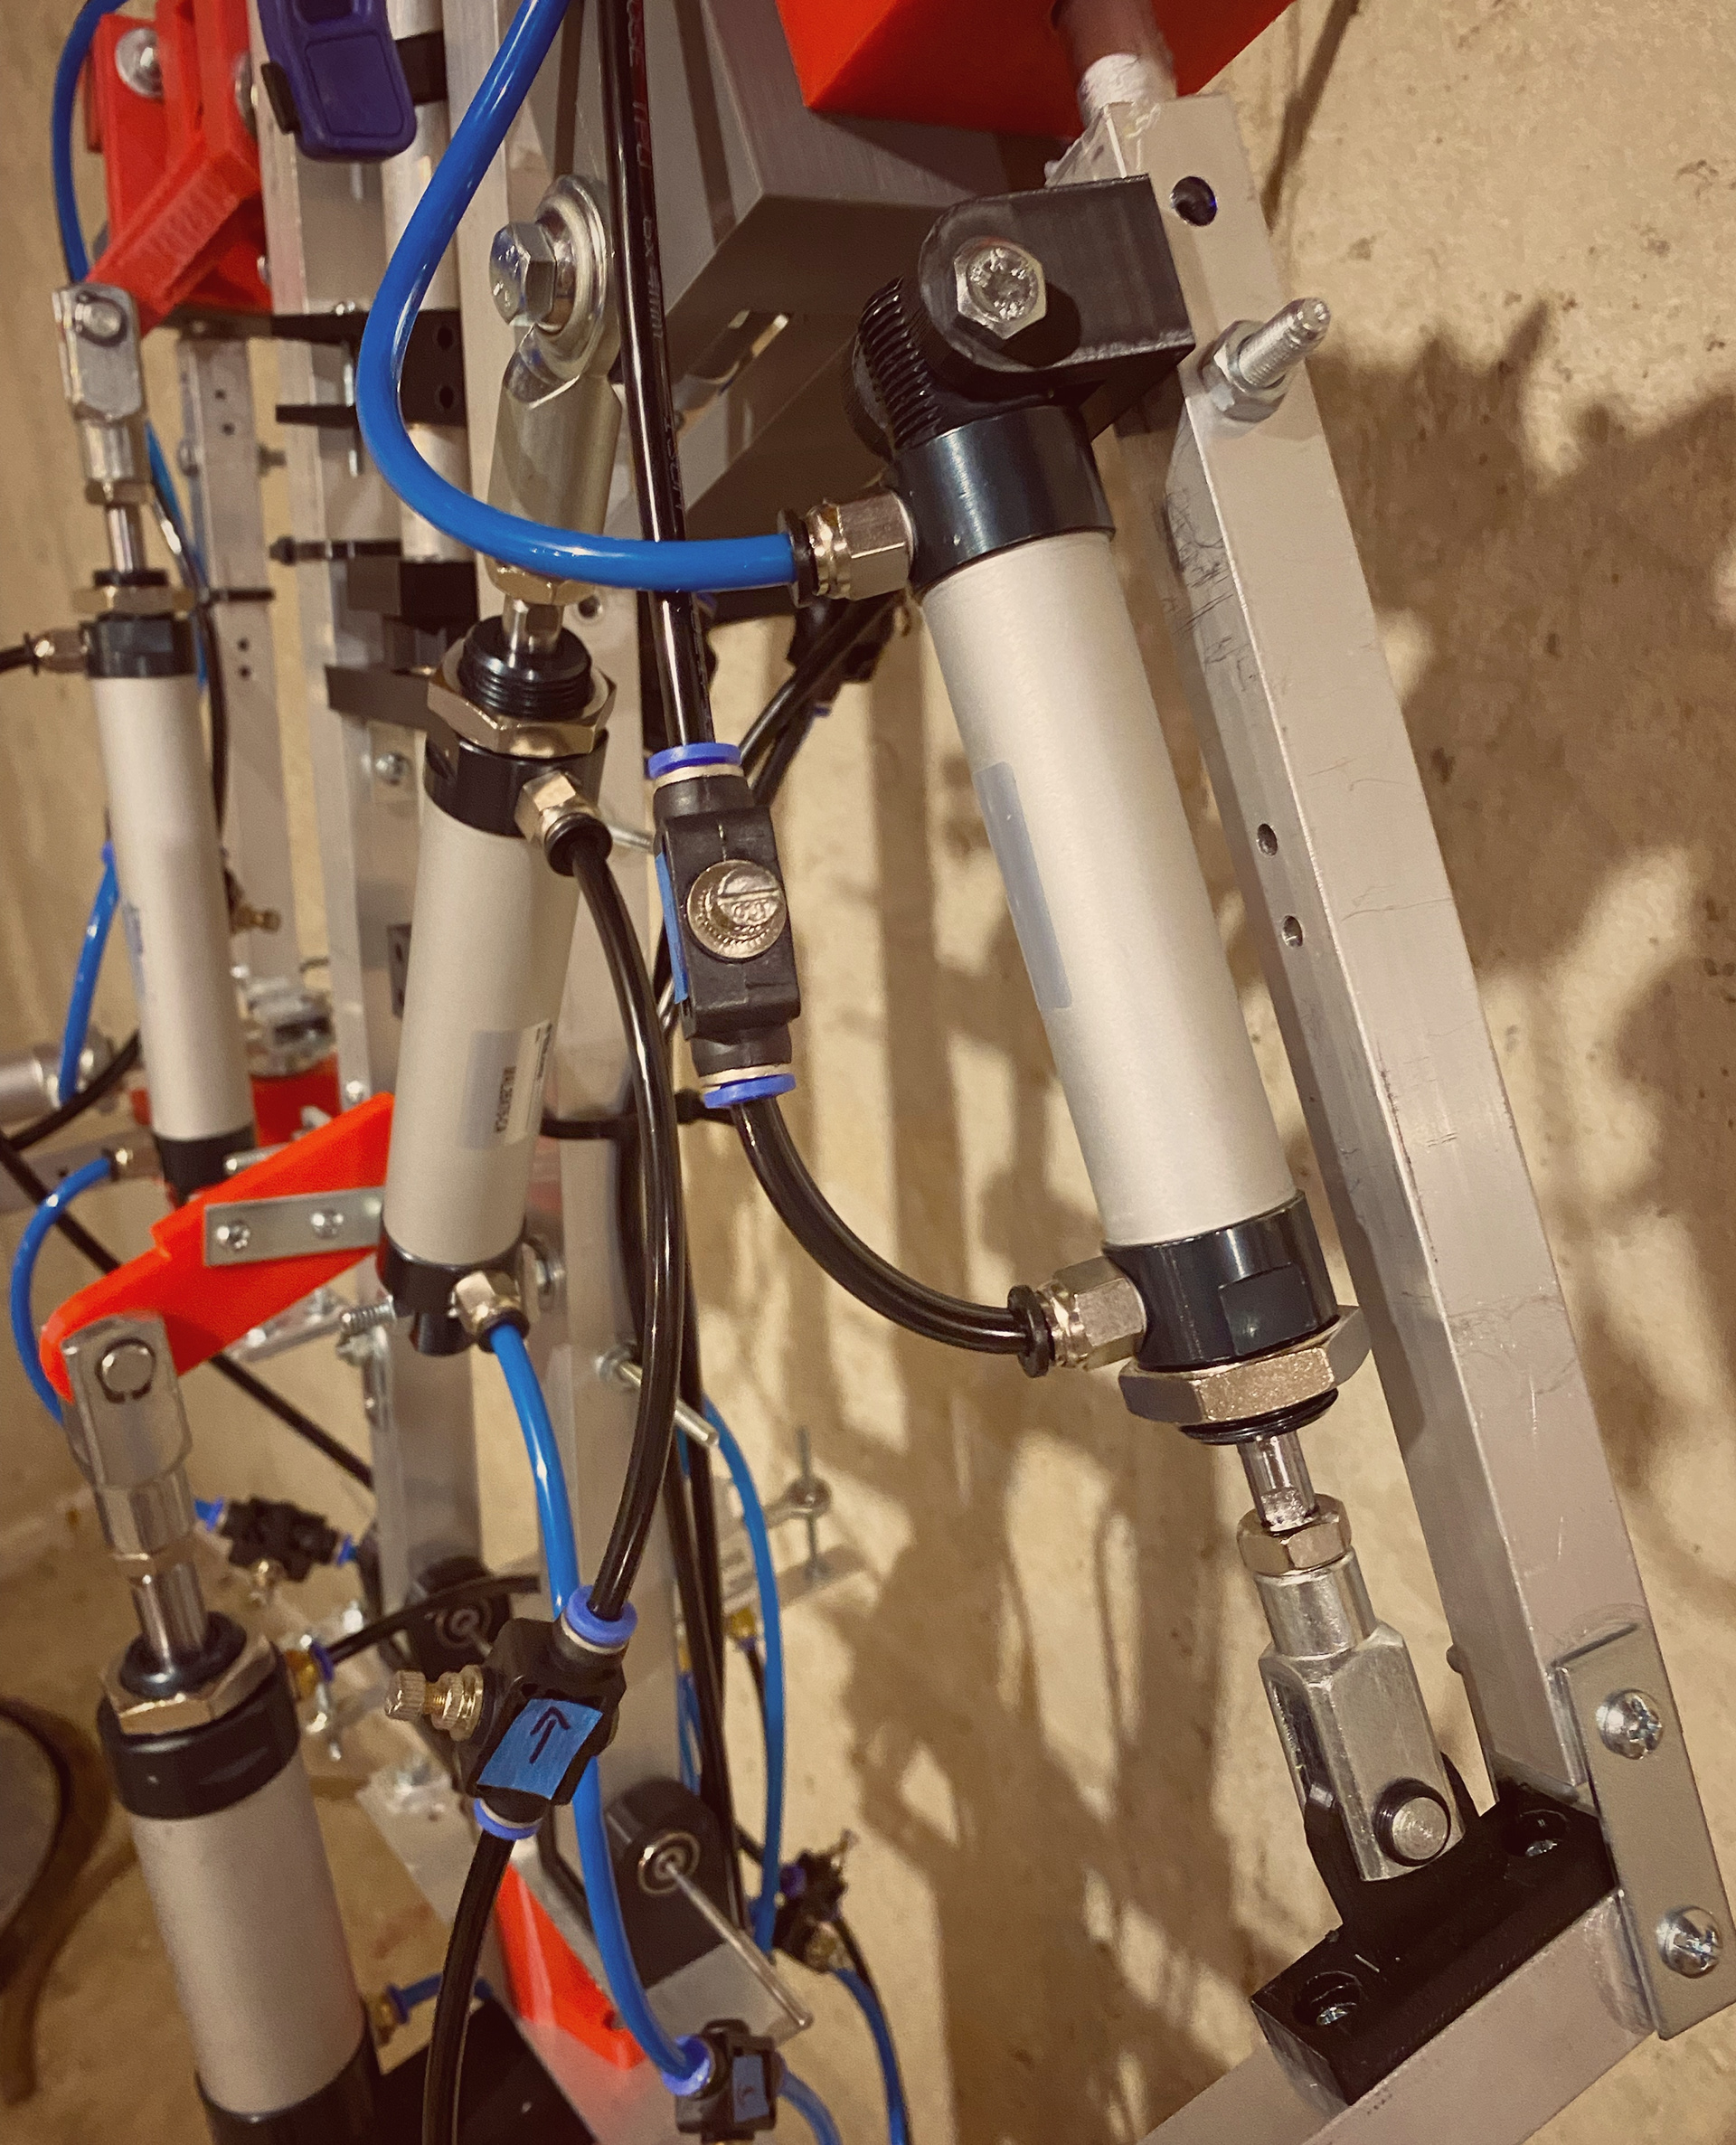
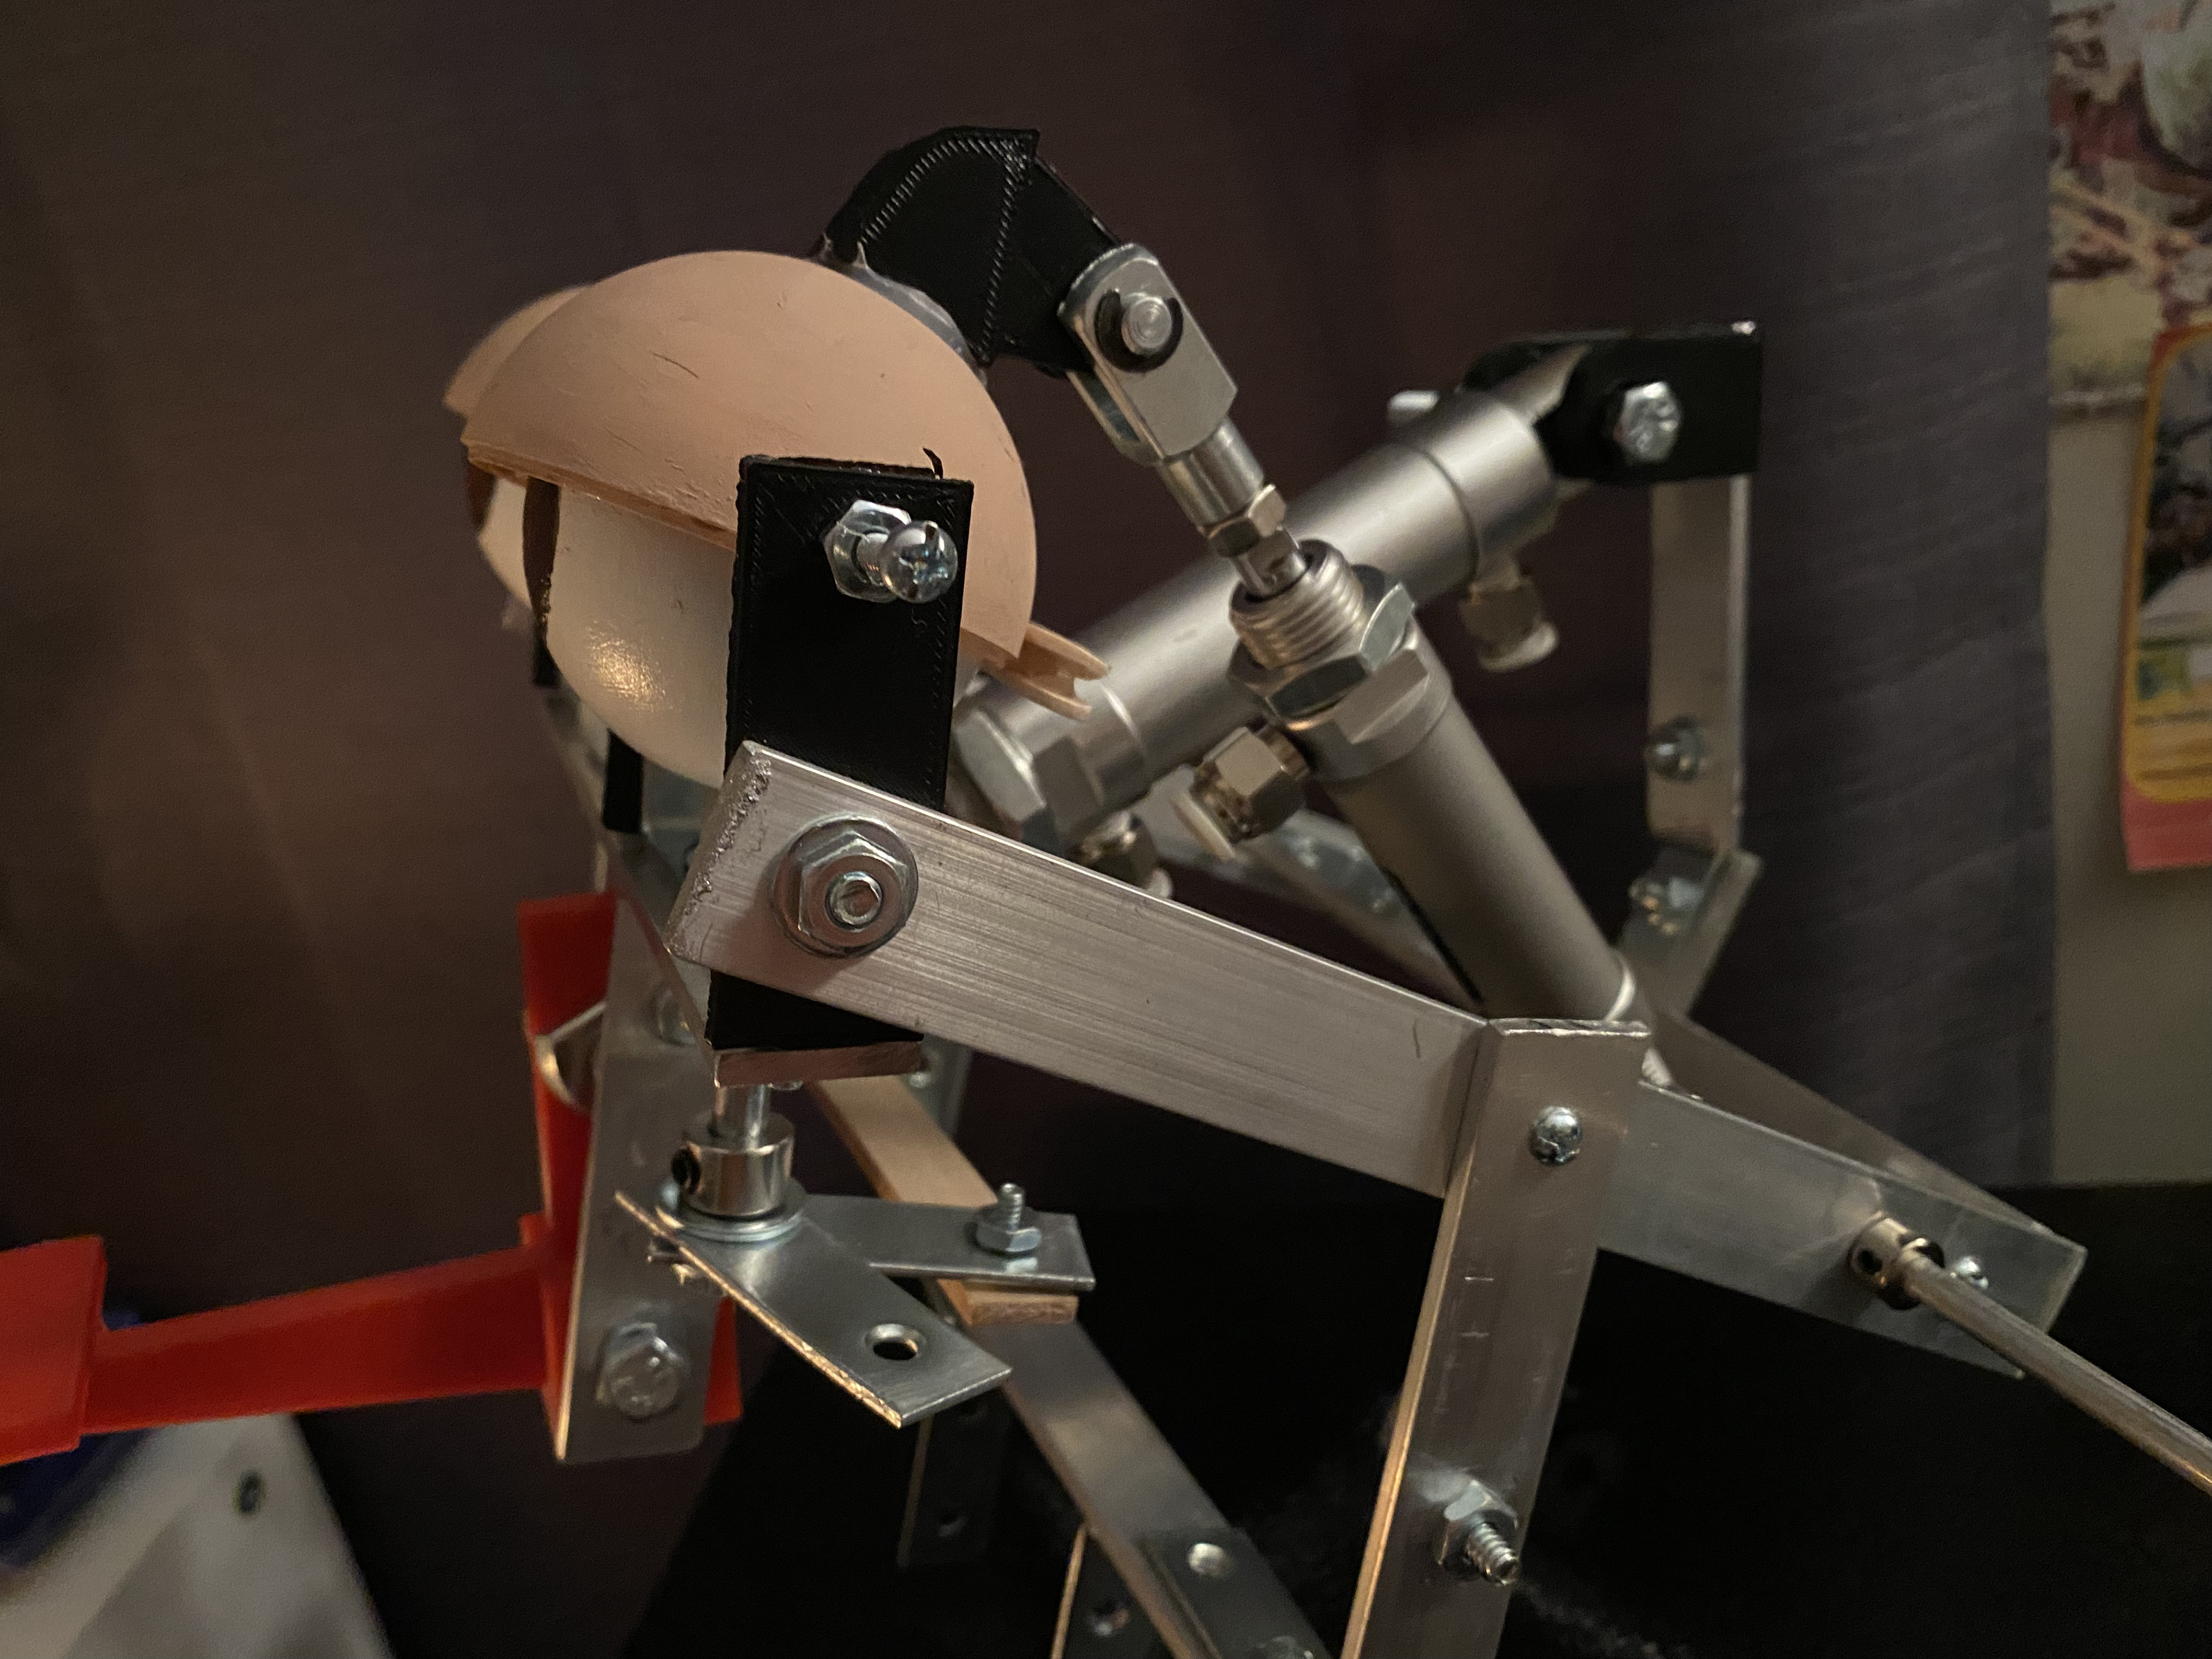
This current figure is now equipped with pillow-block bearings to allow for smooth rotation of the head and waist. It also has several new machined parts that make up the overall frame and individual assemblies. I got creative and began taking advantage of partially threaded bolts to mount cylinders. It allows for the threaded end to secure the joint to the figure, while the unthreaded end can hold a cylinder in place. I am always thinking of new ways to make things work.
This updated assembly is nearly finished!
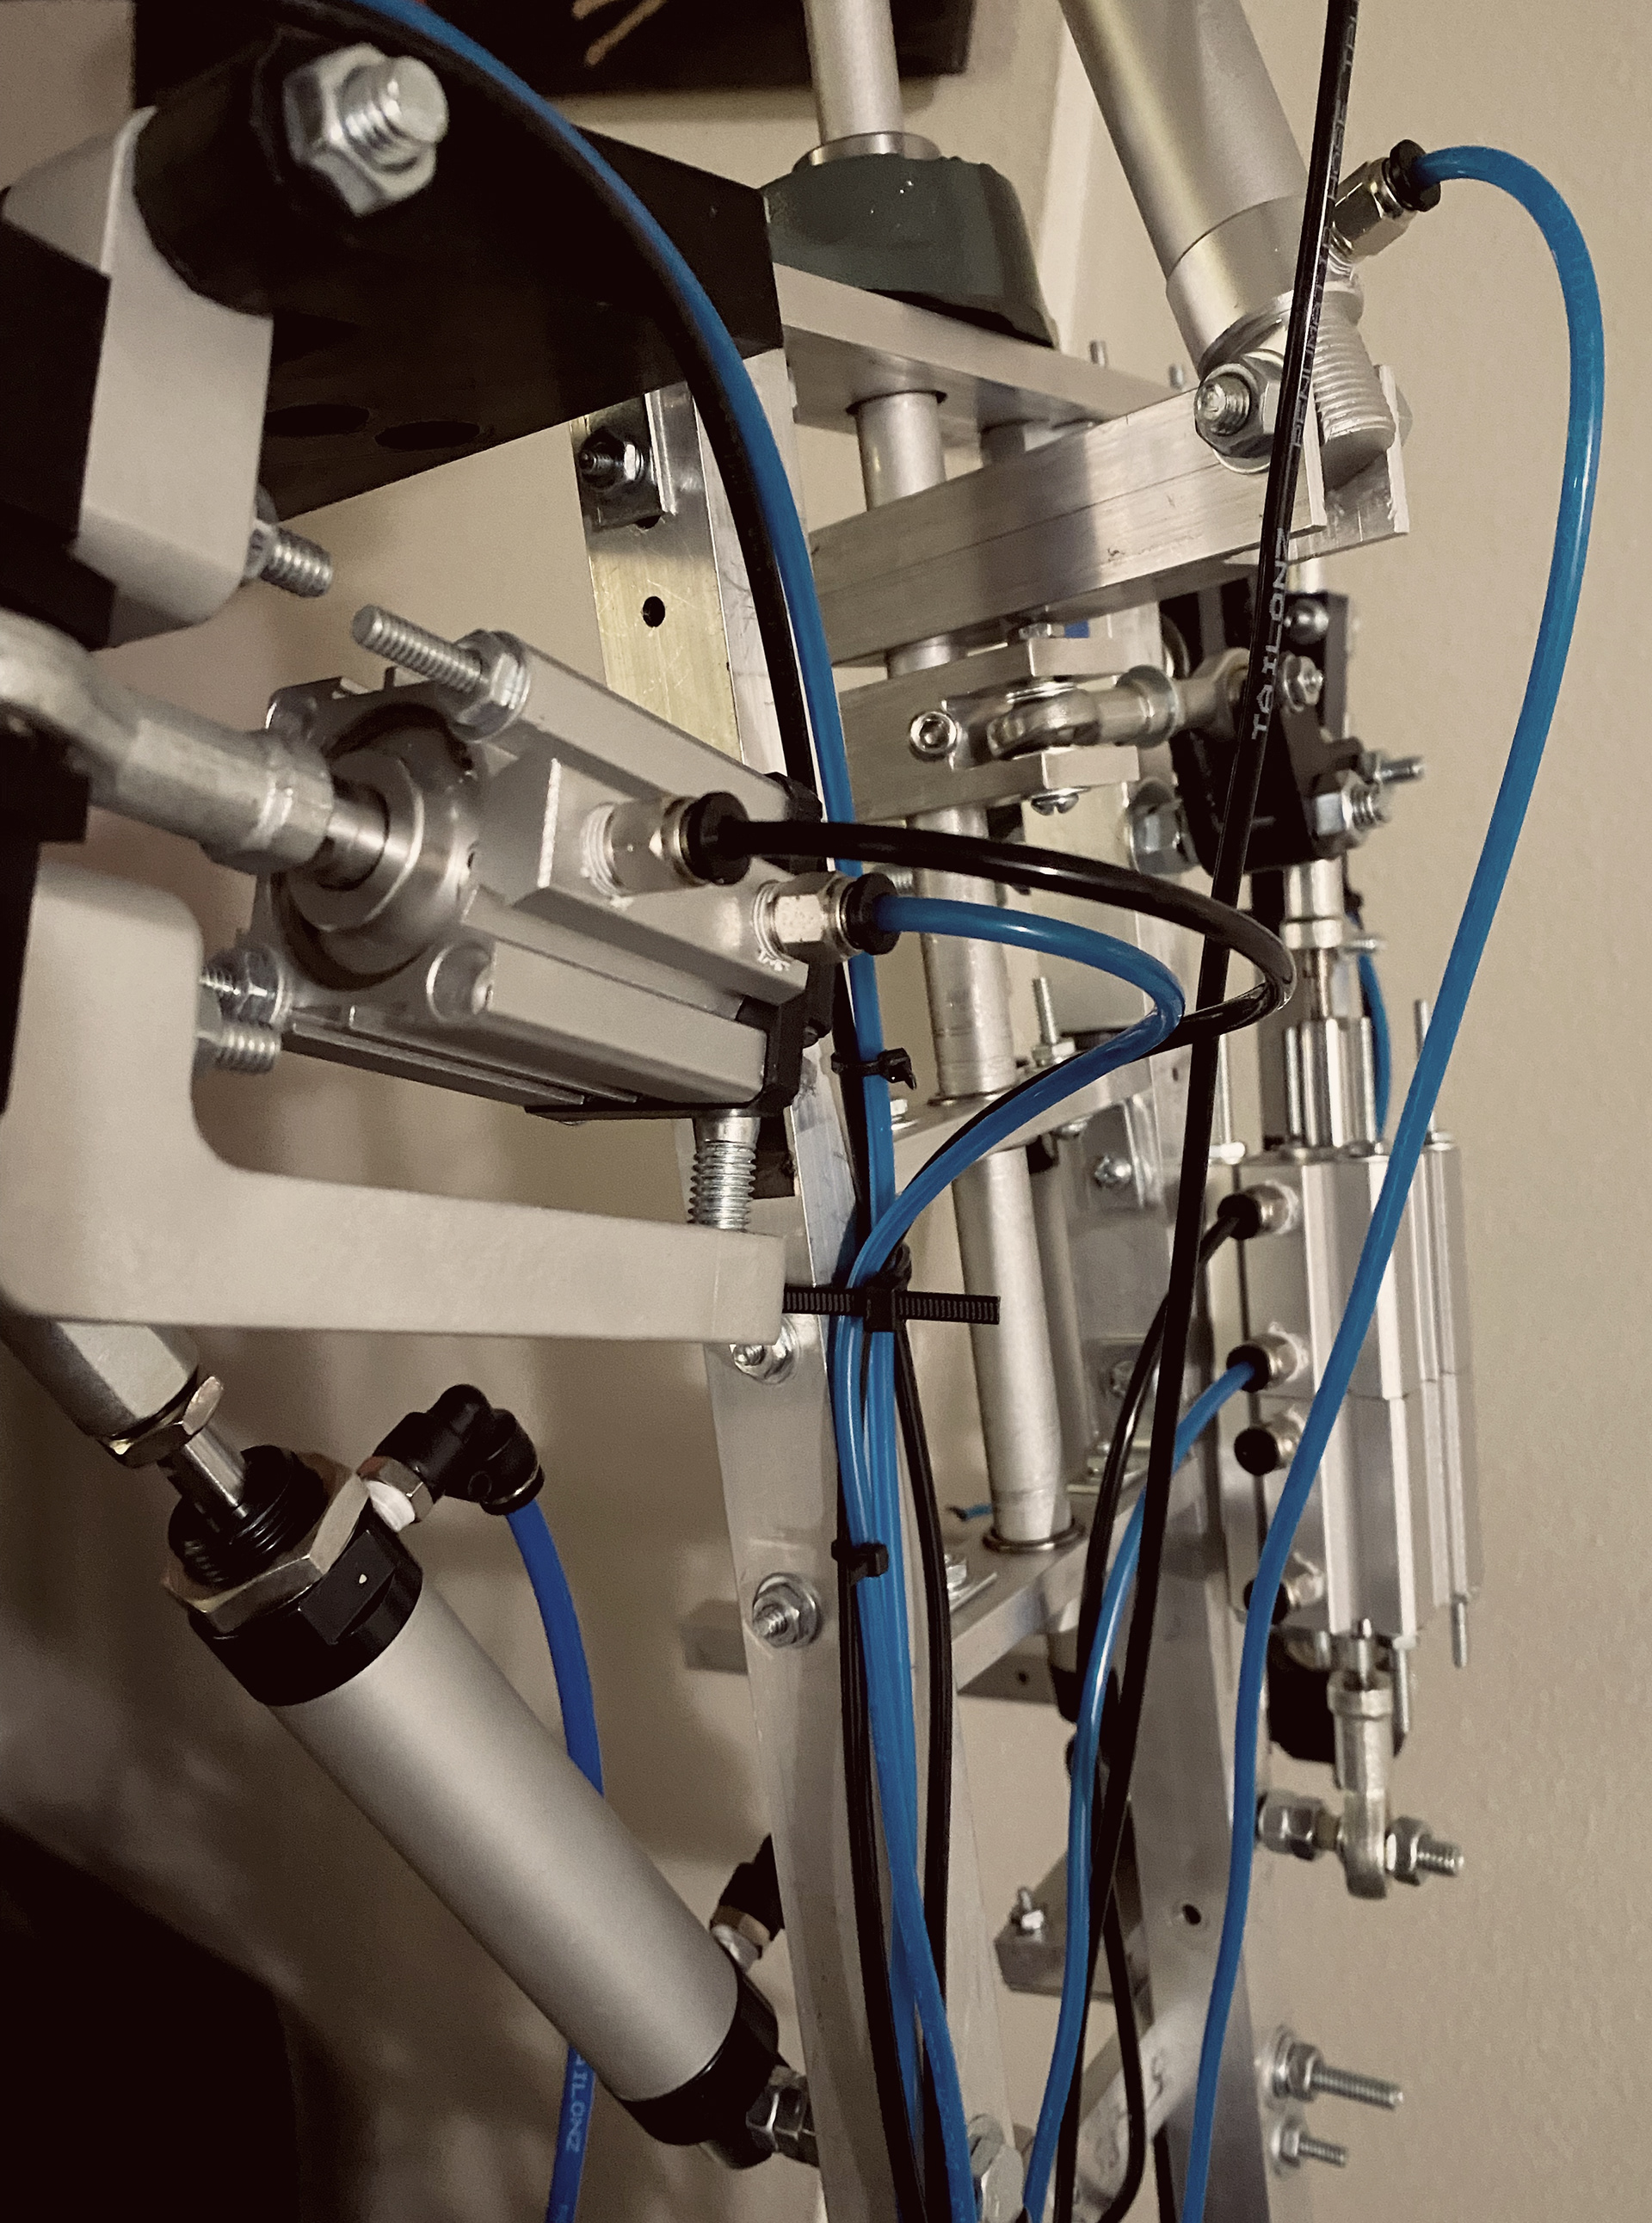

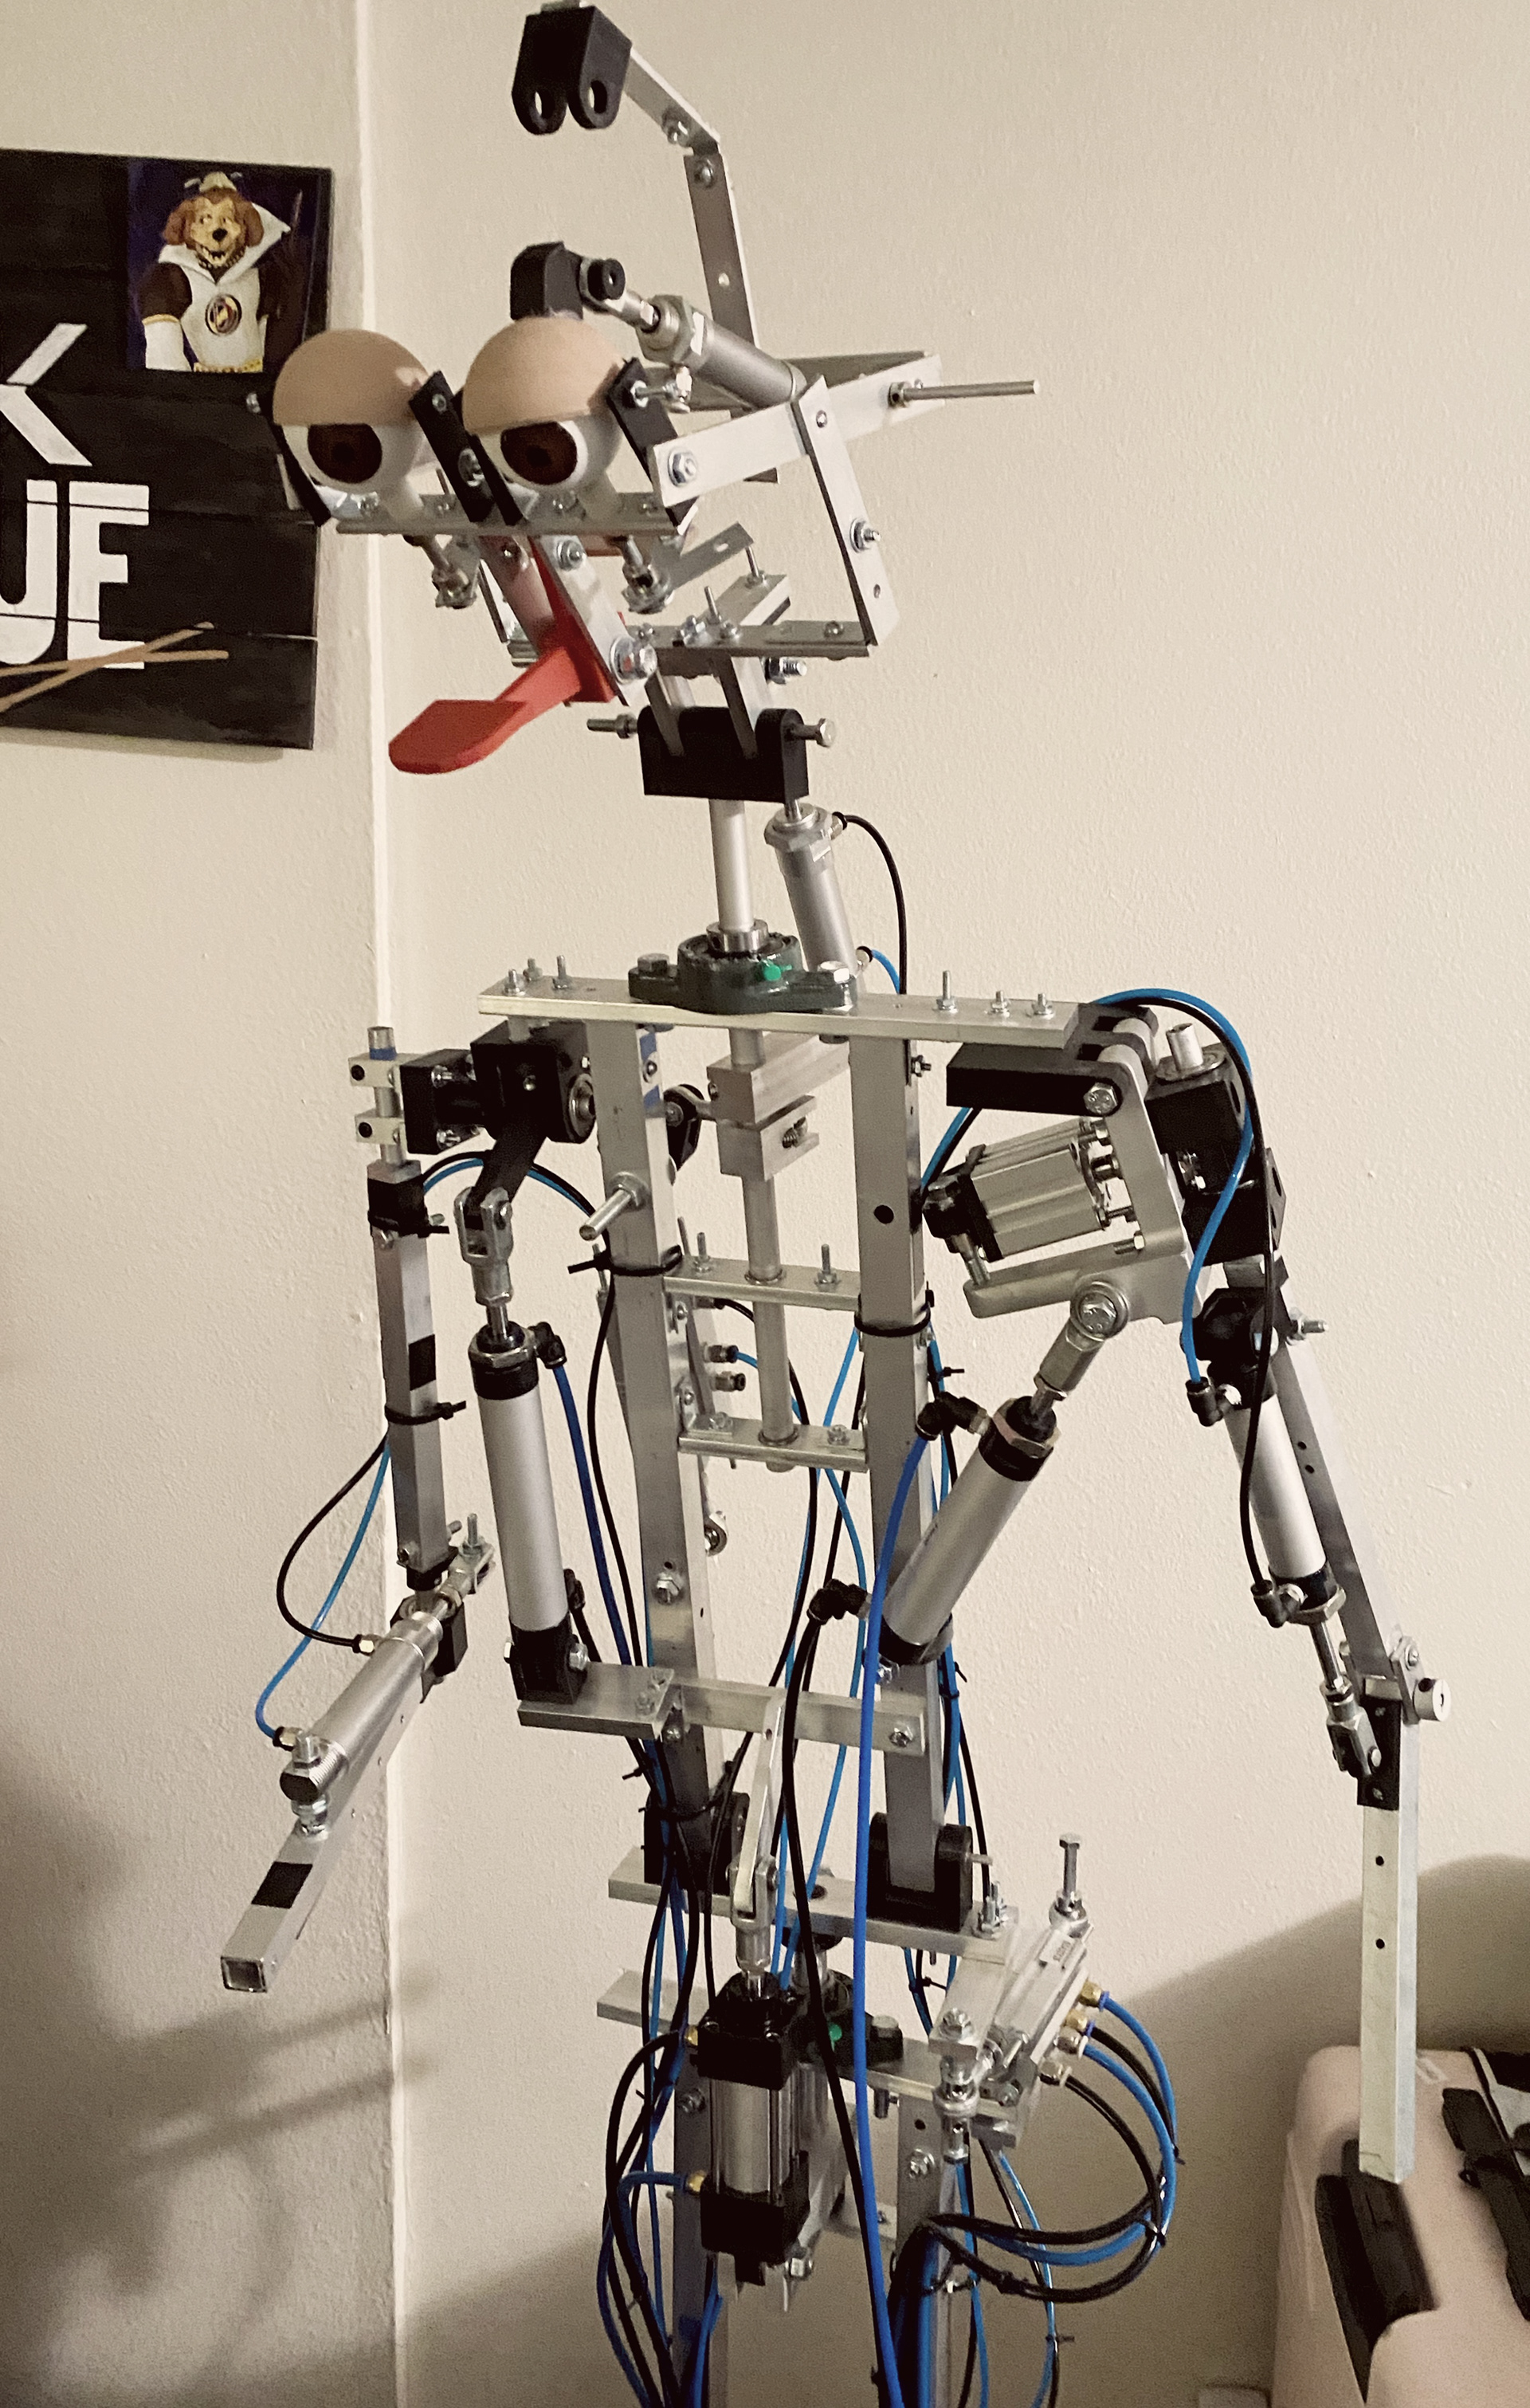
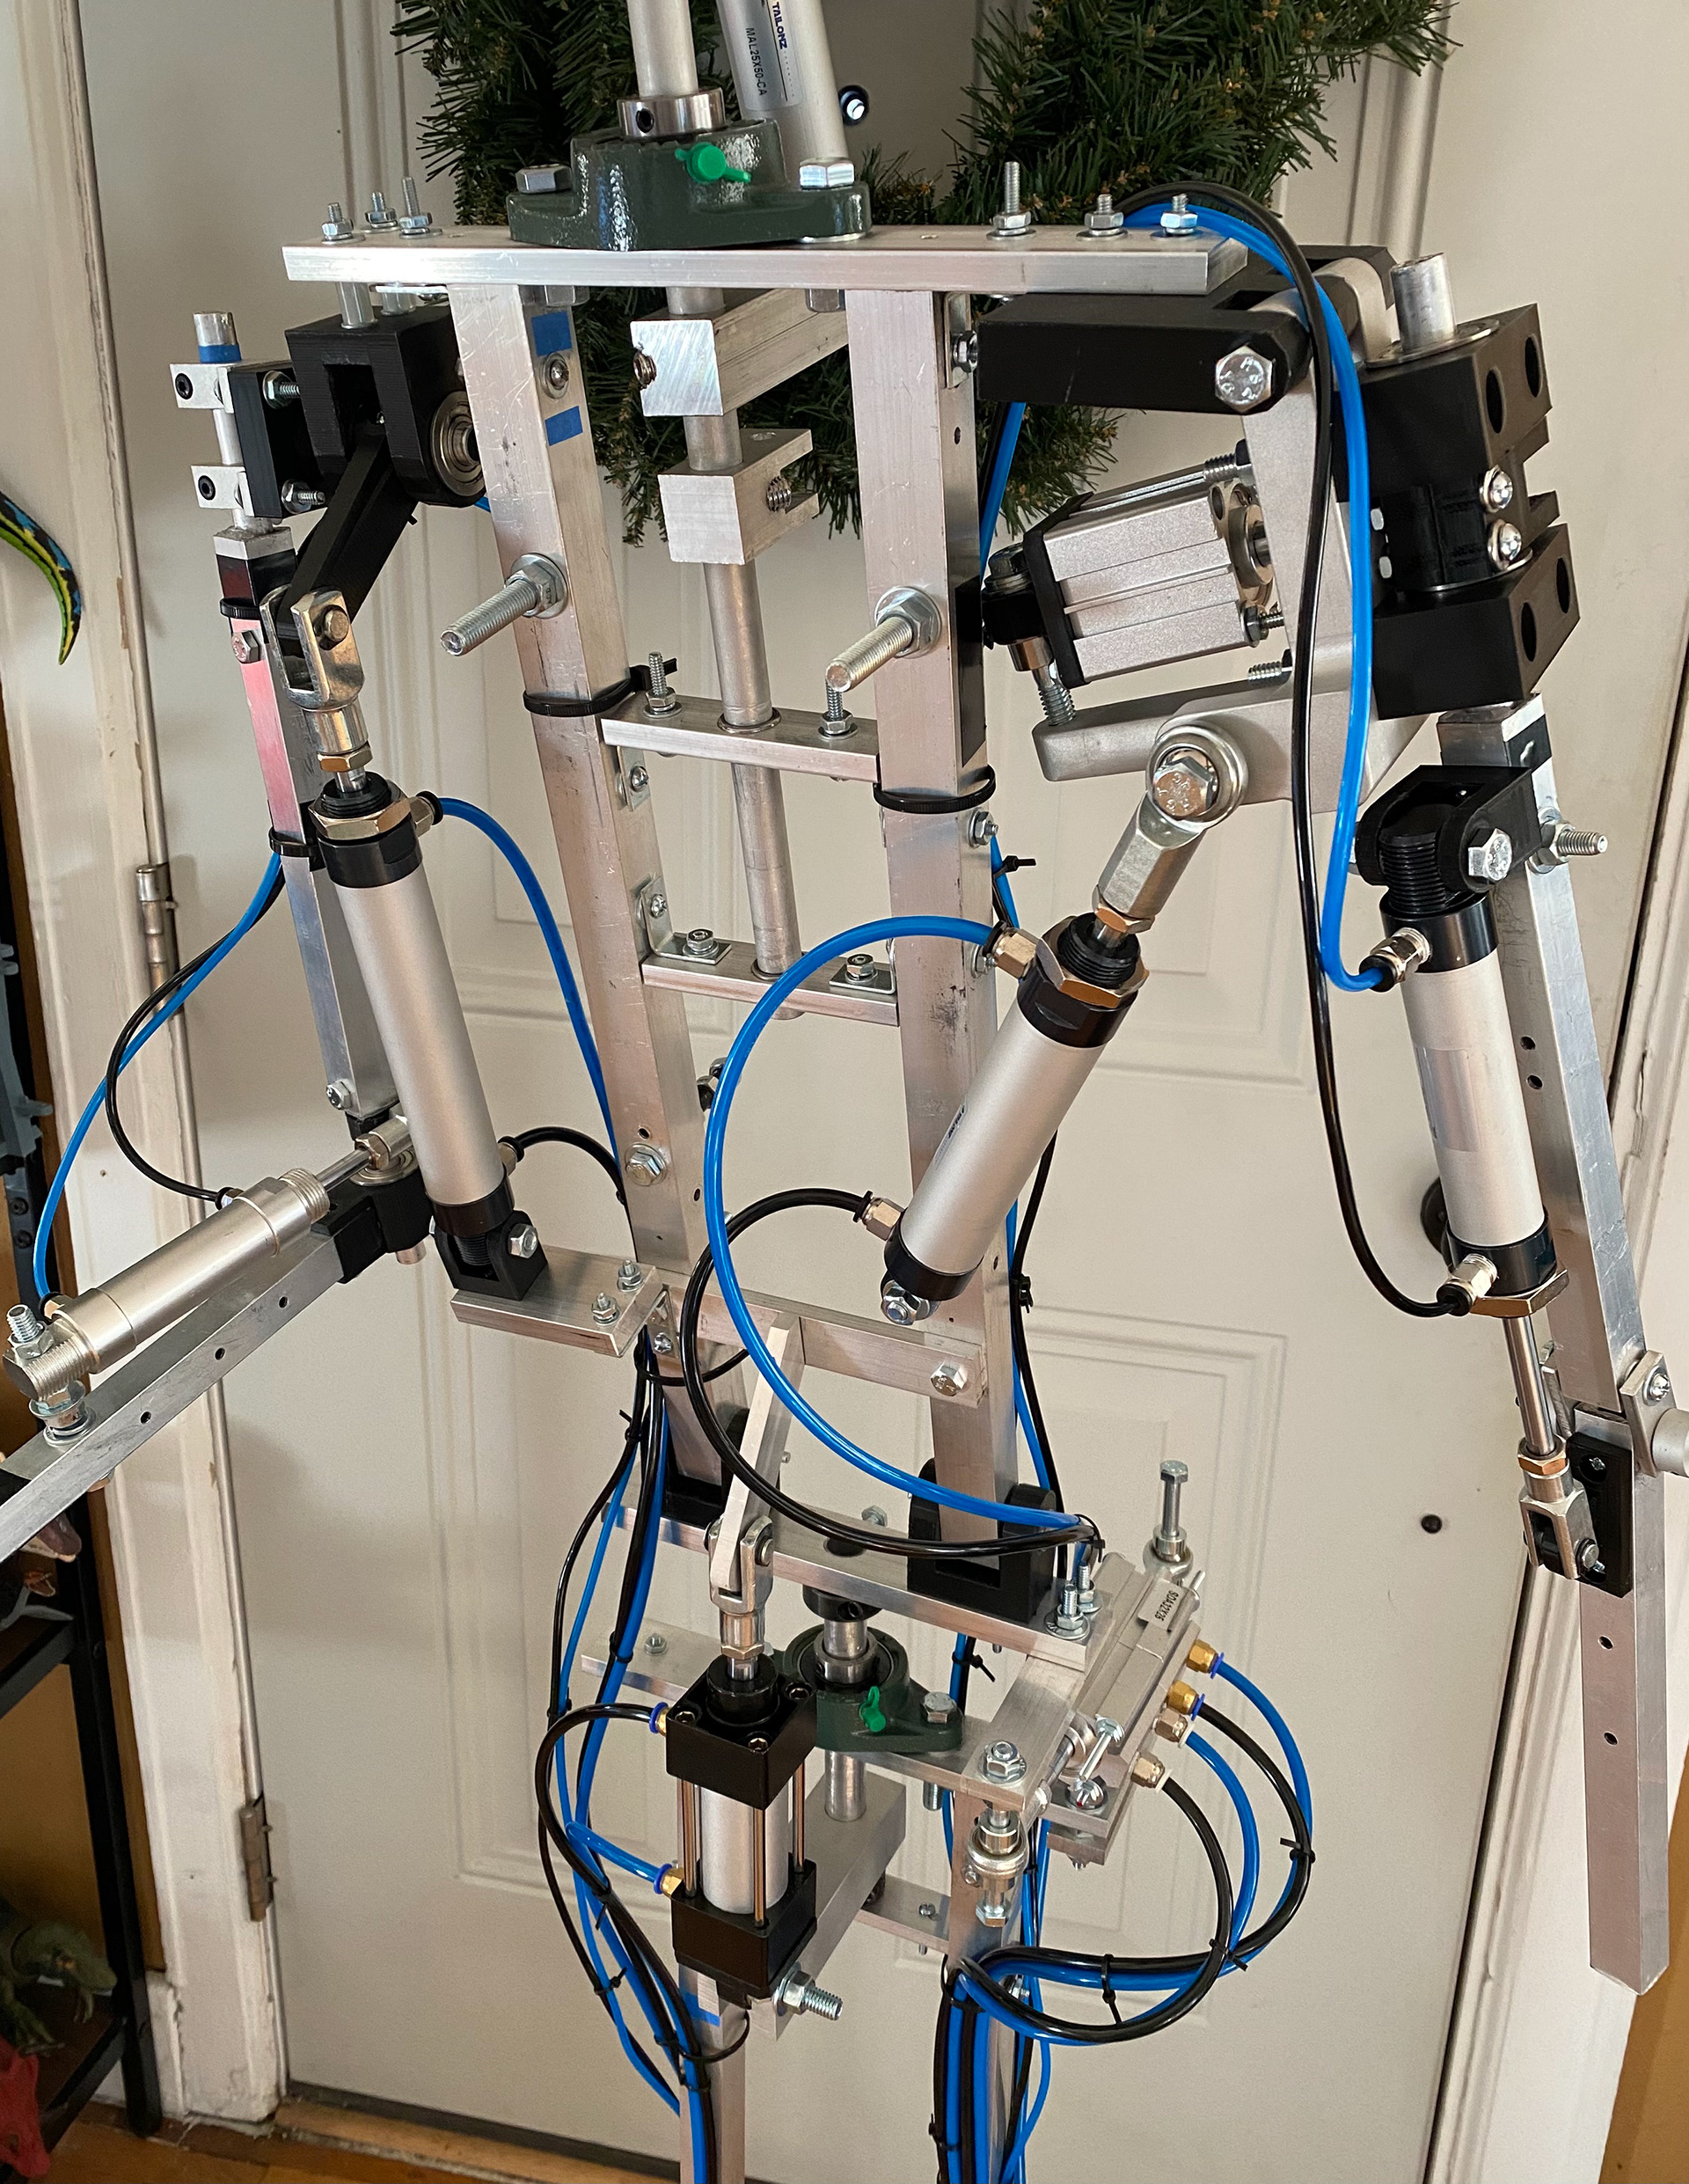
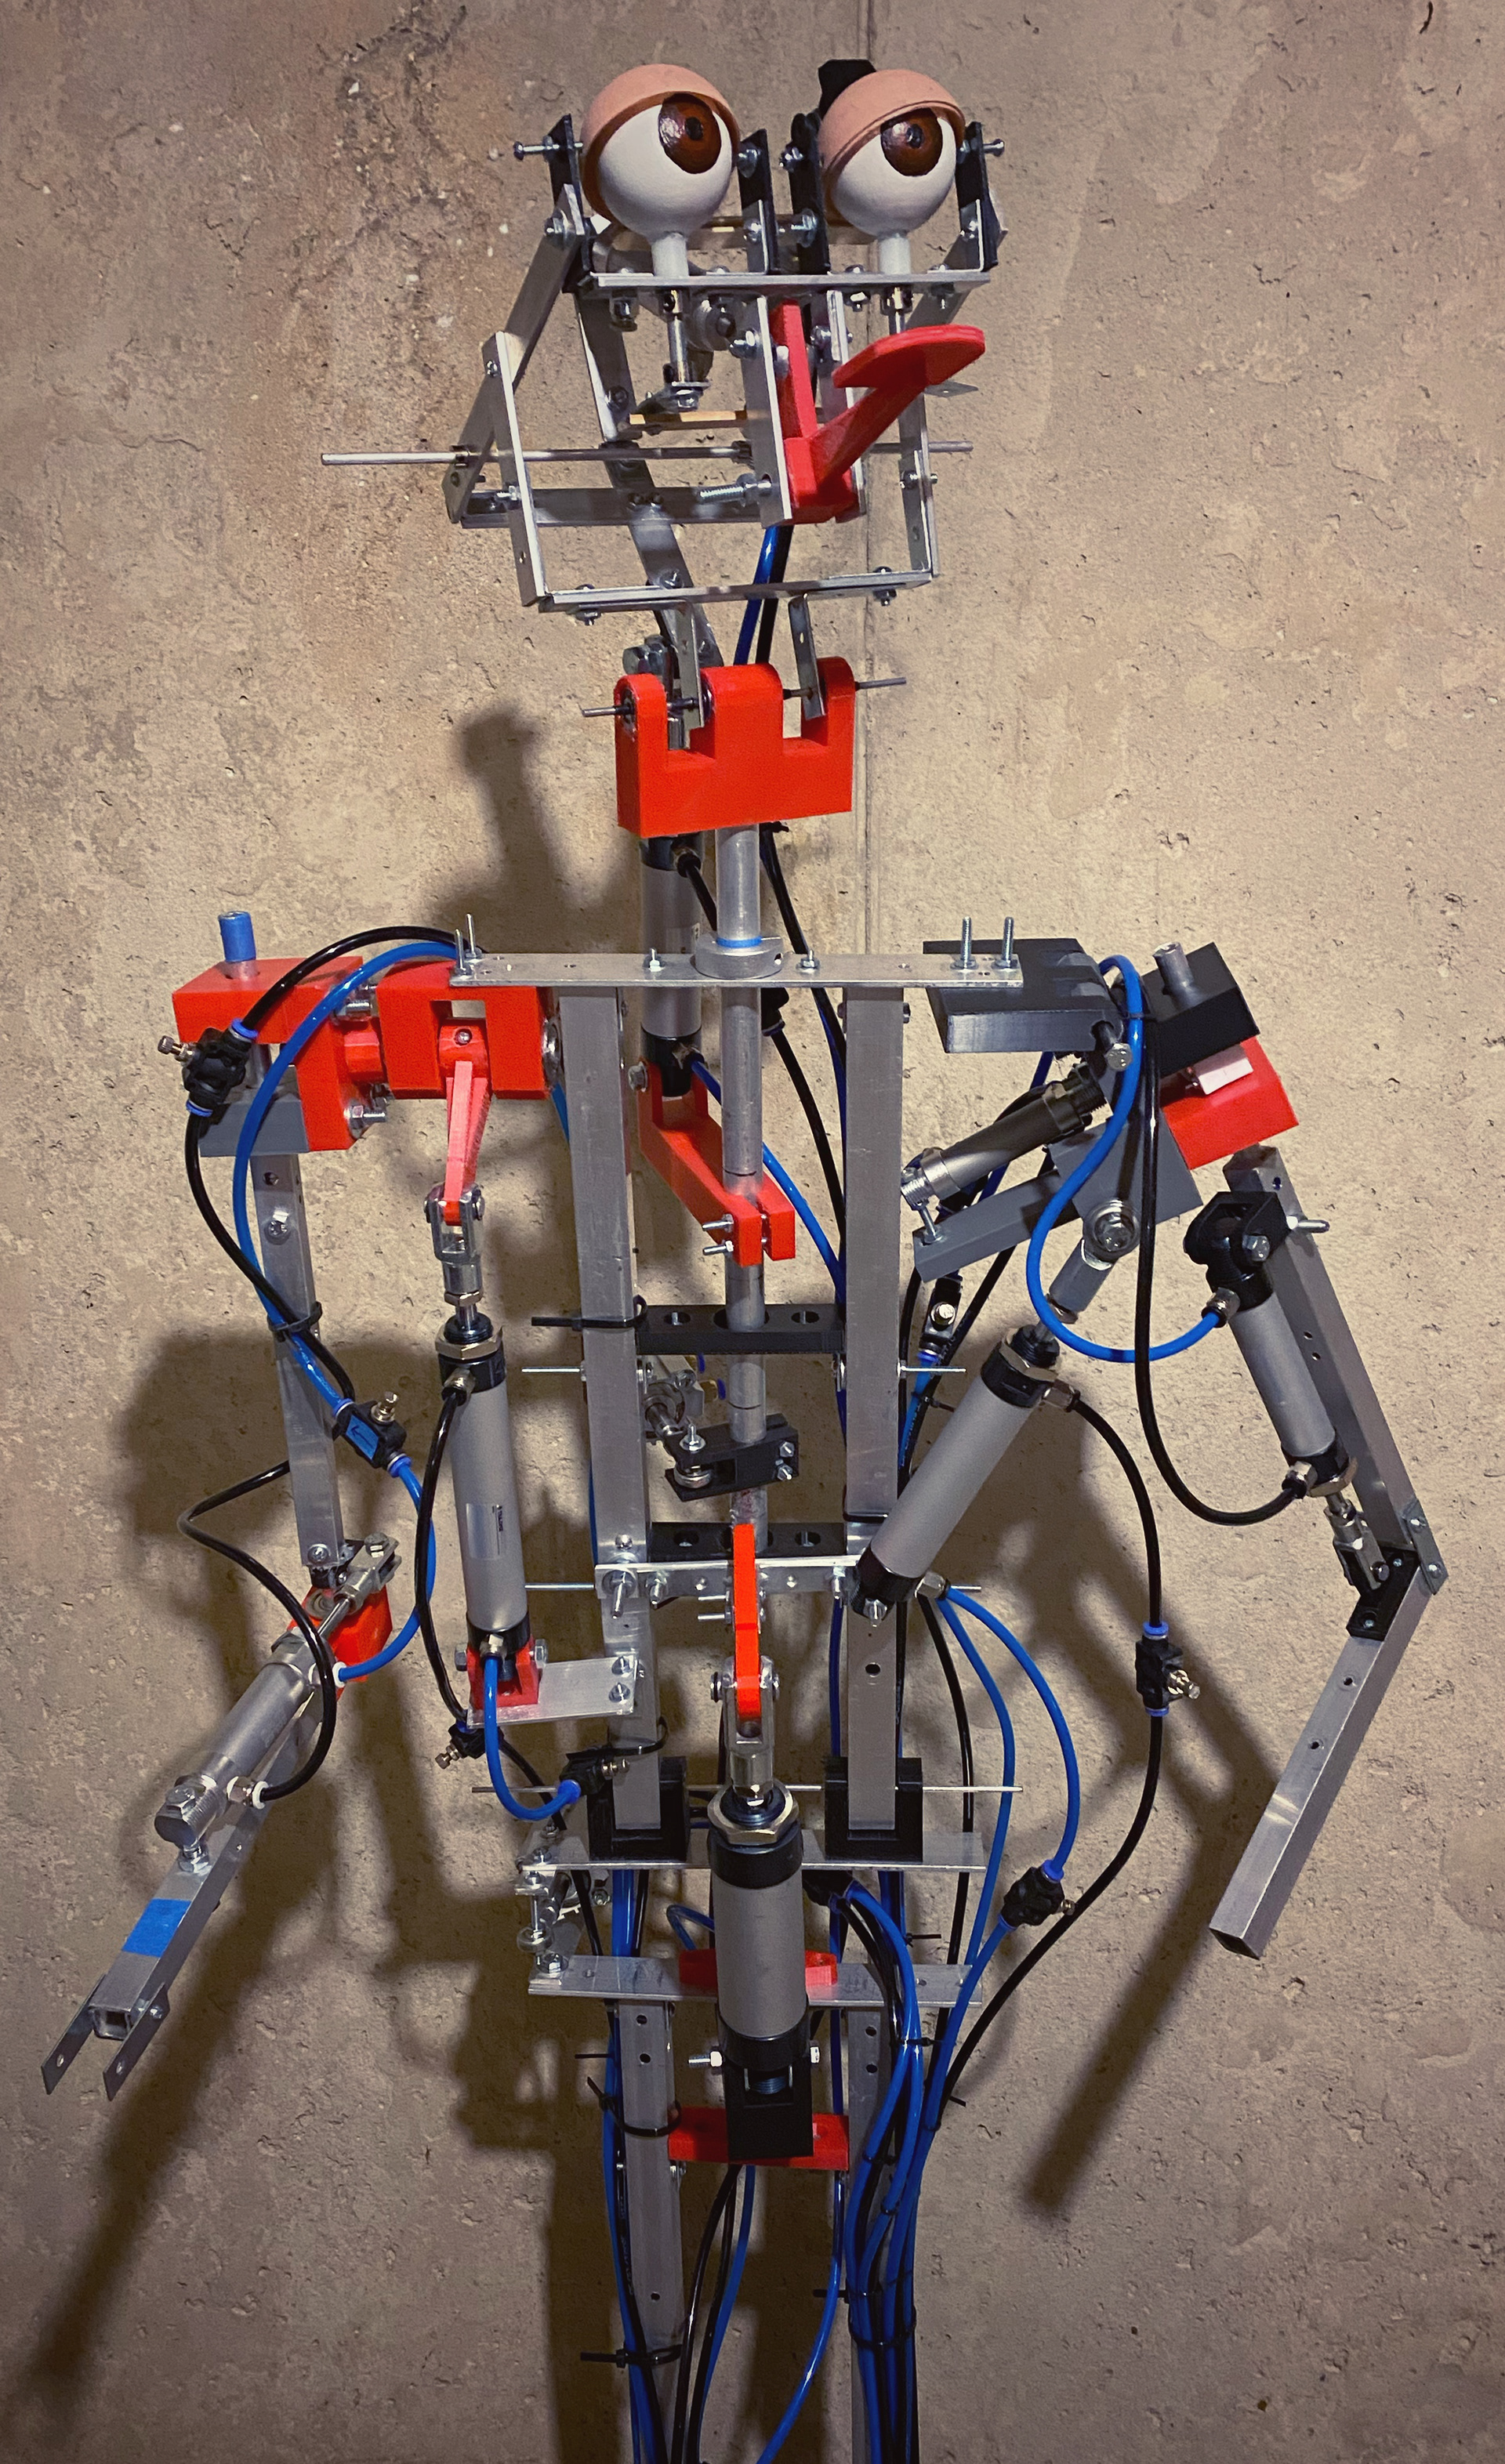
Mechanism as of Dec. 2024
Background
I became infatuated with animatronics back in 2022, when a friend introduced me to "The Rock-afire Explosion", an animatronic band that he liked from the 1980s.
One day, he decided to play videos about the band while we were painting. I thought to myself, "Why do those look familiar?" despite the very fact that I was not alive during the era of "Showbiz Pizza Place".
Ever since that day, I decided to dive head first into animatronics, and to say I fell in love with the artistry of it all, would be an understatement. I thought the ability to express so much character and liveliness through the use of everyday automation was neat. Things that should not make you feel any emotion, all of a sudden do.
I also liked the perfect blend between my two favorite things in life: art and engineering. Building animatronic characters involve the initial design of the character themselves, as well as their mechanical design; I do both!
I get to do just as much artistry through cosmetics and character design, as I do engineering through mechanical design, CAD, prototyping, and machining.
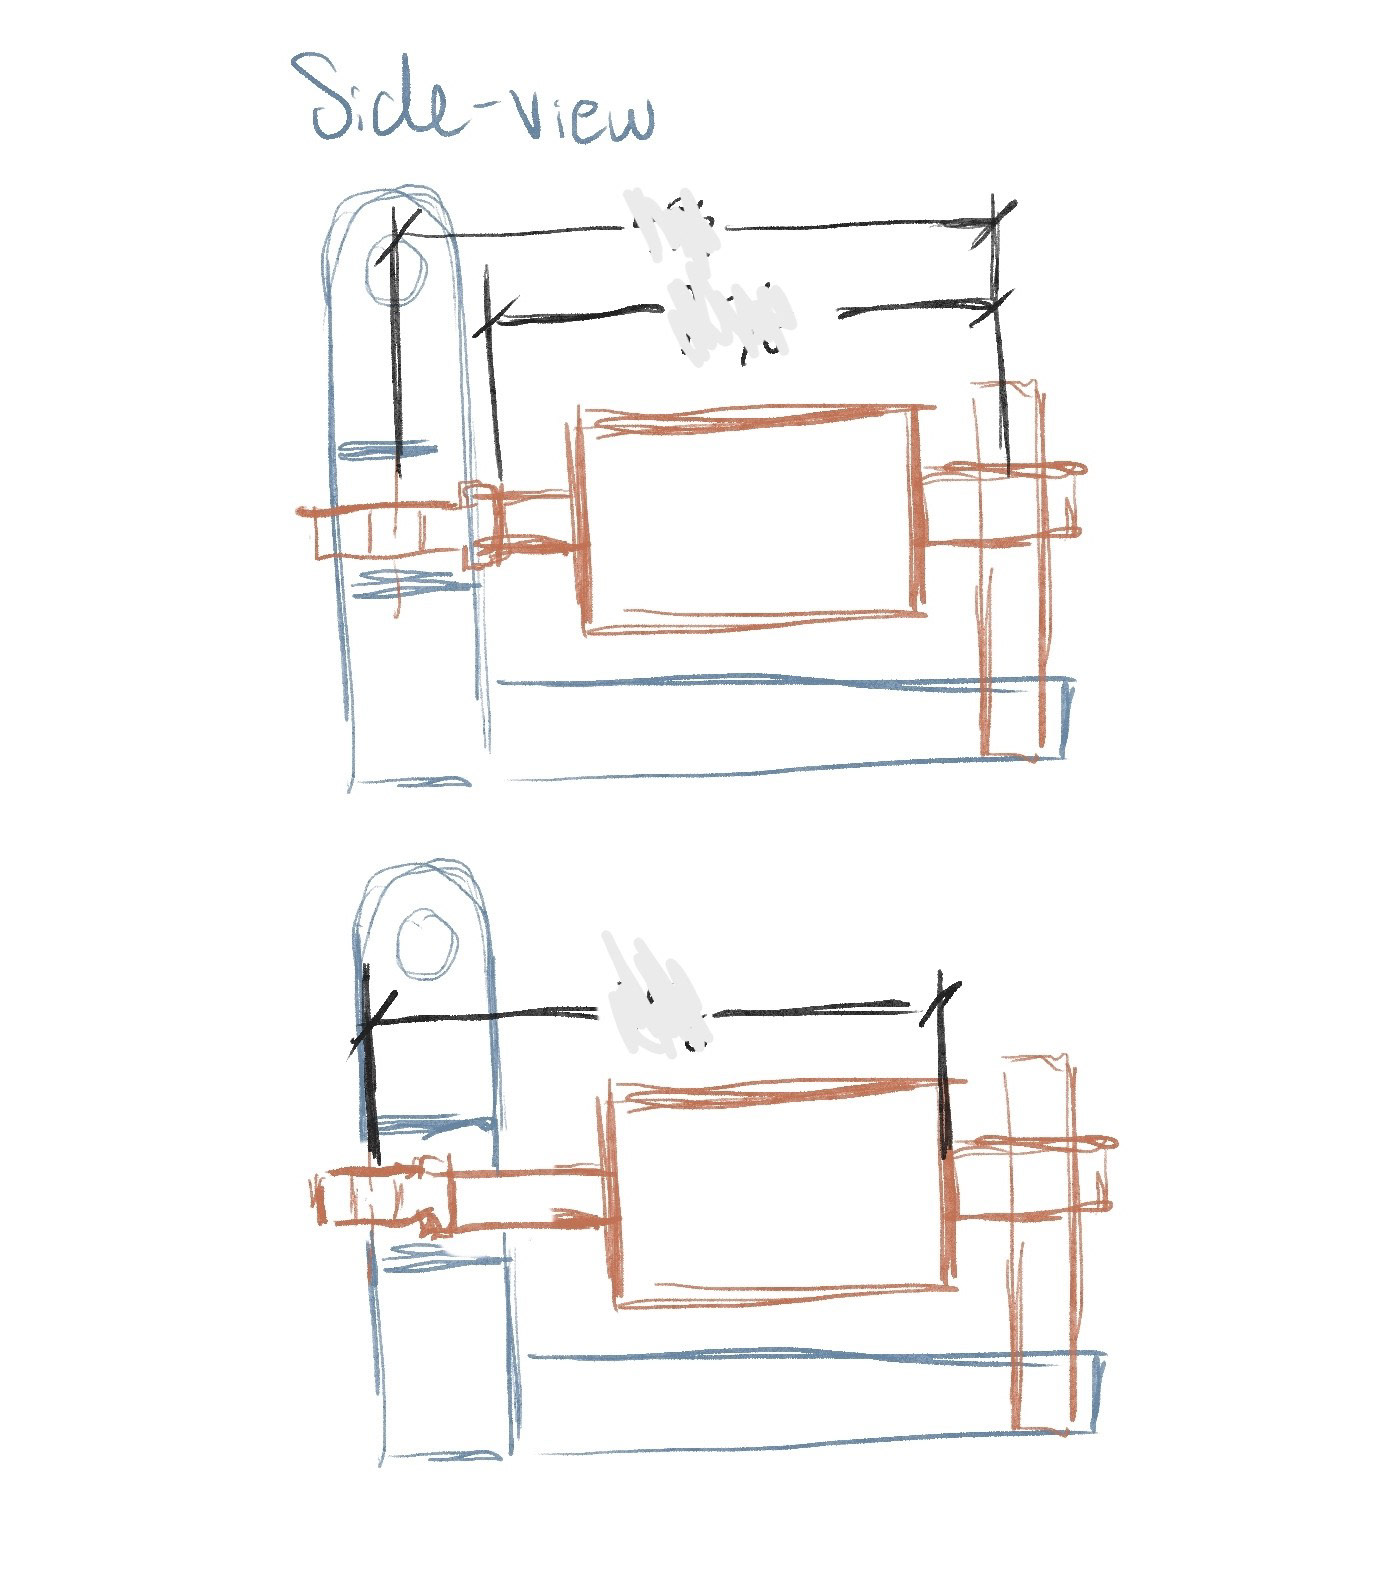
Quick sketch of assembly
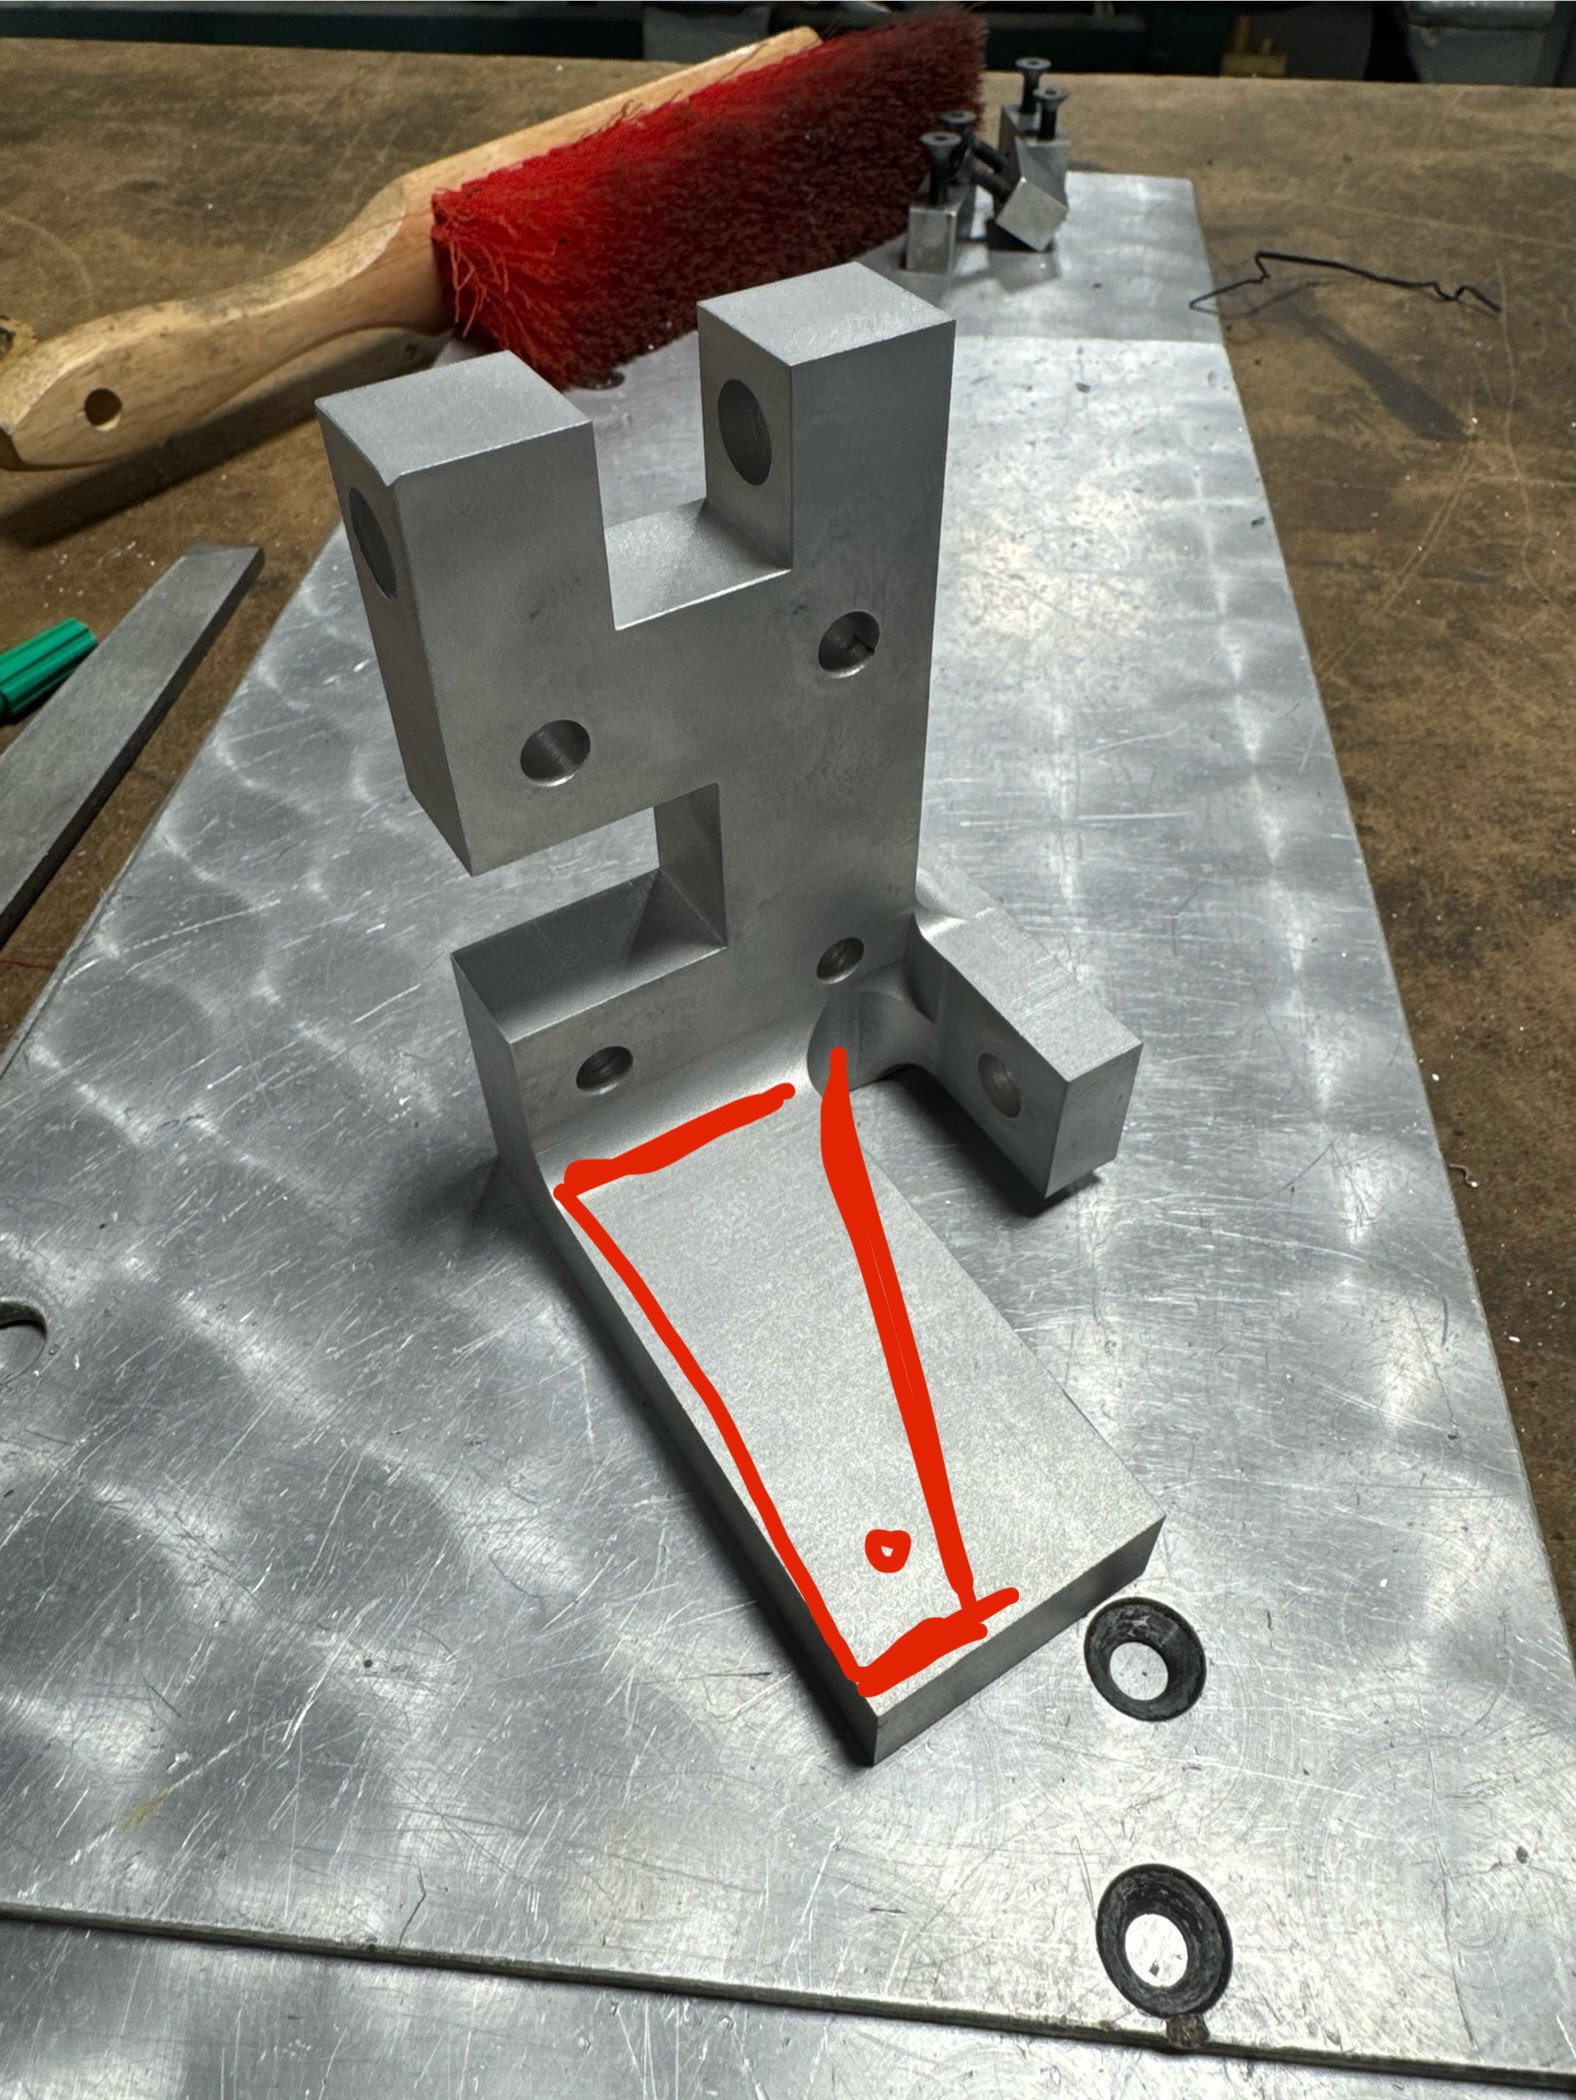
K-hinge WIP
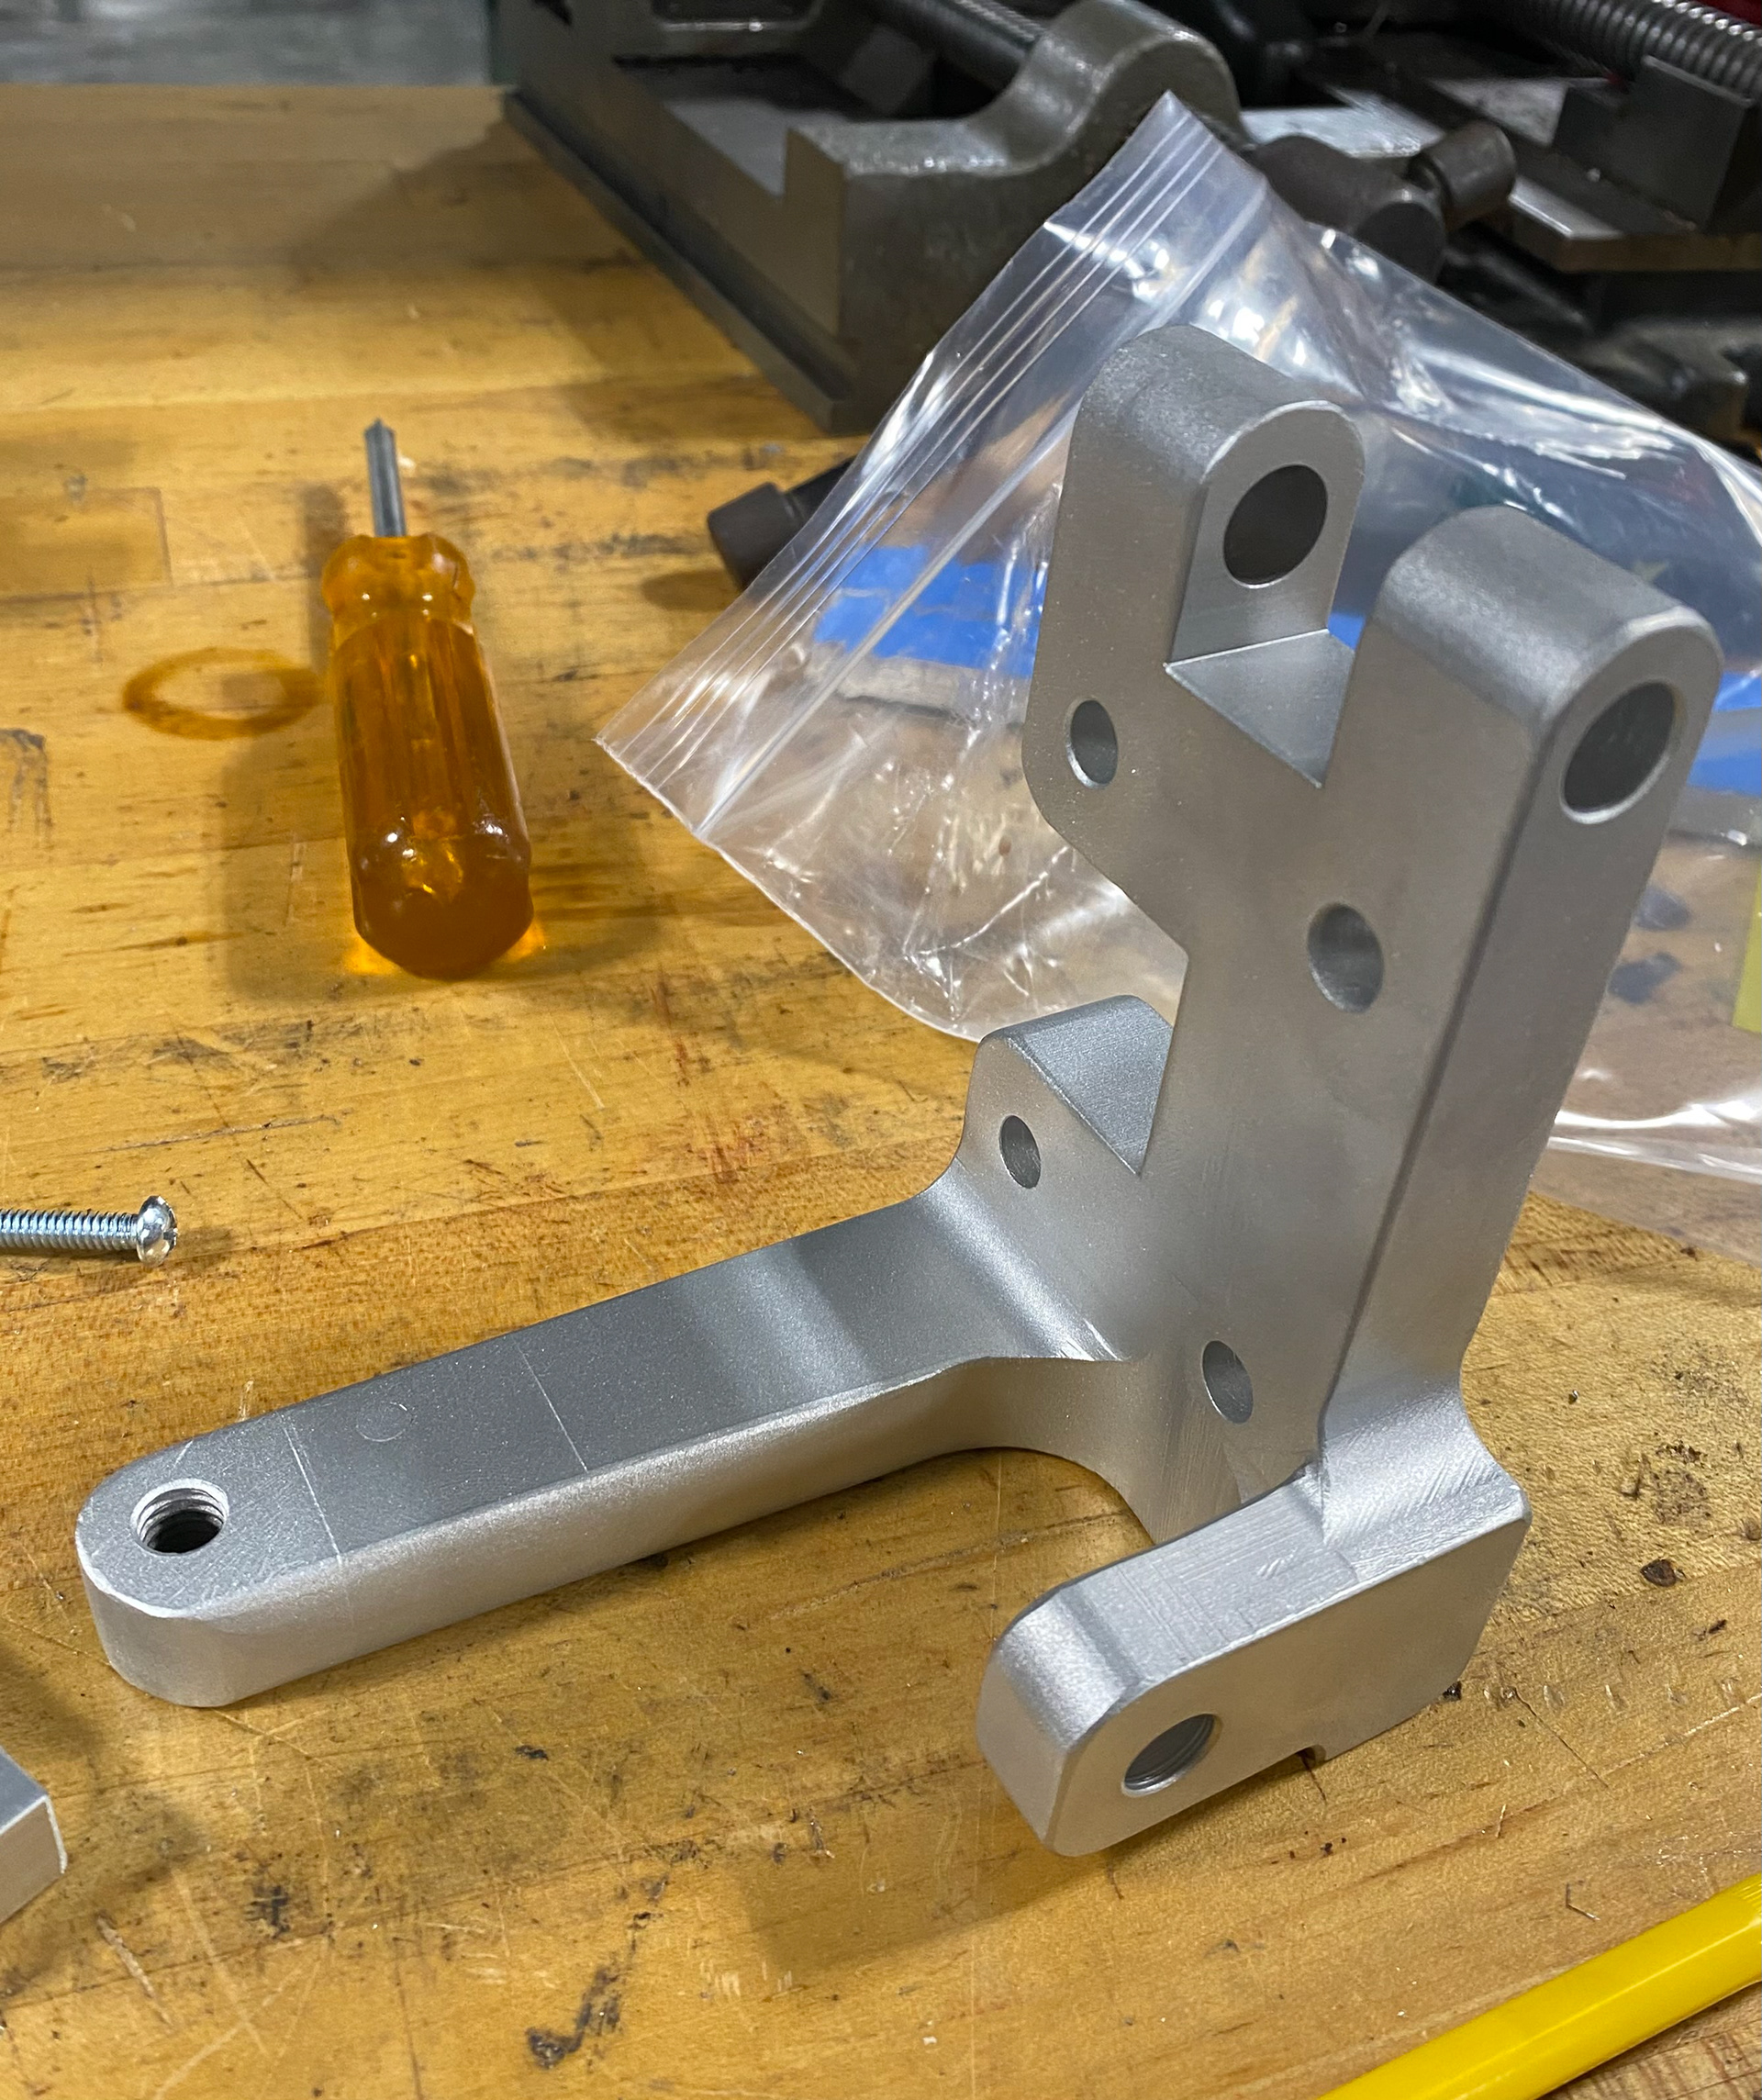
Milled K-Hinge

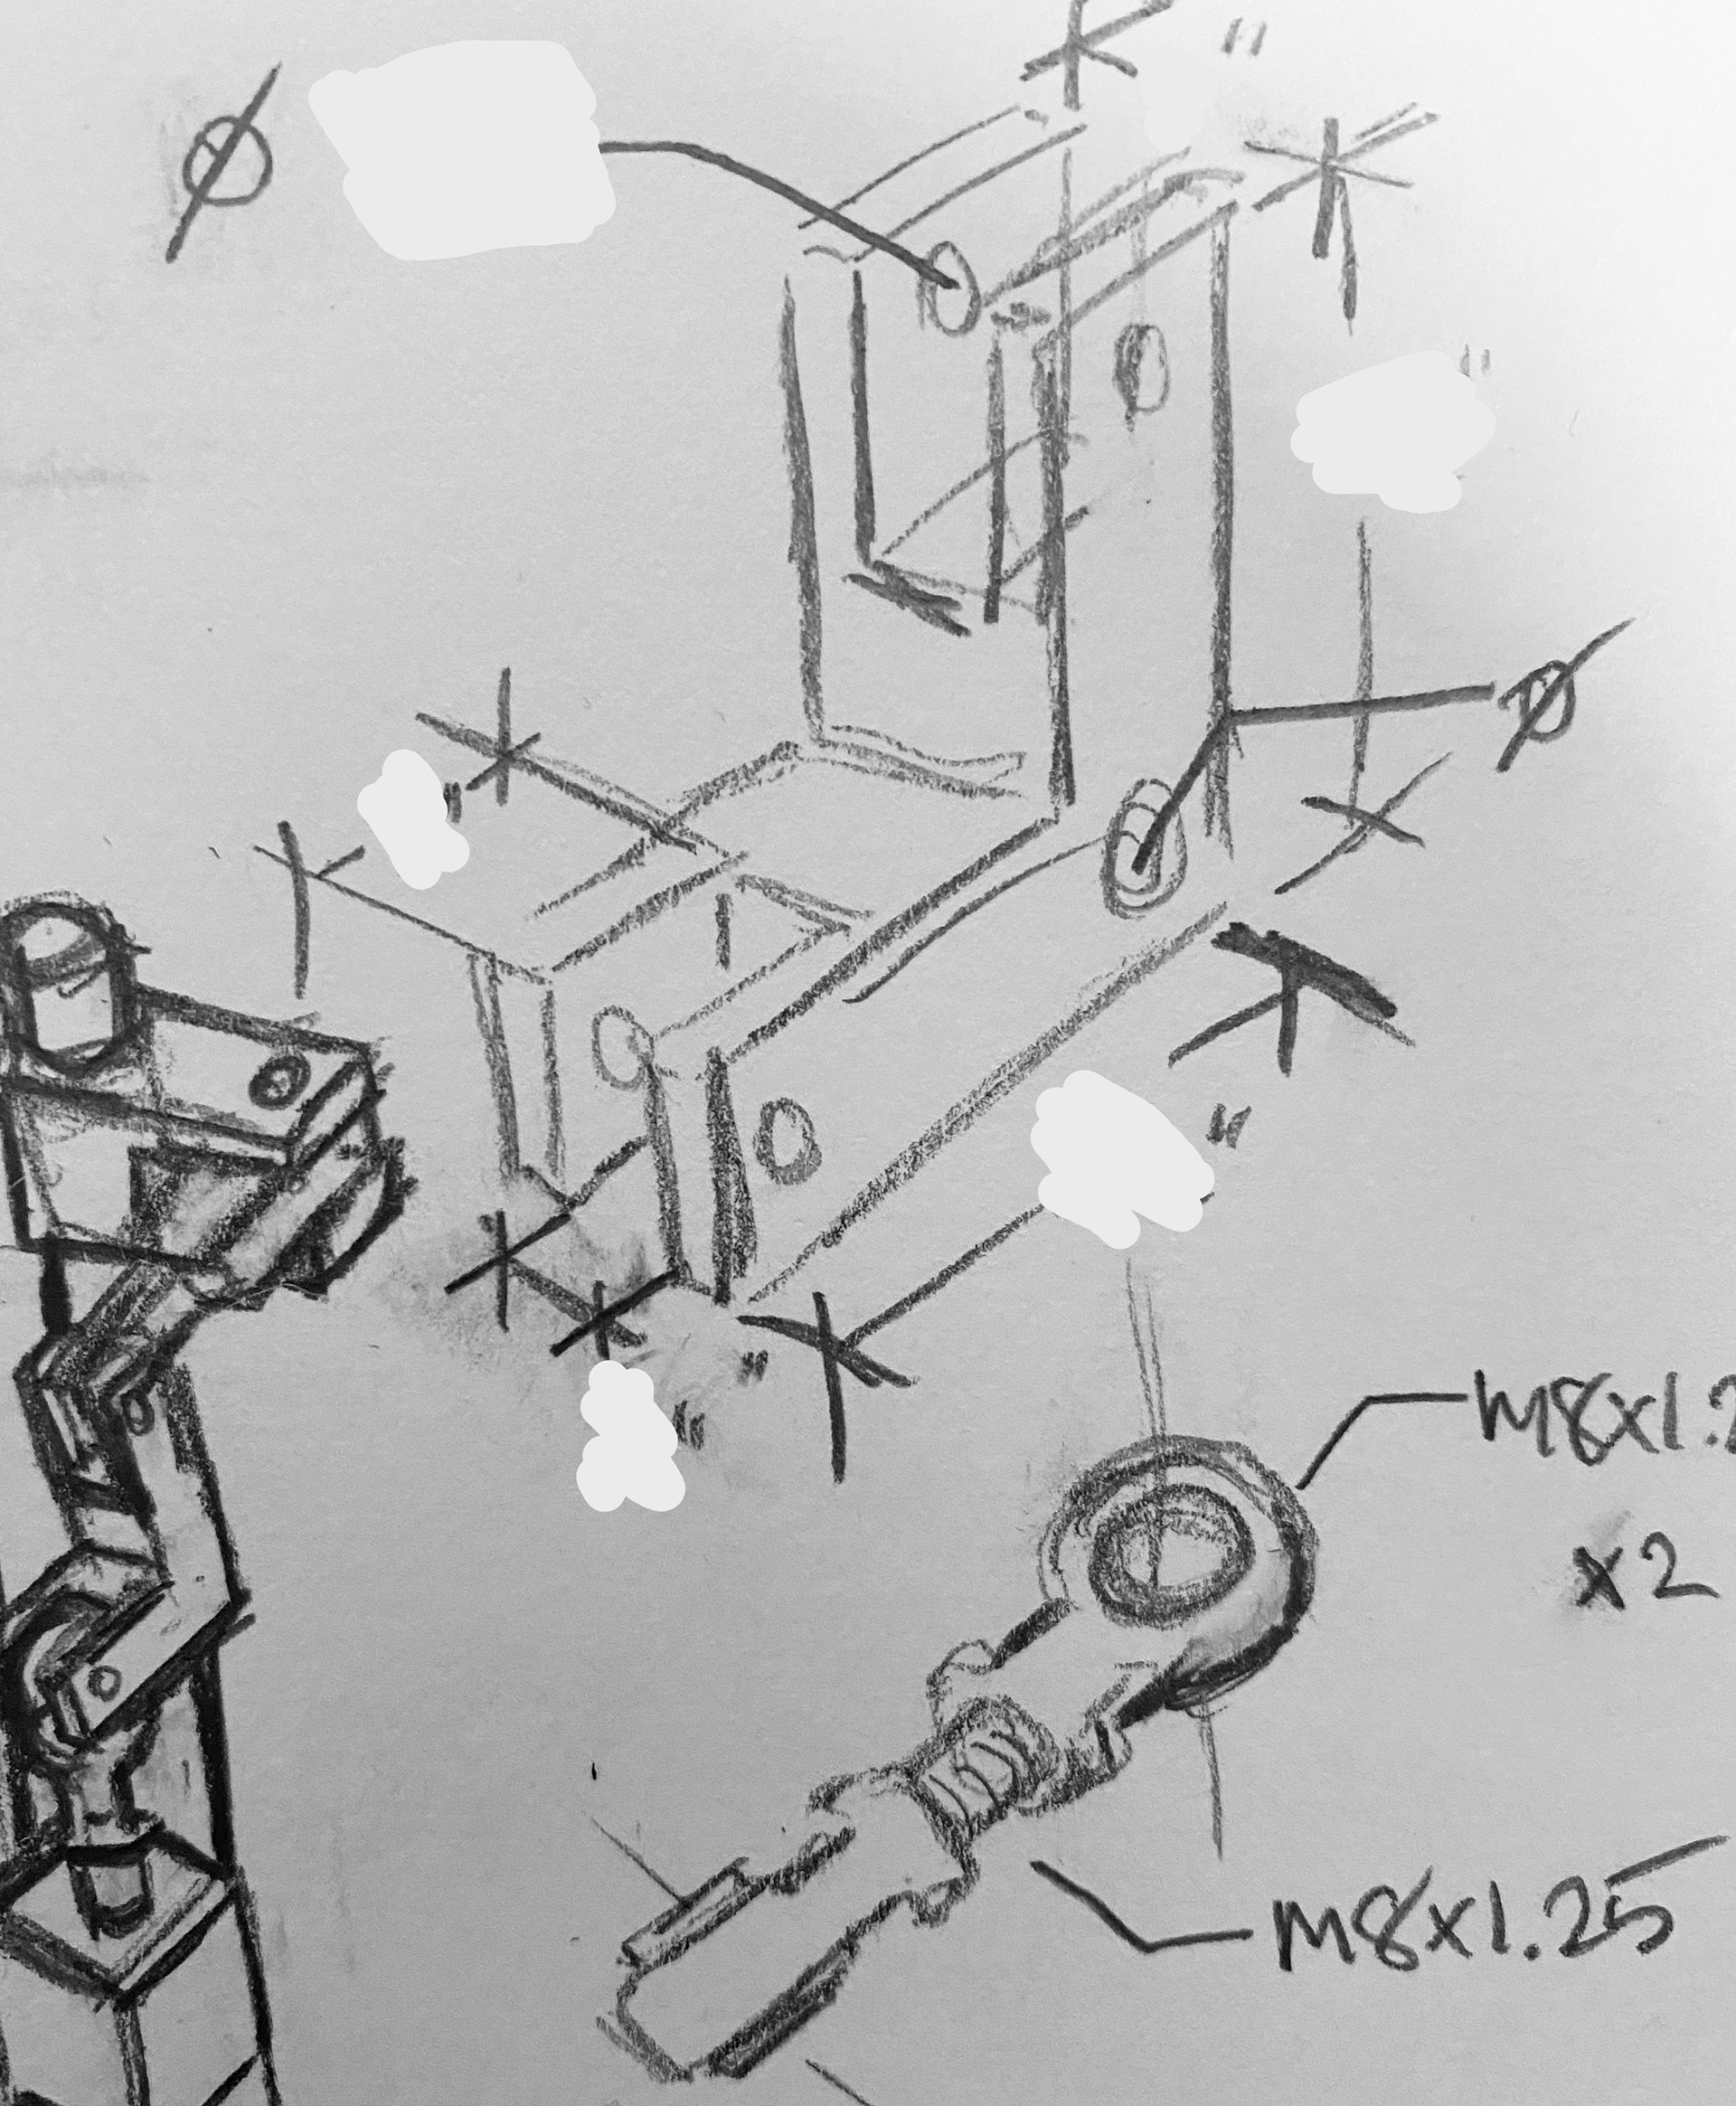
Machining Dimension Notes

Material Annotated
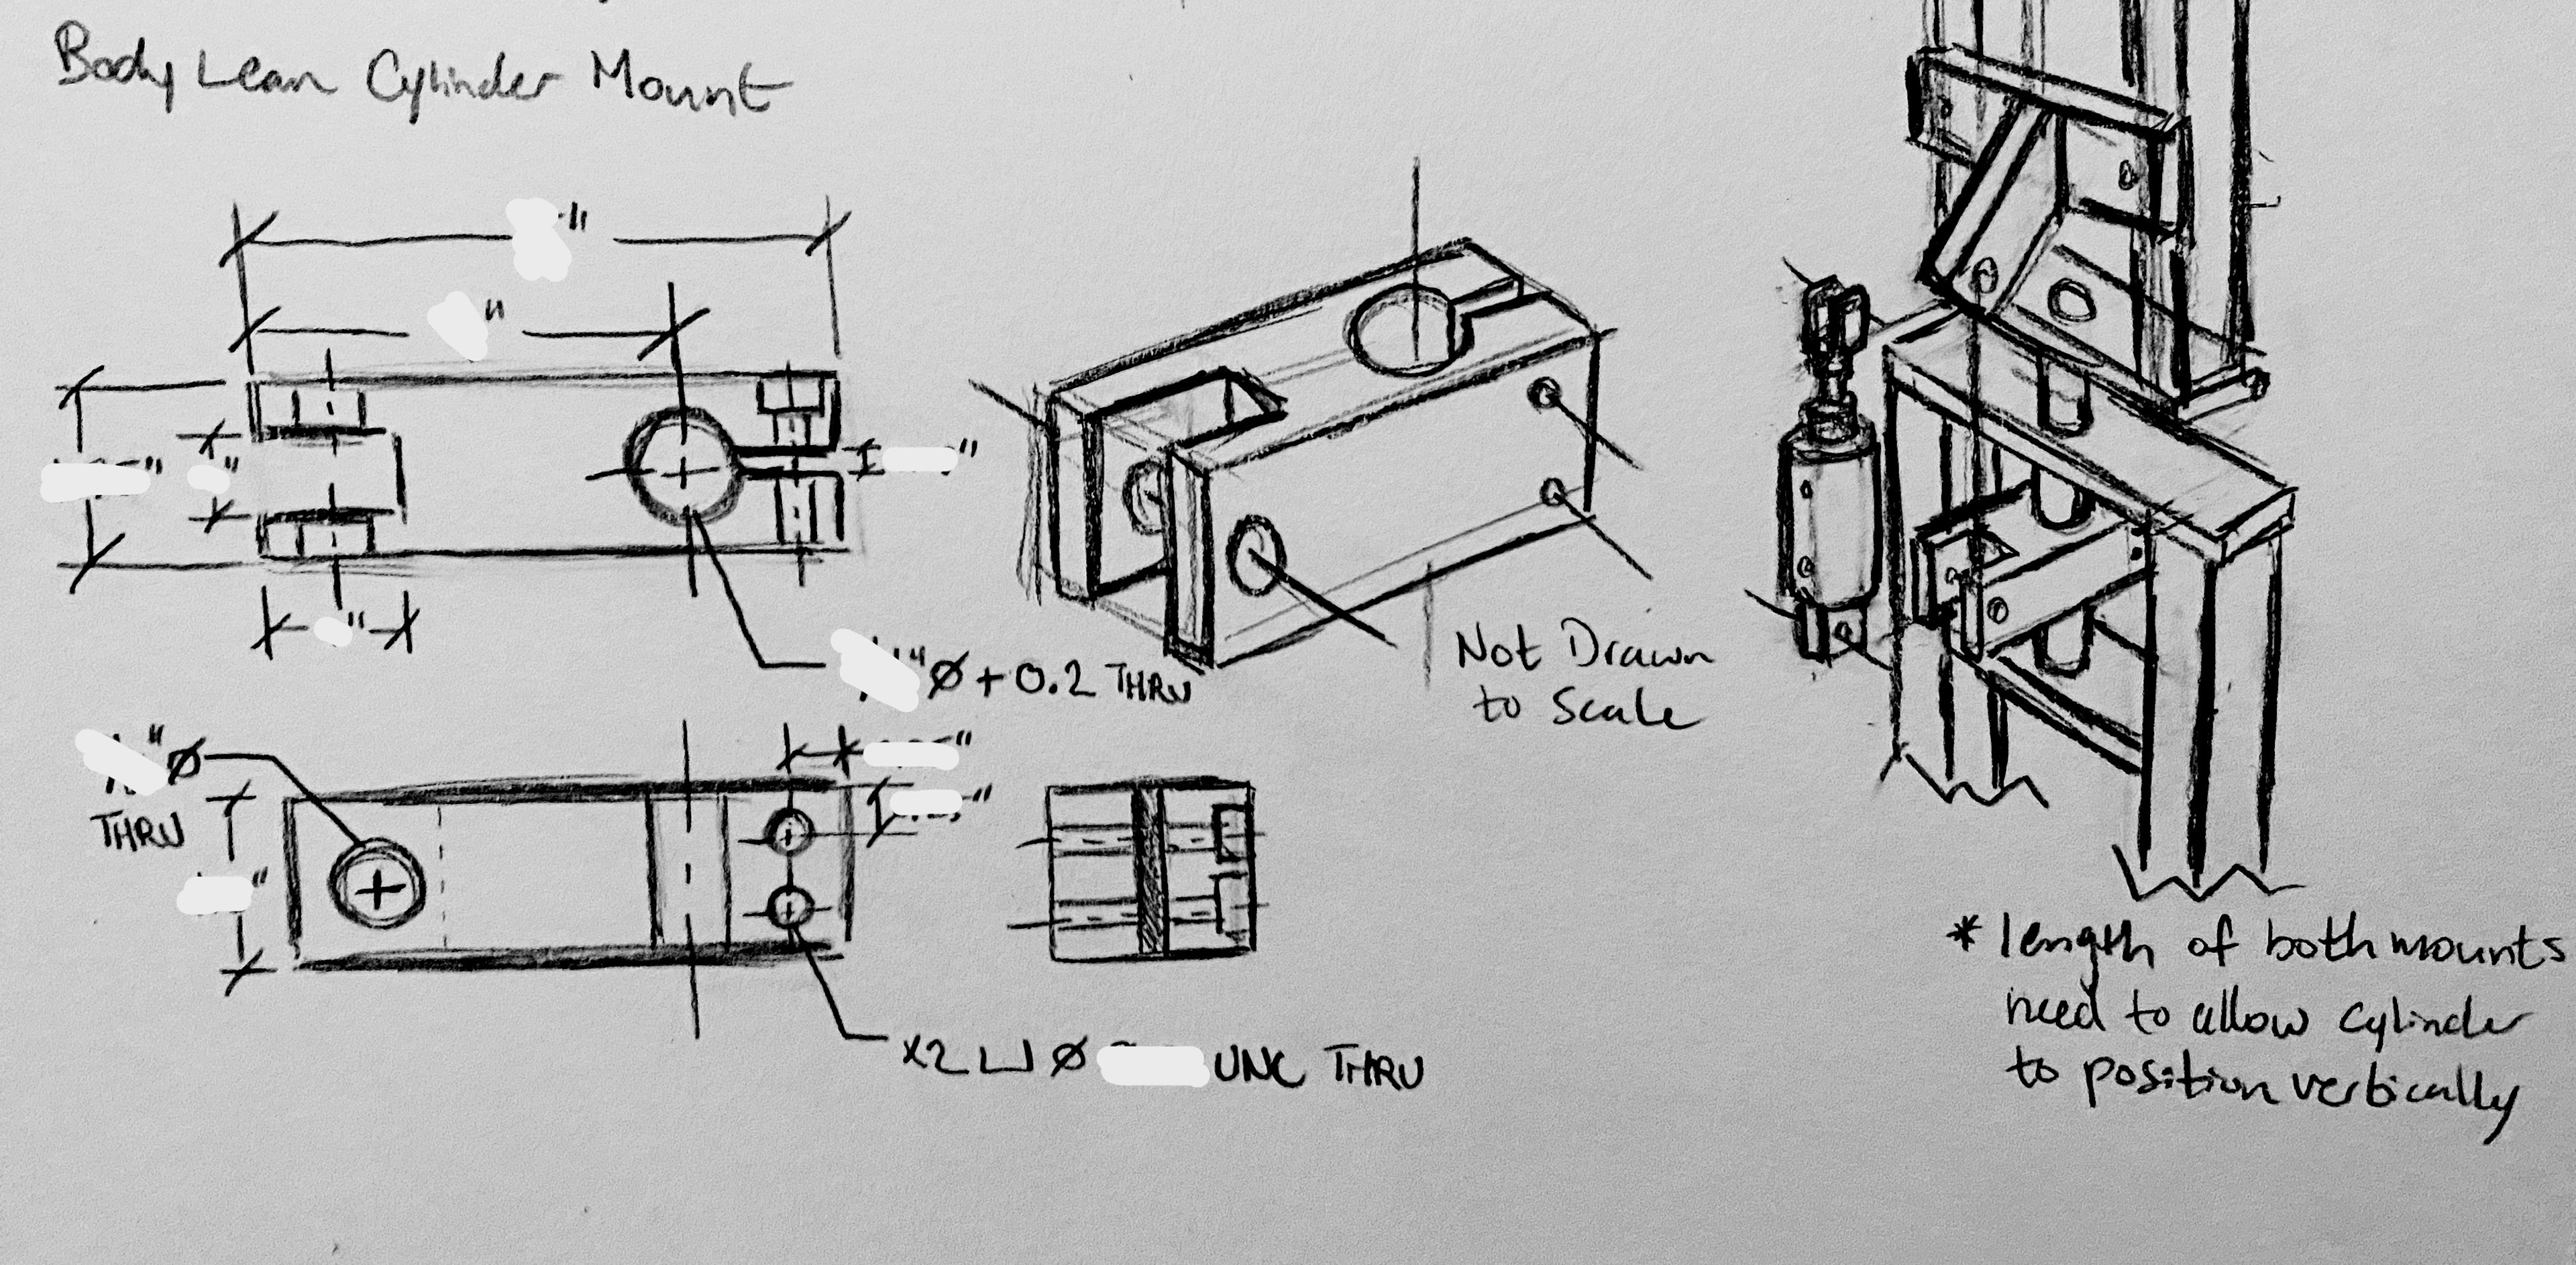
Body-lean Cylinder Mount Multi-view Drawing
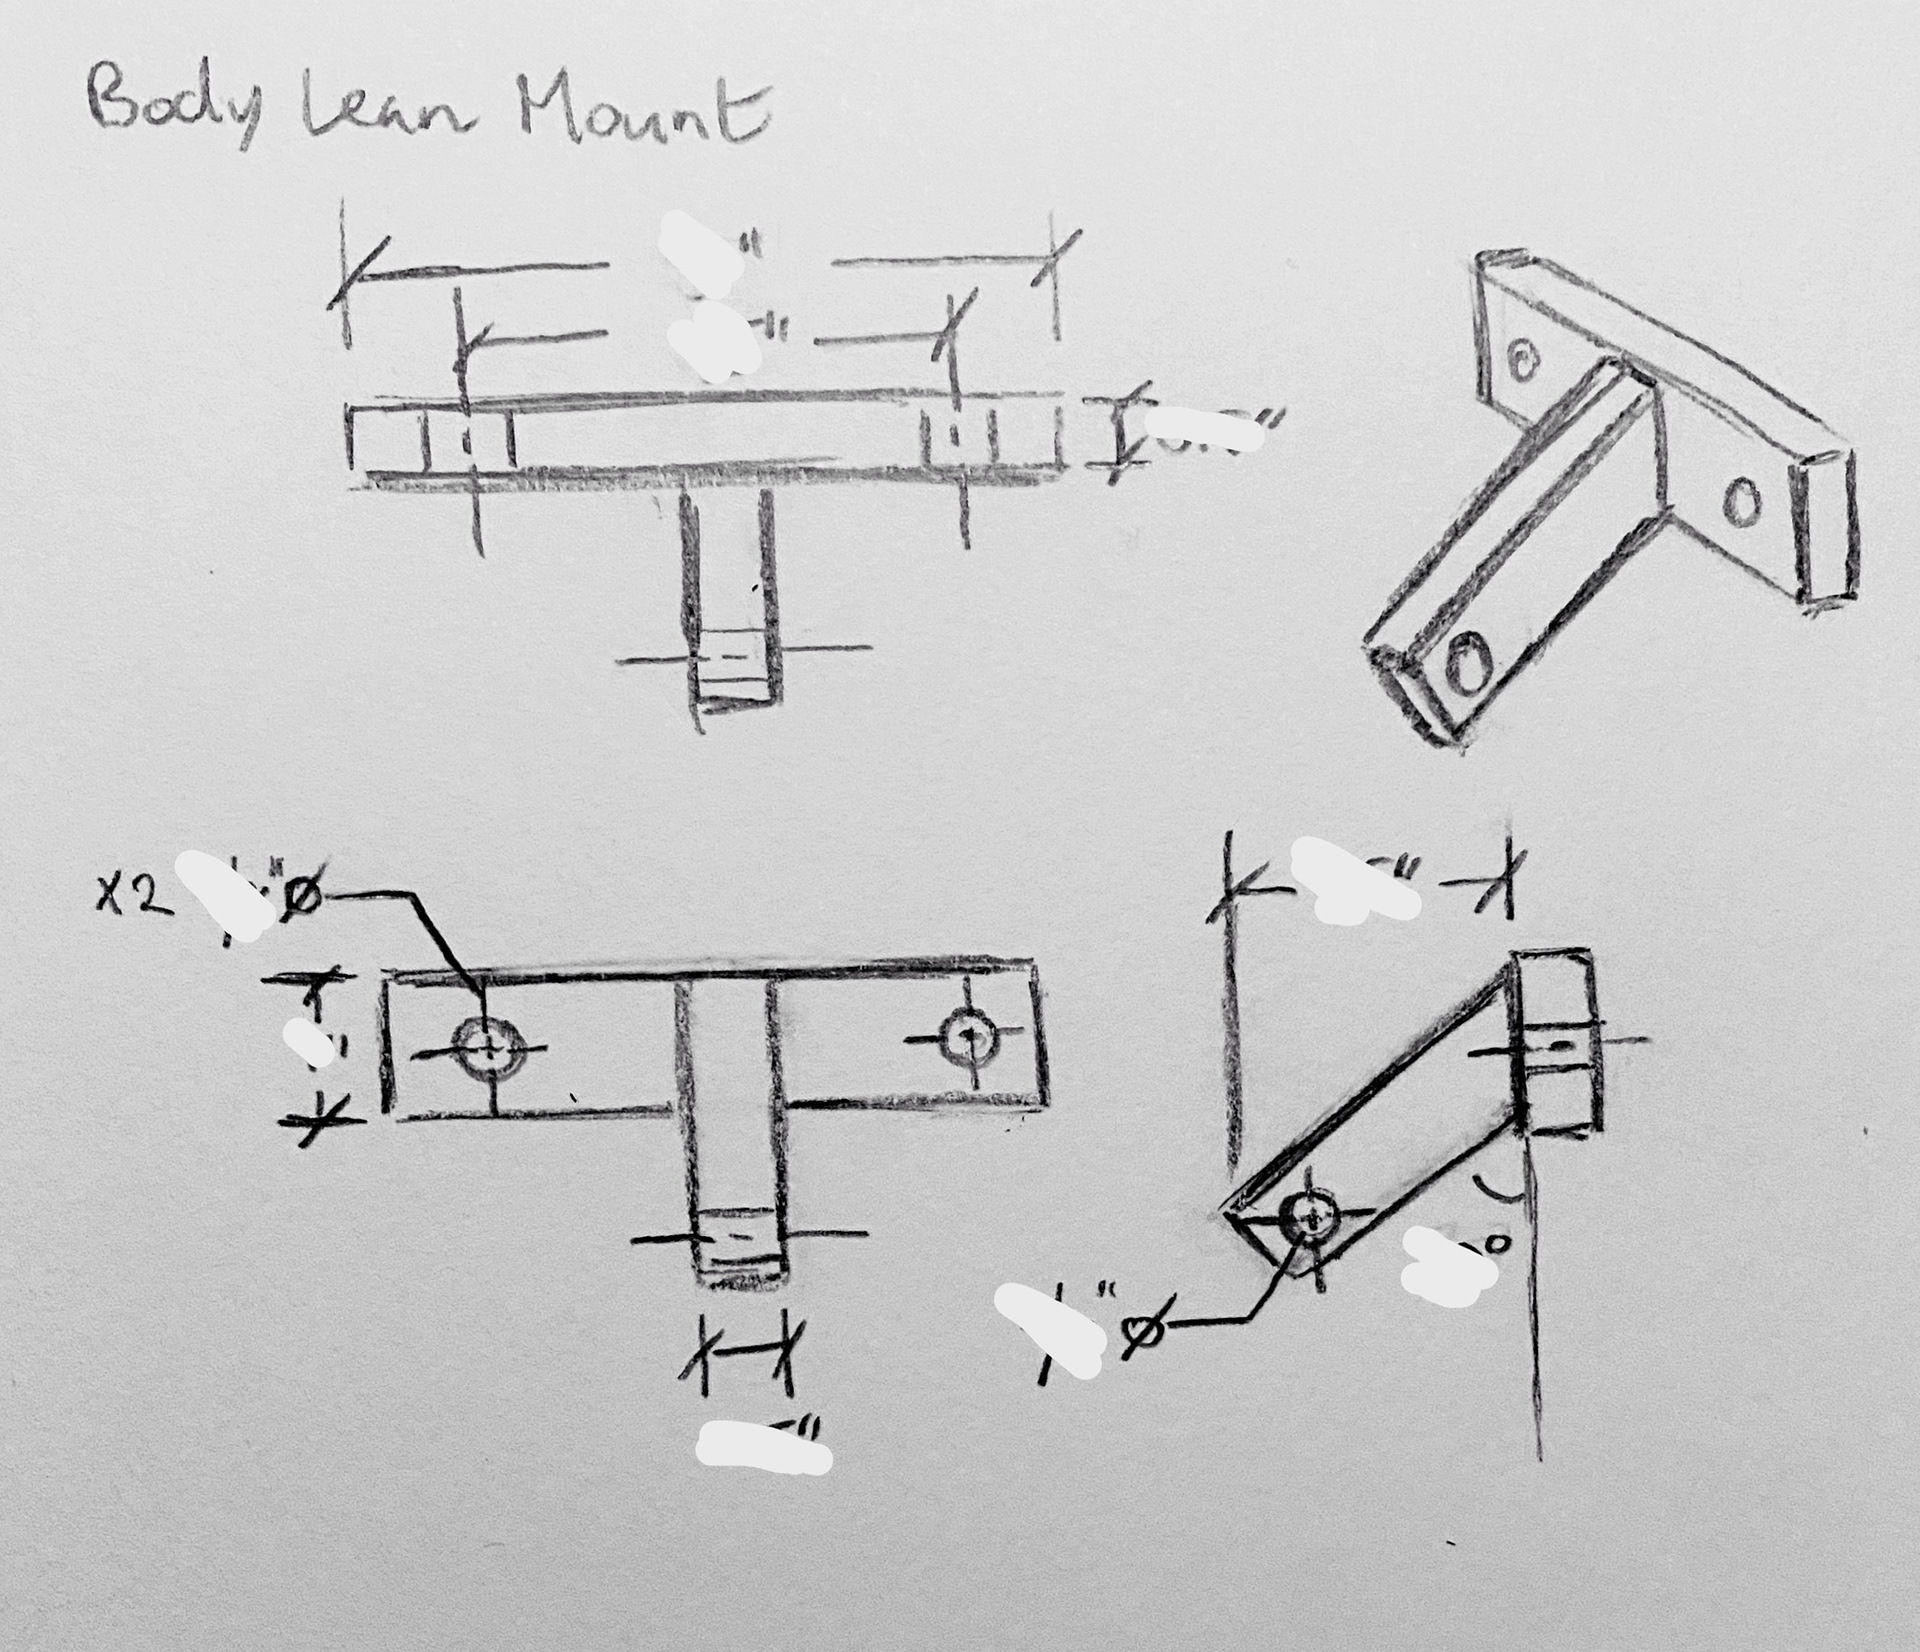
Body-lean Multi-view Drawing
Head-turn L-bracket Isometric
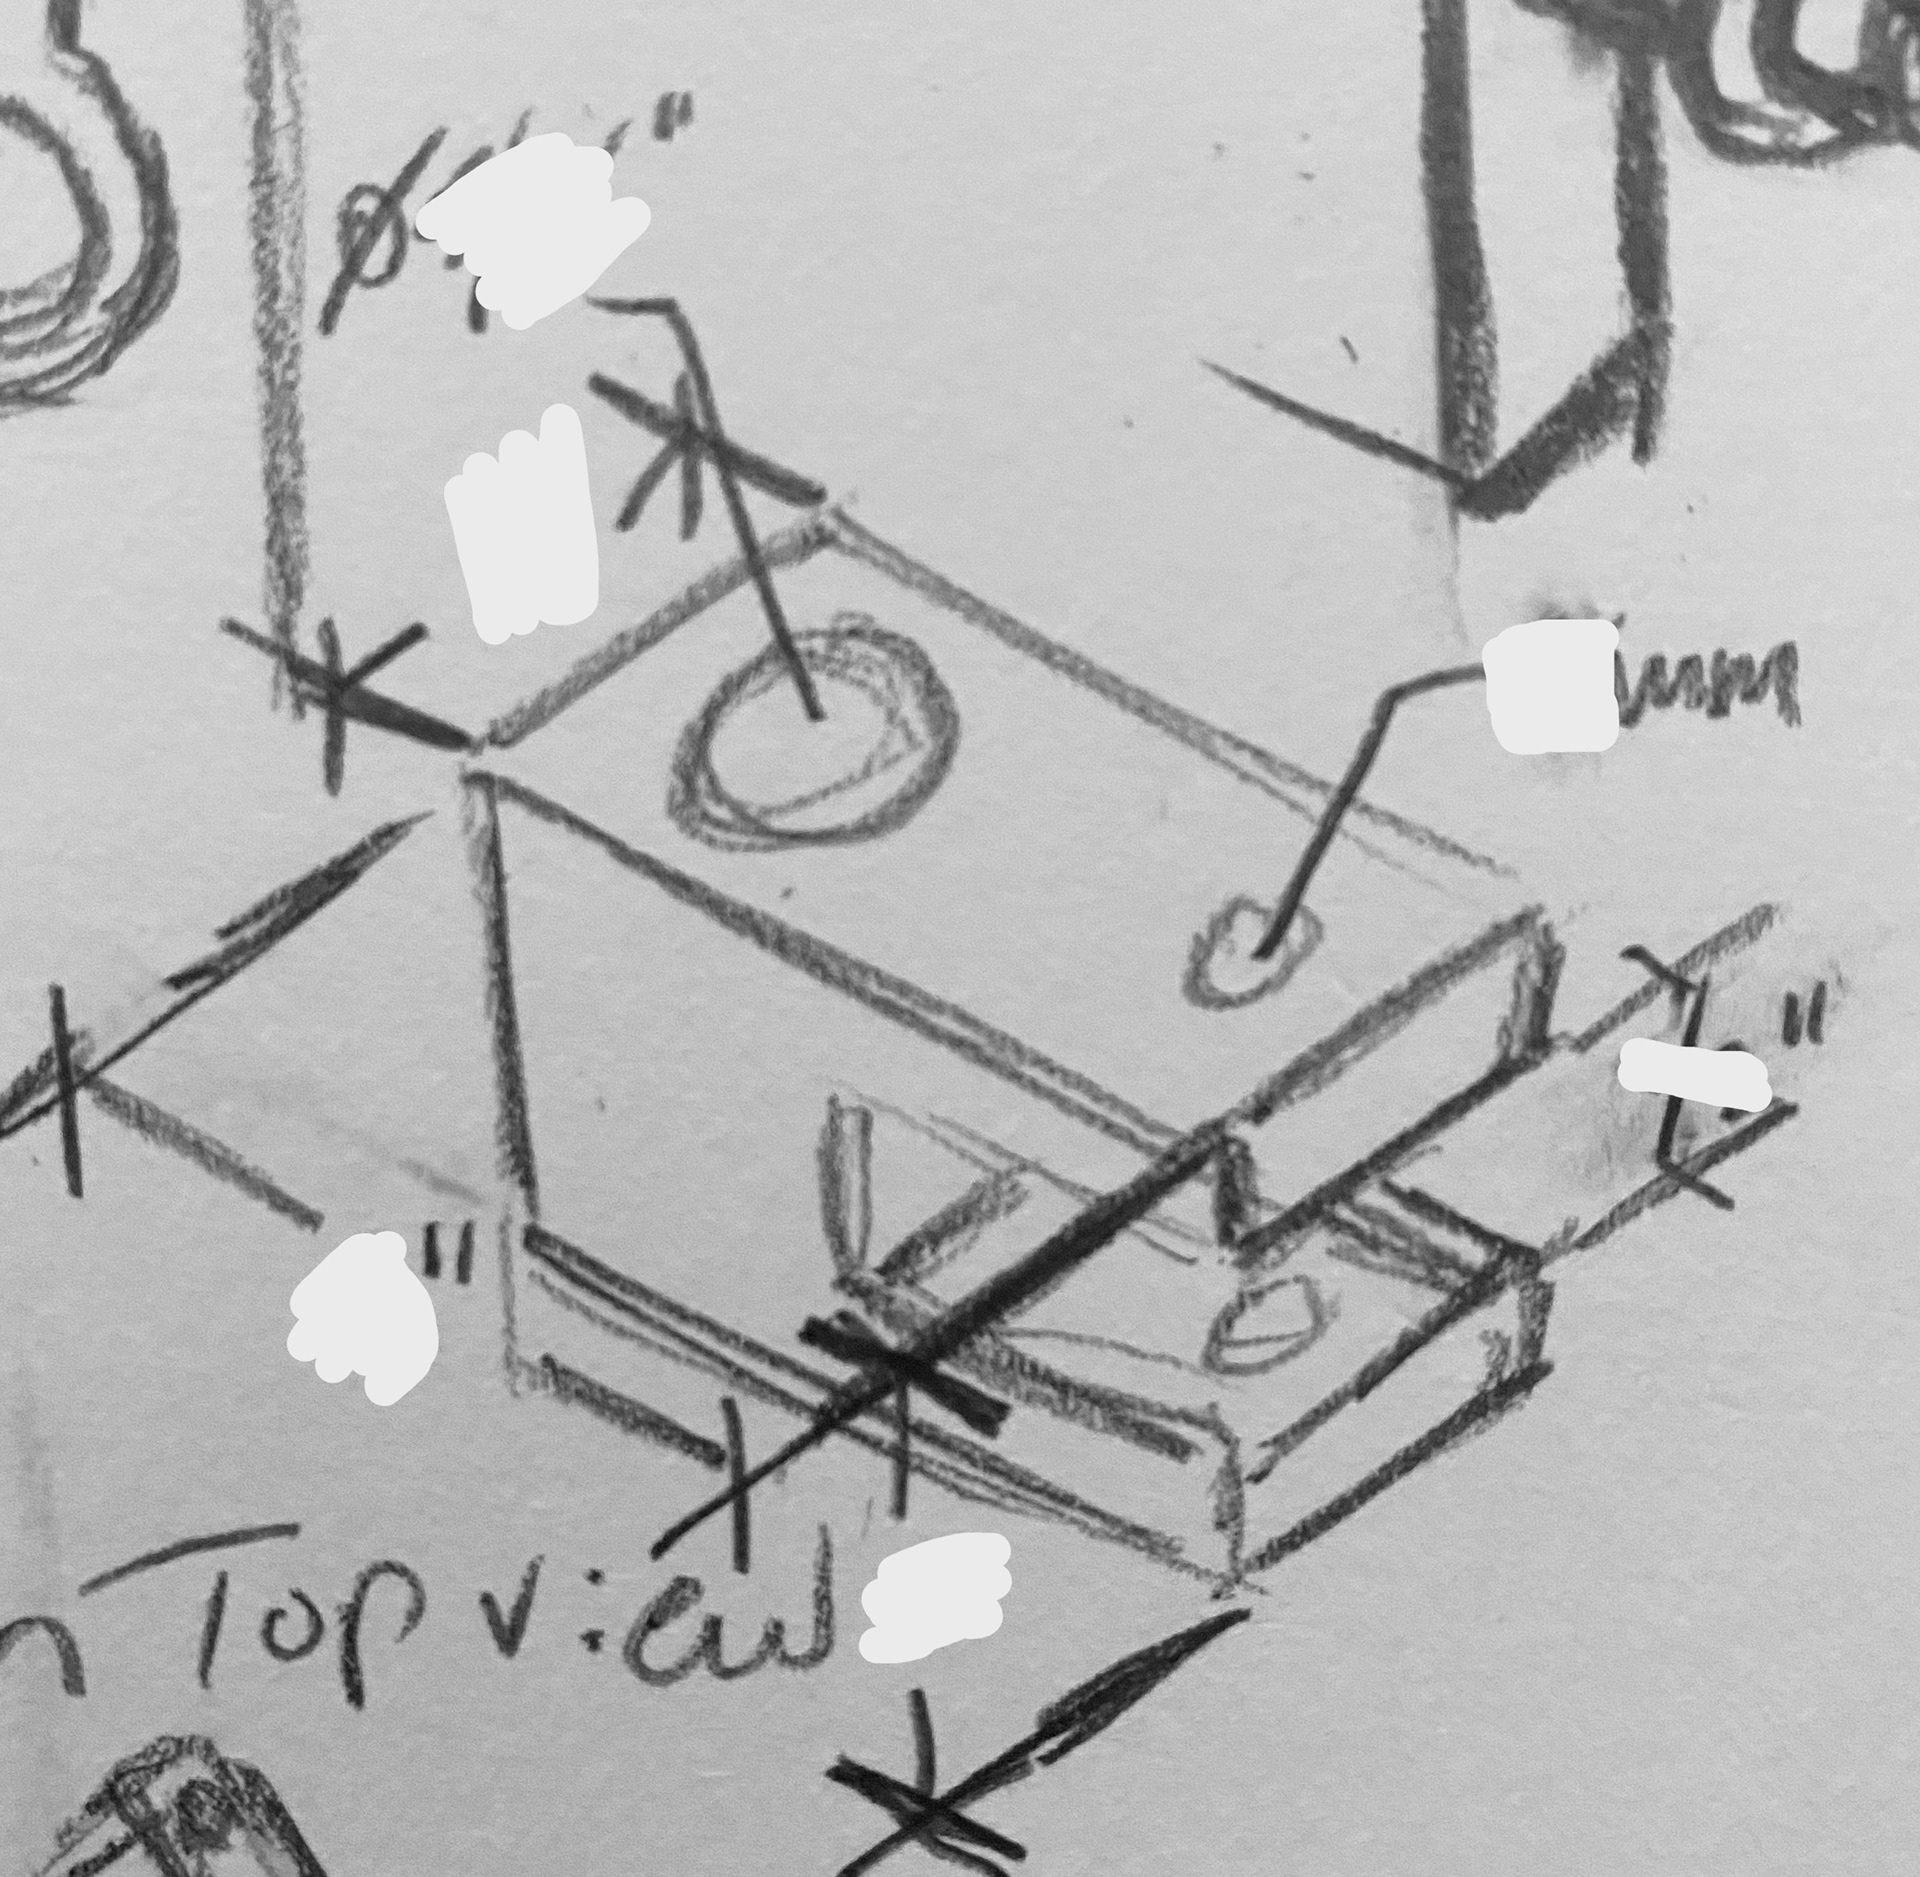
Head-turn Clevis Isometric
Material Annotated for Machining Clevises
Deliverables
Build a pneumatic animatronic figure based on figures built in the 1980s, using the same materials, and taking inspiration from how they achieved various motions.
Utilize reverse engineering to learn how mechanisms are built and how each part of the assembly functions. Illustrate mechanism concepts, 3D model parts using CAD software, create engineering drawings with dimensions for each part and assembly, make scaled models, acquire raw materials and hardware to build full scale model.
Prototype, test, and improve mechanism throughout entire design process. Design and redesign parts until they work as intended. Then, successfully hose and wire figure to a solenoid valve bank, and then to a controller to test functionality.
First "Prototype" Assembly (made in 2022)
Finished Proof-of-concept Mechanism- 2023
Fully hosed and working
Process
After studying lots of pictures and videos to see how these mechanisms were built, I made a scaled-model to understand the physics at play (see in "Model Building" page). Once I understood how everything works, I began to build my first full-sized character in December of 2022.
The mechanism itself took me 6 months to build. Due to presenting this project at a scholarship expo, I did have a deadline to meet in regards to finishing just the frame with no hosing. I basically had a 20 minute presentation where I talked the judge's ears off about animatronics...
well, I won a scholarship out of it, so it must've been engaging to some degree!
Early Body Mechanism

Arm Mechanism
Outcomes
I had zero robotics, electronics, and mechanical design experience prior to starting this project. This project was completely personal and done outside of school activities. Therefore, it was completed with limited resources and on a fixed budget that I set for myself. I suppose I also learned a lot about project management through this endeavor as well then.
I learned more through my interest in animatronics than I ever have before. I taught myself just about everything there is to know. Just to name a few:
I learned how 3D print and prototype... to cut metal, use a manual mill, lathe, band saw, and belt grinder while in the machine shop. I learned to fasten pieces together in various ways, hose a pneumatic figure, build a solenoid valve bank, wire solenoid valves, design mechanisms to work with linear actuators, and much more.
Not to mention, I got to reinforce existing skills. such as creating a "Bill of materials" to document every part I have purchased or made for this figure, creating engineering drawings of every part for future reference, 3D modeling parts and assemblies, and doing a good amount of math via converting scales and hopping between measurement systems!
Updated Head Mechanism
First Head Mechanism